Instant Access
The Instant Access feature enables rapid, writable access to data and application recovery points without transferring data. A DPX Block Data Protection snapshot is mapped as a network disk to a target client node, where it can be accessed, copied, or put into production use as needed. This method restores data and applications in minutes, ensuring continuity in the event of data corruption or hardware failure. Using iSCSI target-attach technology, Instant Access maintains near-continuous availability.
Upon activation, backup instances appear as local, fully accessible (read/write) drives on secondary storage. Users can quickly recover individual files by copying them from an Instant Access drive to another drive on the local node, allowing them to continue working while full recovery runs in parallel to restore data to primary storage. Changes made on the mapped drive do not affect the original snapshot, allowing subsequent restorations from the unmodified recovery point (see Modifying and Recovering).
Instant Access can be seamlessly integrated with SnapMirror to provide uninterrupted access to mirrored Block backups. For example, Block backups can be mirrored to a high-performance offsite storage system, where Instant Access gives users rapid access to offsite data (see Instant Access Mapping to the NetApp Alternate Secondary Storage). Additionally, Instant Access serves as an efficient backup verification tool, as backup instances on secondary systems are readily accessible from standby nodes (see Verifying a Block Backup using iSCSI Mapping).
Catalogic DPX also offers compatibility with Oracle Databases, Microsoft Exchange Servers, and Microsoft SQL Servers, displaying them as selectable volumes in the Block Backup Recovery and Block Restore interfaces. Experienced administrators can use Instant Access with the DPX Block Data Protection for point-in-time recovery, leveraging database administrative procedures to minimize application downtime.
Creating an Instant Access Restore
Go to Job Manager in the sidebar.
Click New Restore Job to open the New Restore dialog.
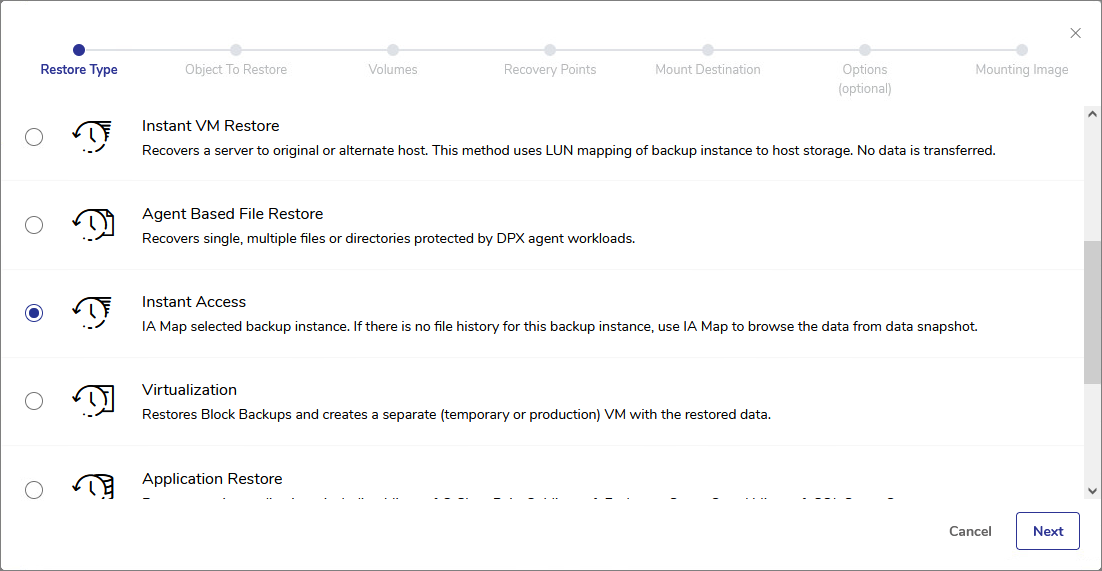
Select Instant Access and click Next.
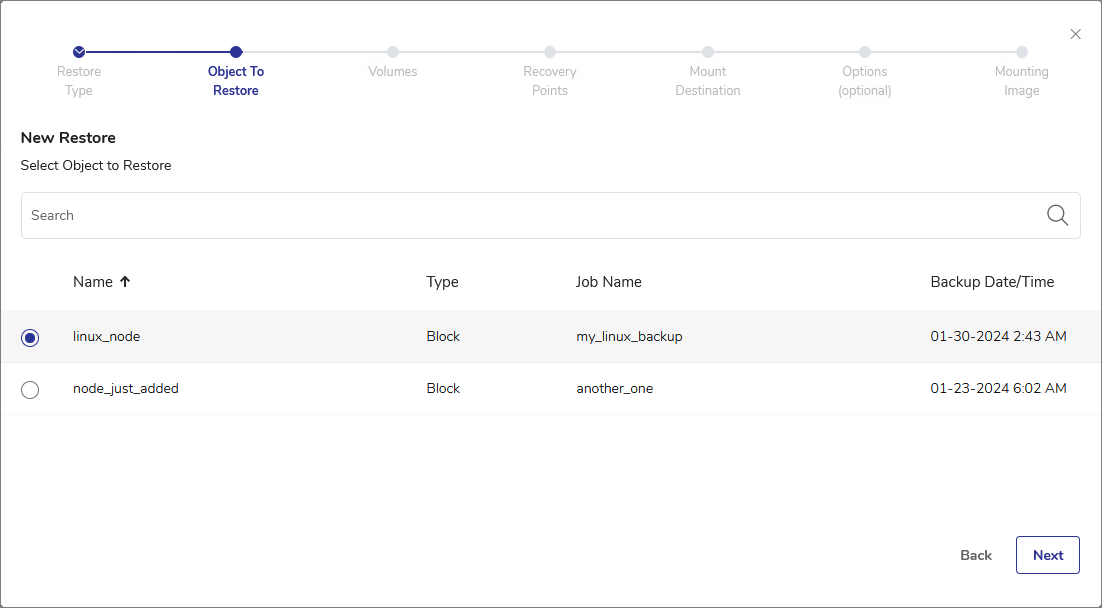
The Object to Restore view shows all nodes that you backed up using DPX Block Backup. The available objects to restore can be sorted by Name, Type, associated Job Name, or the backup Date/Time. Find the Node that contains the files or directories you want to restore. Click Next.
From this point on, the workflow is slightly different for Block backups from Linux and Windows machines.
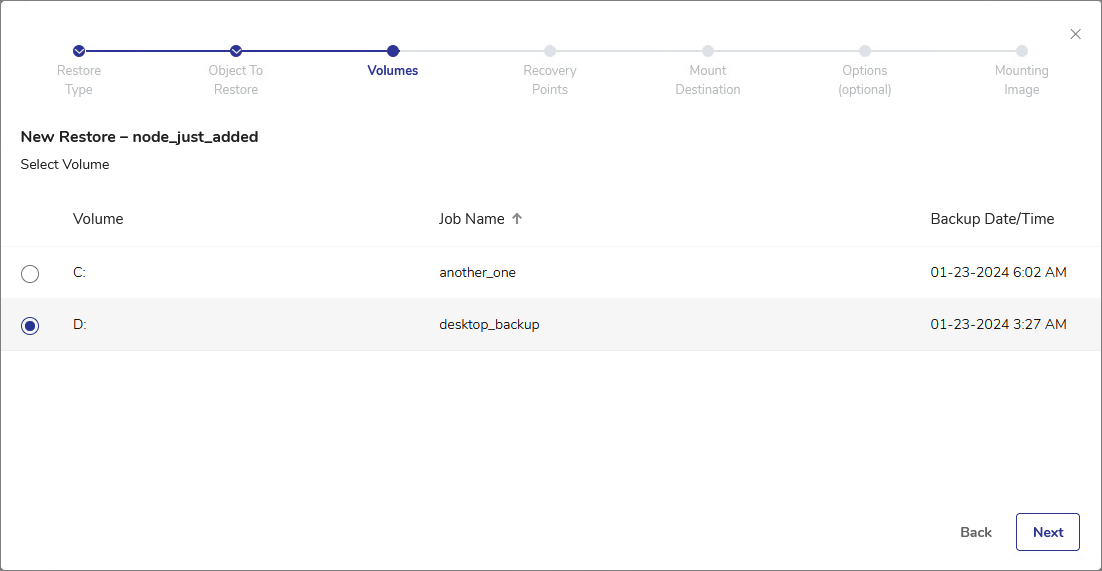
From the list of volumes within the object, select the volume you want to mount as an Instant Access disk. Click Next.
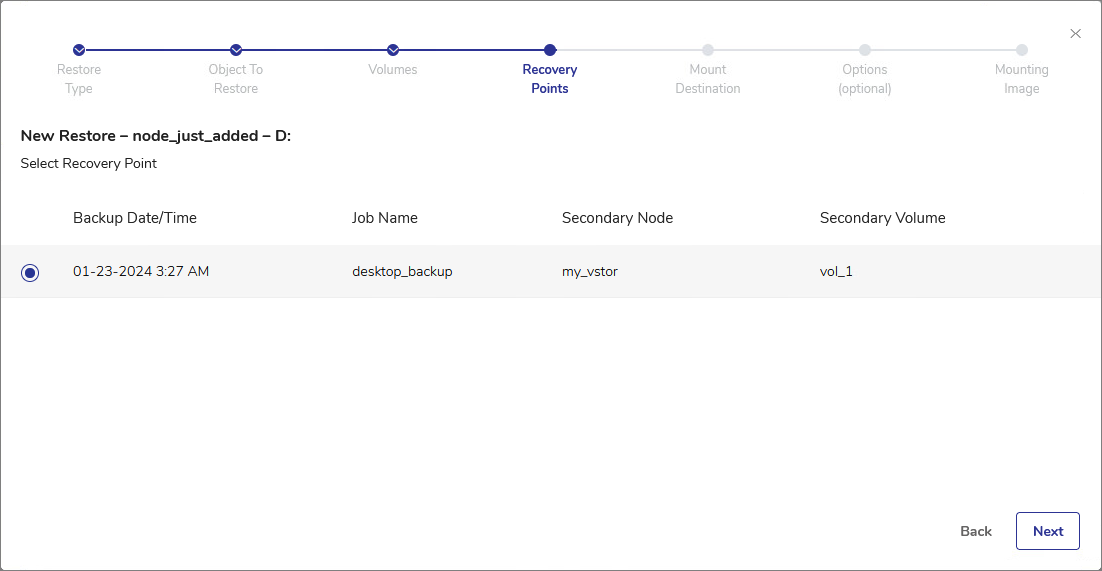
In the Recovery Points step, select the recovery point to restore. The available recovery points can be sorted by Backup Date/Time, Job Name, Secondary Node or Secondary Volume. Click Next.
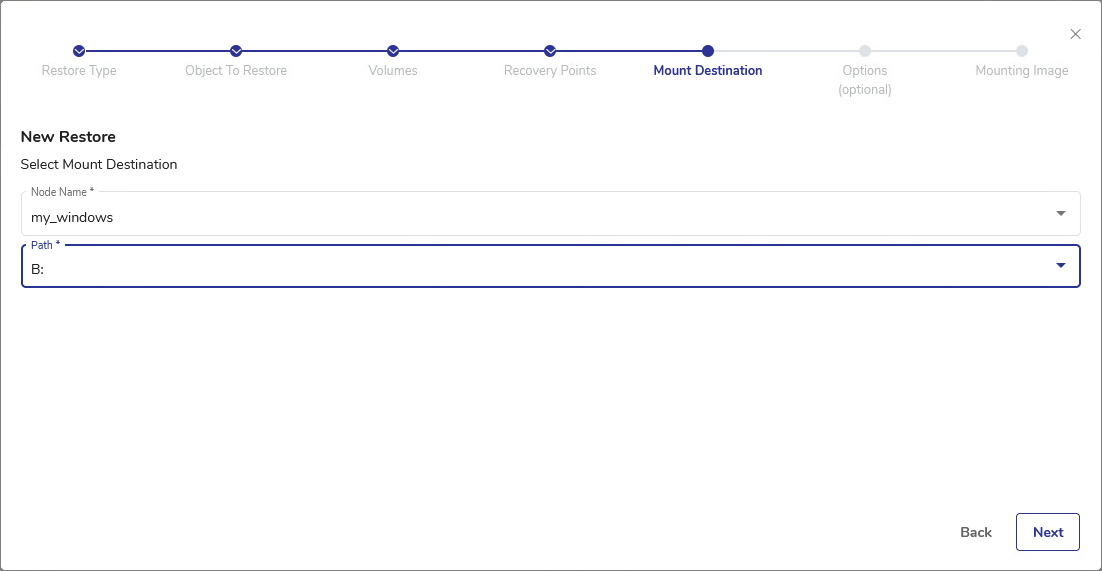
In the Mount Destination step, select the destination Node Name from the drop-down list. Only Windows nodes will be available for selection. Then, from the Path drop-down list, select the letter identifying the newly mounted disk. Click Next.
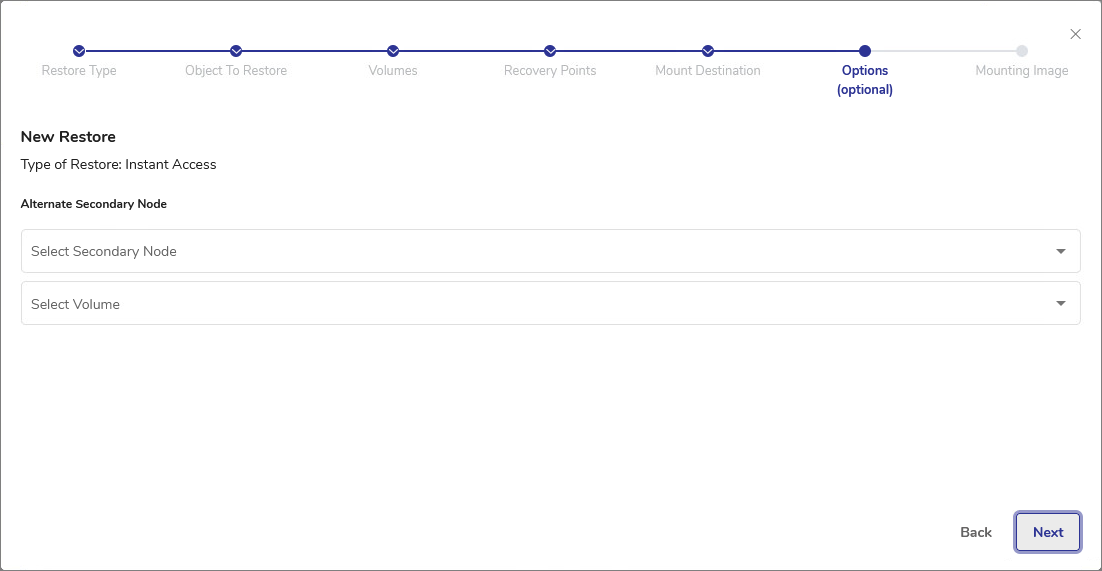
In the Options step, you can select the Alternate Secondary Node. This step is optional. You can skip it by just clicking Next. In all previous steps of creating a restore job, the available selections were based on the backup metadata stored on DPX. This means that DPX is aware of all backups made by the user and where they are stored. If, during backup or at a later stage, the backup data have been replicated to a secondary location and the primary location becomes corrupt or inaccessible, you can choose to restore your data from such secondary location using this option.
Select the Secondary Node from the drop-down list.
Select the volume where the alternate backup is stored.
DPX will attempt to identify the files or directories specified in previous steps. If this proves impossible, the following warning will be displayed:

See also. For more information, see Creating vStor Partnerships in vStor 4.11 Documentation.
In the Mounting Image step, wait for DPX to mount the selected volume.

After a while, the success screen will be shown.

Click Finish. To manage the items mounted by DPX, go to the Unfinished Restores tab in Job Monitor.

If you cannot see the freshly mounted volume in the Active Restores widget, click Scan…. The Scan for Active Restores dialog will be displayed.

Click Scan. DPX Master Server will communicate with the Clients to retrieve information about the mounted volume.

You can now access your IA-mounted volume on your Windows machine.

Note. Remember that by acting upon the IA-mounted volume, you are actually connecting to the vStor where the backup is stored (or the secondary node). This translates to a potentially high latency.
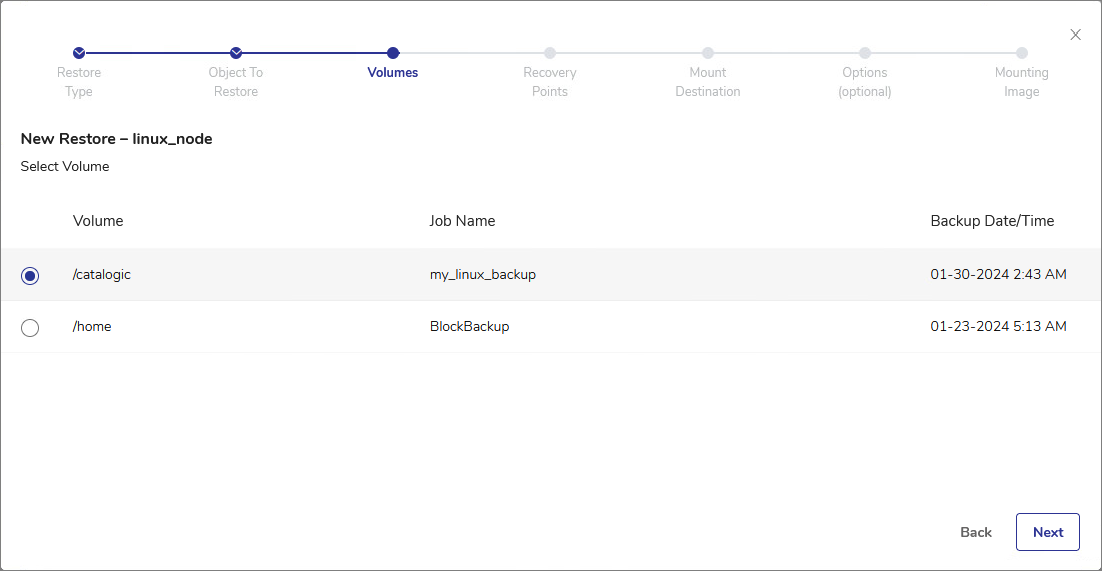
From the list of volumes within the object, select the volume you want to mount as an Instant Access disk. Click Next.
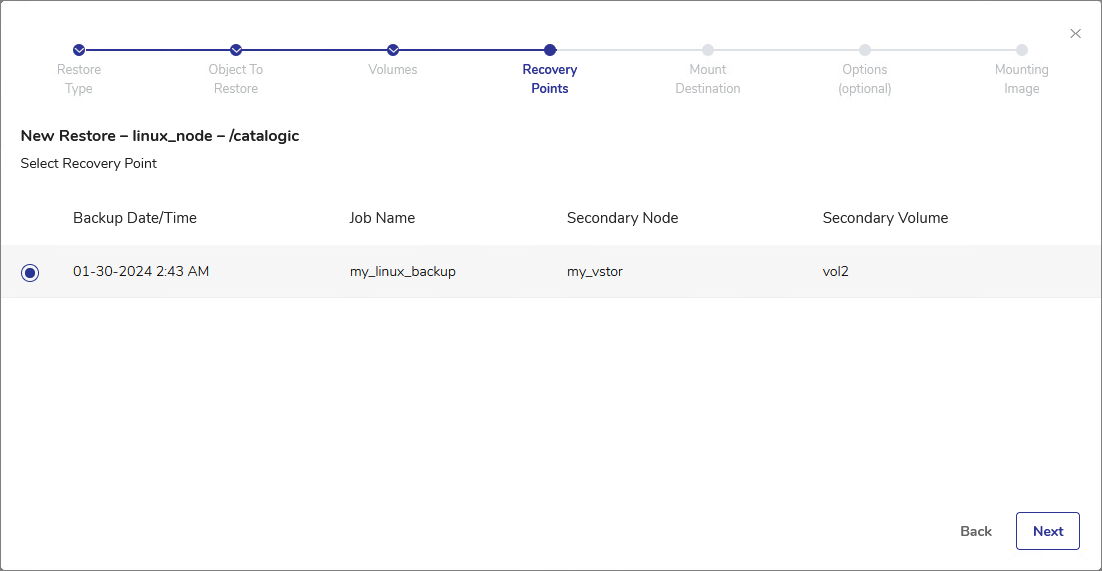
In the Recovery Points step, select the recovery point to restore. The available recovery points can be sorted by Backup Date/Time, Job Name, Secondary Node or Secondary Volume. Click Next.
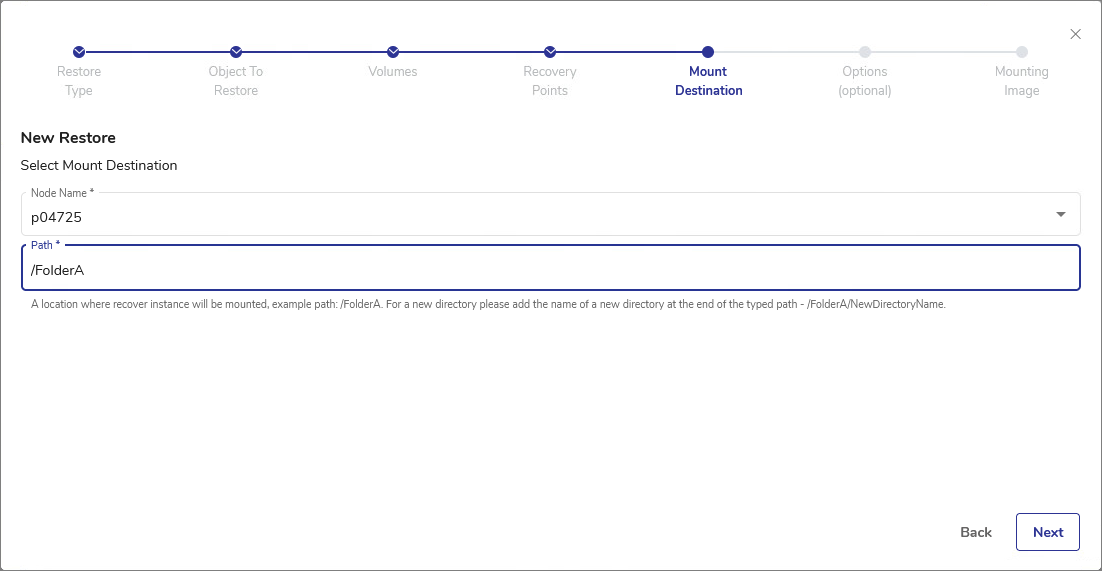
In the Mount Destination step, select the destination Node Name from the drop-down list. Only Linux nodes will be available for selection. Then, type the mounting point for the newly mounted disk. For a new directory, type it at the end of the existing path. Click Next.

In the Options step, you can select the Alternate Secondary Node. This step is optional. You can skip it by just clicking Next. In all previous steps of creating a restore job, the available selections were based on the backup metadata stored on DPX. This means that DPX is aware of all backups made by the user and where they are stored. If, during backup or at a later stage, the backup data have been replicated to a secondary location and the primary location becomes corrupt or inaccessible, you can choose to restore your data from such secondary location using this option.
Select the Secondary Node from the drop-down list.
Select the volume where the alternate backup is stored.
DPX will attempt to identify the files or directories specified in previous steps. If this proves impossible, the following warning will be displayed:

See also. For more information, see Creating vStor Partnerships in vStor documentation.
In the Mounting Image step, wait for DPX to mount the selected volume.

After a while, the success screen will be shown.

Click Finish. To manage the items mounted by DPX, go to the Unfinished Restores tab in Job Monitor.

If you cannot see the freshly mounted volume in the Active Restores widget, click Scan…. The Scan for Active Restores dialog will be displayed.

Click Scan. DPX Master Server will communicate with the Clients to retrieve information about the mounted volume.

Note. Remember that by acting upon the IA-mounted volume, you are actually connecting to the vStor where the backup is stored (or the secondary node). This translates to a potentially high latency.
Unmounting an Instant Access Volume
To unmount an Instant Access from a machine, go to the Job Monitor view, select the Unfinished Restores tab and click the unmount icon![]() next to the Instant Access Mapping item or right-click the Instant Access item and select Unmount.
next to the Instant Access Mapping item or right-click the Instant Access item and select Unmount.

The volume will be unmounted from the machine and will disappear from the Unfinished Restores view.
Important. Never unmount an Instant Access volume directly from the machine where it is mounted. This may result in inconsistent behavior.
Modifying and Recovering
The backup instance accessed through Instant Access appears to be a normal drive as if the backup instance had been copied to a new disk volume. The diagram following this section is a logical representation of a backup instance mapped to a drive letter. The Block backup instance on the secondary remains unchanged because the data is protected (read-only). Any modifications made are stored only in the “live data” area on the secondary. This “live data” area is created when the Instant Access iSCSI connection is made and is associated with the LUN. From that point, the “live data” area is continuously updated independently of the backup instance, but an integrated view is shown instead, that combines the backup instance and the “live data” area.

Modifying the Backed-up Data
After mapping the backup instance to a drive letter as described in Creating an Instant Access Restore you can open, read, copy, create, and modify files from the device they were mapped to.
Typically, you would unmap the server drive letter that became unavailable due to a failure, then map the backup instance to the same drive letter on the application server.
Modifications are stored on the backup storage in a “live data” area associated with the LUN, but data in the original backup instance are not modified.
Recovering Modified Data
When a replacement data server or drive is available, you can restore the backup instance and recover the modifications. Two procedures are available.
Example 1: To recover using a regular Block restore followed by copying only the modifications: Perform a regular Block restore, then perform a Windows command line copy of the modifications from the Instant Access mapped drive.
Example 2: To copy everything from an Instant Access mapped drive: Perform a Windows command line copy of everything from the Instant Access mapped drive.
Example 1 has the advantage of limiting the amount of downtime for the user. You can restore from the backup as soon as the new disk drive is available, while users continue to work via Instant Access. Then, when it is convenient, you take down the application and copy the modifications to the new disk. Example 2, on the other hand, requires the application to be down for the entire duration of the recovery.
Note. During the copy period, no modifications should be made to the data until the new drive is available to the application.
Considerations for Recovering Modified Microsoft Database Data
Instant Access is designed for uninterrupted file system access and backup verification. However, expert database administrators may want to adapt Instant Access as part of a protection strategy for applications, such as SQL and Exchange databases.
The copy procedures shown here are examples, designed to illustrate a basic approach and may not be directly applicable to the complexities of your environment. The examples are provided as a starting point. You would need to develop and carefully test your own procedures, based on knowledge of your particular database, system capabilities, and recovery requirements, including database synchronization. And, of course, it is important to continue to back up the secondary system itself.
Example 1: To recover using a regular Block restore followed by copying only the modifications:
Follow the steps in Virtualization, Application Restore or File Restore from Block Backup to restore the Block backup using the management console. You can do this at any convenient time because it will not interfere with operations in the “live data” area.
Using Microsoft Disk Management, partition the new drive, and assign a drive letter to the new data area.
Stop the relevant application(s) on the recovery destination machine.
From the Microsoft Windows Command shell, use the
xcopyutility with the/Doption with no date. This copies only the modifications from the Instant Access mapped drive (the “live data” area).This is an example xcopy command:
Note. The /D option with no date copies only those files whose source time is newer than the destination time. /S copies only files that are not empty. /Y suppresses prompting to overwrite an existing destination file.
The new drive now has the current data.
Unmap the Instant Access mapped drive as described in Unmounting an Instant Access Volume.
Using Microsoft Disk Management, reassign the new drive letter if needed.
Restart the relevant application(s).
Example 2: To copy everything from an Instant Access mapped drive:
Using Microsoft Disk Management, partition the new drive, and assign a drive letter to the new data area.
Stop the relevant application(s) on the recovery destination machine.
From the Windows command line, use the
xcopyutility to copy the Instant Access mapped drive to the new replacement server drive.This is an example
xcopycommand:
The new drive now has the current data.
Unmap the Instant Access mapped drive as described in Unmounting an Instant Access Volume.
Using Microsoft Disk Management, reassign the new drive letter if needed.
Restart the relevant application(s).
Instant Access Mapping to the NetApp Alternate Secondary Storage
Instant Access can be used in conjunction with SnapMirror for uninterrupted access to mirrored Block backups. For example, you can mirror Block backups from a NetApp storage system to an alternate secondary, such as a high-performance off-site storage system, then use Instant Access to give users rapid access to data on the off-site system. In the discussion that follows, alternate secondary refers to the mirrored backup.
Mirroring to an alternate secondary can provide significant benefits:
Mirroring a NetApp storage system provides additional backup security.
The alternate secondary system could be a higher-performance network storage device than the original.
A NetApp storage system can be mirrored to a different NetApp storage system at a remote data center, such as a disaster recovery site.
See also. For the latest system compatibility details regarding supported hardware, file systems, applications, operating systems, and service packs, see DPX 4.11 Compatibility Matrix.
Requirements for an Alternate Secondary System
The storage system must be configured as a SnapVault secondary, running the compatible version of Data ONTAP.
The volume structure on the alternate secondary must be a mirror image of the original Catalogic DPX Block backup destination storage. That is, mirroring is done at the volume level.
Perform either of the following procedures on the alternate secondary:
Clone the volume on the alternate secondary by using the NetApp FlexClone feature.
Quiesce the SnapMirror process on the alternate secondary. Then suspend or break the mirror on the alternate secondary. This does not remove the entire mirror relationship.
Note. Both SnapMirror and FlexClone are optional, separately licensable features of NetApp. For more information about these features, refer to your NetApp documentation.
Change Appropriate Node References
In the Block Restore window, change the secondary node reference from the original Block backup instance to the mirrored Block backup instance or the cloned Block backup instance. By changing the secondary node reference, you are redirecting the restore from the original instance to the alternate instance. To change the secondary node references:
Open the Block Restore window from the management console.
In the restore source pane, select the backup instance you want to map.
Right-click the backup instance you selected. From the context menu, select Alternate Secondary Node. The SnapVault Secondary Node dialog box appears.
In the Node List pull-down menu, select the secondary node name that contains the mirrored or cloned backup instance. Note that the Node List pull-down menu only contains SnapVault secondary nodes.
In the Drive List pull-down menu, if the alternate secondary uses a different drive than the initial secondary, select the drive name that contains the mirrored backup instance. Click OK.
In the source pane of the Block Restore window, the secondary node name under the Secondary Node header changes to the alternate secondary node and the drive name under the Secondary Volume and Secondary Qtree headers reflects your selection on the Drive List pull-down menu.
At this point, you are ready to map the alternate secondary. The procedure for mapping the alternate secondary is identical to that for the initial secondary. See Creating an Instant Access Restore.
Using an Alternate Secondary with a Primary Backup Storage for Recovery
Once the mapping is complete, modifications are stored on the newly mapped alternate secondary in a “live data” area associated with the LUN. Modifications can be recovered from the “live data” area. See Modifying and Recovering.
However, both processing the recovery and data modification can slow down the access response time for Instant Access users. Using Example 1: To recover using a regular Block restore followed by copying only the modifications in Recovering Modified Data, it is possible to restore the backed-up data from the initial secondary and recover the modifications from the alternate secondary. That is, all changes are made to the “live data” area for the backup instance mapped by Instant Access.
Verifying a Block Backup using iSCSI Mapping
Catalogic DPX provides two levels of backup instance verification for the Catalogic DPX Block Data Protection.
First, backup instances are automatically verified by Catalogic DPX at the time of the backup. Random change blocks are selected during backup. “Checksums” of these selected blocks are compared against the backup instance on the storage system just before the completion of a backup job. If the checksum fails, the job fails and the failure is recorded in the log file. This process occurs completely in the background and is performed for each and every Block backup job. In the job log, it is shown as Simple.
Second, you can initiate a more thorough verification process through the management console. This verification process checks the integrity of the entire image. This is shown as Advanced.
Note. For Microsoft ReFS backups, do not use the management console verification process. Microsoft ReFS is self-healing.
The following are considerations for management console verification support:
Verification support is for disk containers.
Note. To verify a Windows Server 2012 deduplicated NTFS volume, select a verification node running Windows Server 2012 or Windows Server 2012 R2. To verify a Windows Server 2012 R2 deduplicated NTFS volume, select a verification node running Windows Server 2012 R2.
Verification for Microsoft Exchange, Microsoft SQL Server, or Oracle Database backups is performed using a different procedure. See Verifying Application Backups.
To perform a management console verification of a Block backup instance:
Select the backup Snapshot to verify: a. On the management console, open the Block restore window. b. Expand the restore source tree until you identify the specific backup Snapshot to verify. c. Right-click on the backup Snapshot to display a context menu.
Choose Verify on the context menu. A Verification job is created. You are prompted to run the Verification job.
Select Run or Run and Monitor. the Catalogic DPX performs an iSCSI mapping to the storage system, then verifies the content. The results are provided in the job log. If verification fails, the reason is provided in the job log. Take appropriate corrective action. To delete a failed verification job, use Delete Restore Job on the task pane.
At the conclusion of the verification process, the Catalogic DPX automatically unmaps the iSCSImapped backup Snapshot.
Last updated