Creating a Catalog Backup Job
Note. Creating a Catalog backup requires that there is at least one device and at least one media added to your DPX.
Creating a dedicated media pool for Catalog backups enables you to quickly locate your latest Catalog backup. It also makes it easy to keep a set of tapes for Catalog backup with a shorter retention period than your normal backup tapes.
See Adding a Device and Adding a Media Pool.
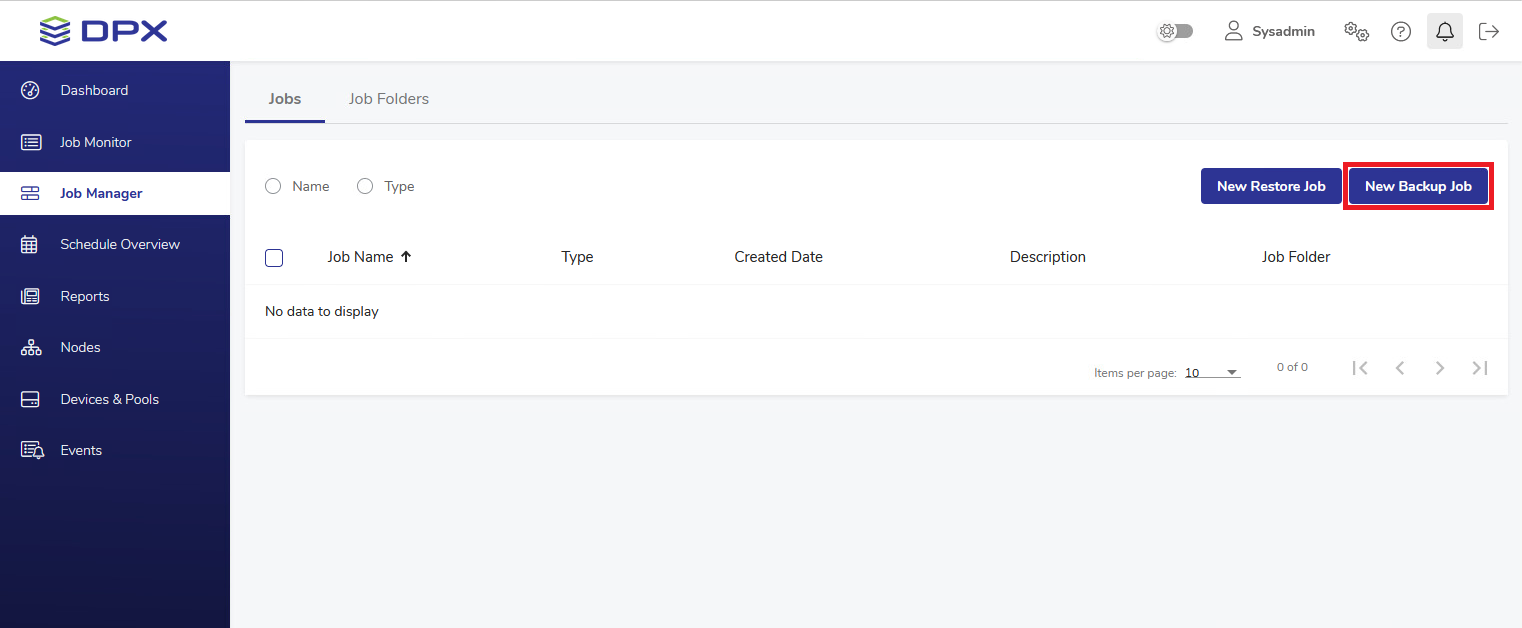
In the main web interface view, go to Job Manager in the sidebar. Then select the New Backup Job button in the upper right corner.
Specify the Job Name (this field may contain up to 16 characters). Add an optional, brief description (this field may contain up to 48 characters).
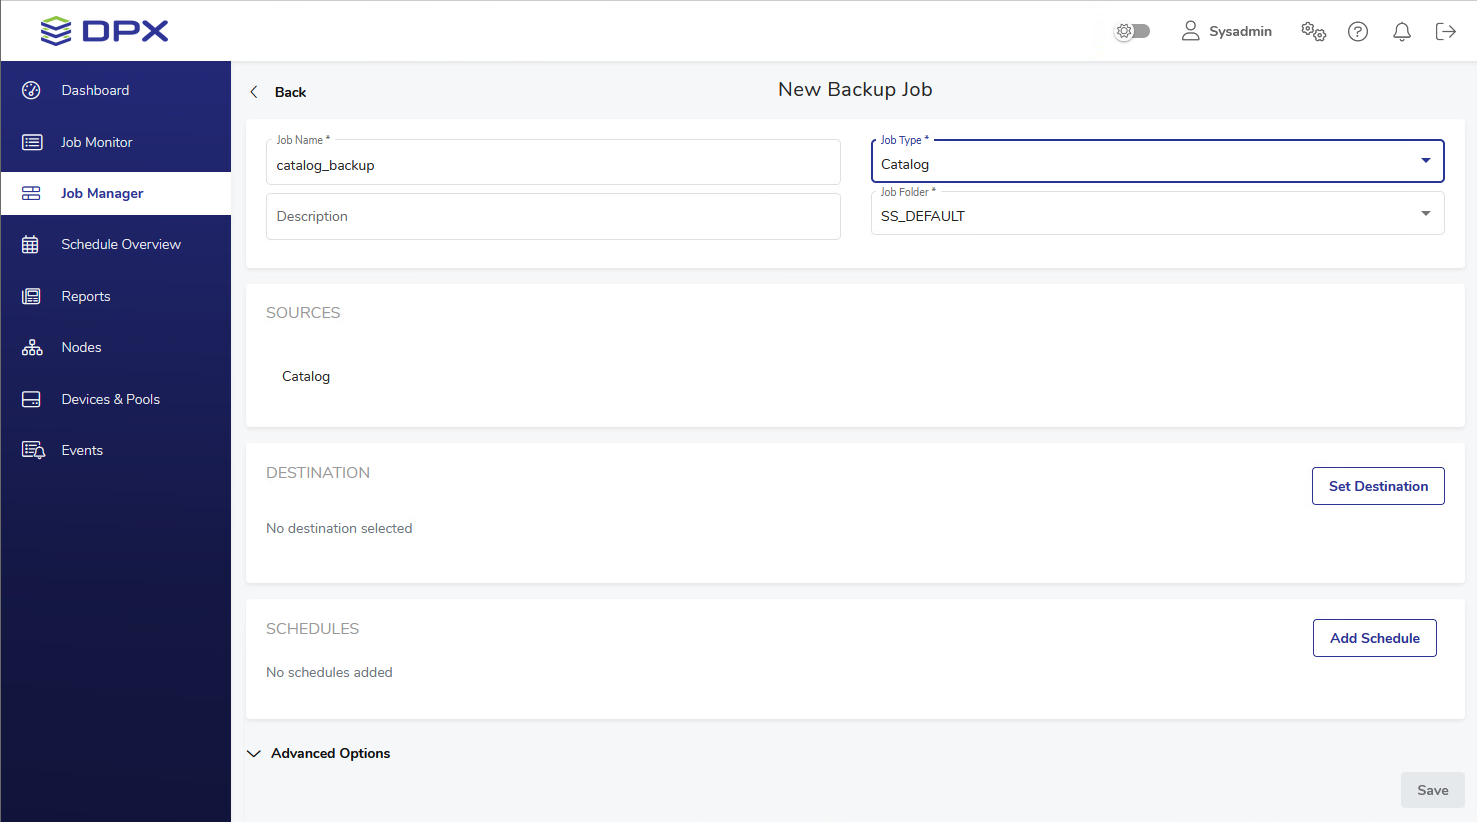
Select Job Type – Catalog and the Job Folder to store the job in (see the Job Manager section for more information). By default, all jobs are stored in the SS_DEFAULT job folder.
The SOURCES pane shows Catalog as the source. This setting cannot be edited, as this type of job is used to back up the Catalog only.
In the DESTINATION pane, click Set Destination to choose the destination for the backup.
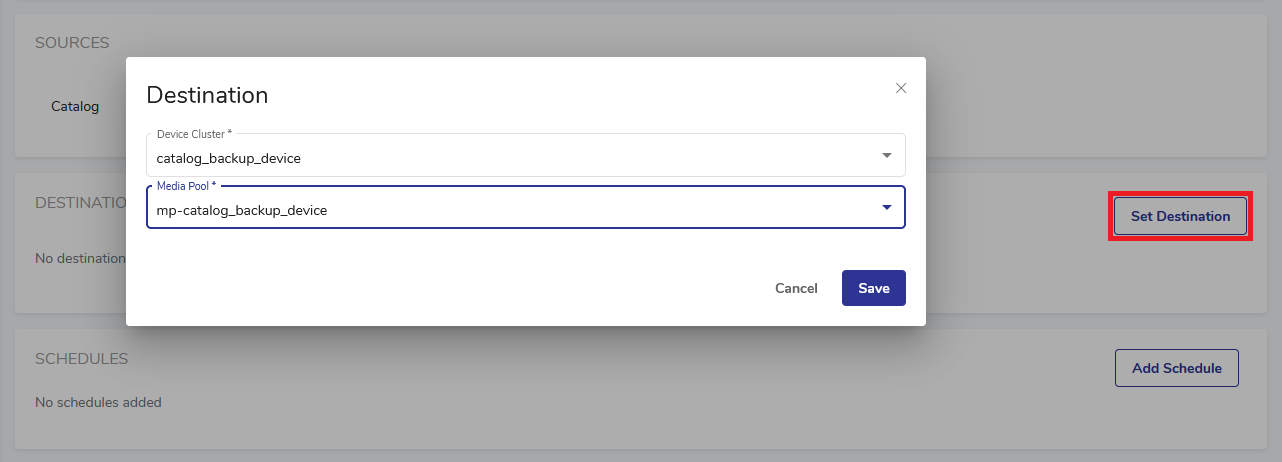
Note. It is recommended to use a dedicated device cluster and media pool so that you can quickly locate your latest Catalog Backup.
You may also add a schedule in the SCHEDULES pane for the backup to be run on a regular basis. See Scheduling a Catalog Backup Job.
Note. It is strongly recommended to create a regular schedule for Catalog Backup, as the Catalog is vital for managing any backups you might need to restore.
Set Advanced Options as desired. For details, see Job Options for Catalog Backup Job.
Important. When you define a Catalog backup, ensure you go to Catalog Backup Job Options and select the option to e-mail the backup report to a user or group accessible even when the master server is down. It is advisable to send a copy offsite. For details, see Catalog Backup Notification Options.
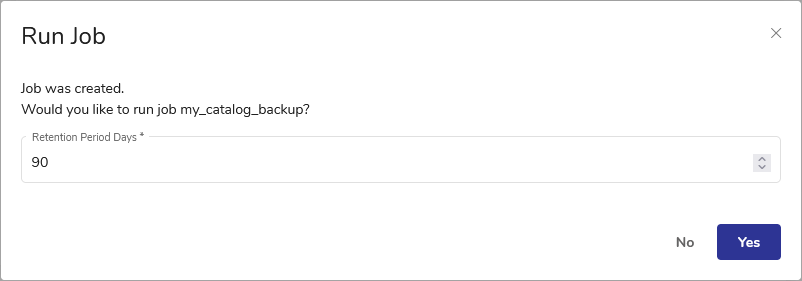
Click Save. The Run Job prompt will be shown, where you may determine the retention period (default: 90 days) and choose whether to run the job immediately. Either way, the job will be available in the Job Manager section.
In the main desktop interface window, go to the Catalog tab, and from the Catalog Operations section in the task panel, choose Backup. Catalog backup is all about backing up the Catalog, so the source selection is disabled for this type of job.
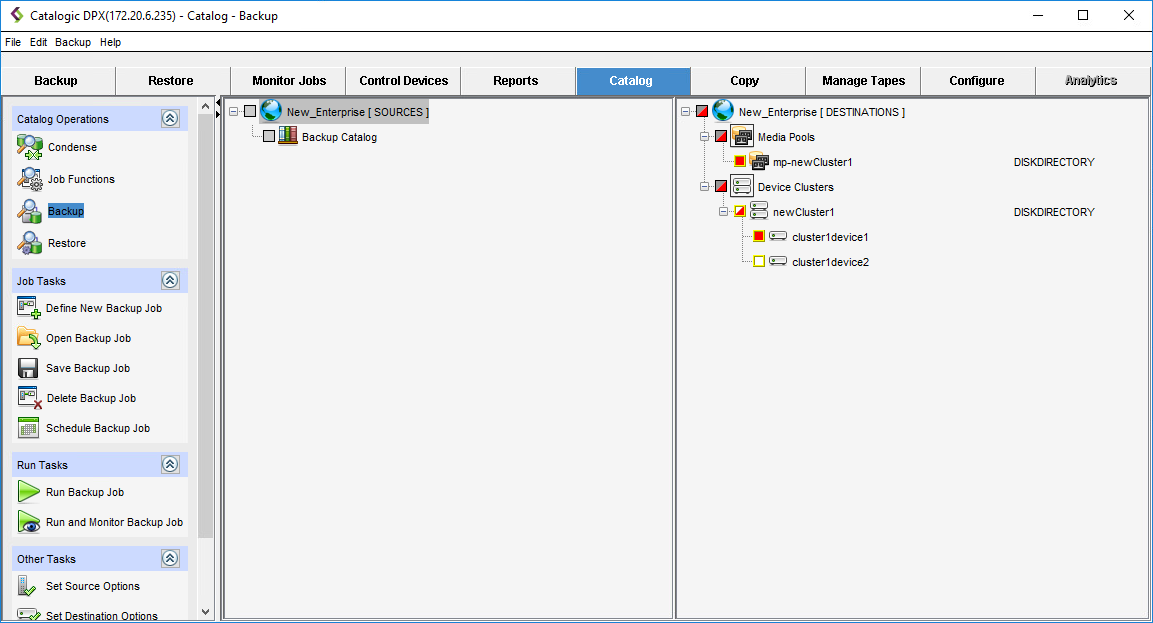
Note. For Catalog backup, the source is already defined, therefore the SOURCES pane is disabled for selection. For more information, see Catalog Backup.
In the DESTINATIONS pane, select a device and a media pool. Expand the tree as necessary.
Note. Before running a backup job, you need to save it. Once saved, a previously defined job can be modified, run, or deleted. If you try to leave the job creation view without saving the changes, you will be prompted to either save or discard changes before leaving.
If you select Define New Backup Job, all unsaved changes will be lost.
Set advanced options as desired, selecting appropriate items in the Other Tasks section of the side panel. Scroll down if necessary.
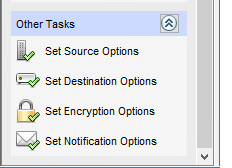
See also. For more information about file backup job options, see Job Options for Catalog Backup.
Save the job by doing one of the following:
Select File > Save Job
Select Save Backup Job in the Job Tasks section of the side panel
Press [Ctrl + S]
The Save Job dialog will appear.
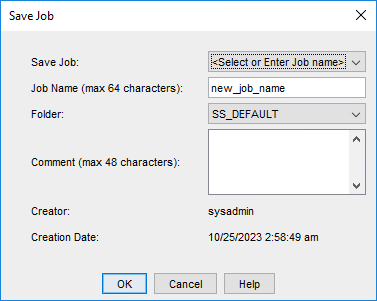
Restrictions. The new job name must be unique throughout the entire DPX, regardless of the folder the job is stored in.
Click OK. The job is now saved.
Click Save Backup Job in the Job Tasks section. You can now run the Catalog Backup job.
When running a Catalog Backup job, you will be prompted to specify the retention period for the backup. The default value is 90 days.