
Creating an Agentless VMware Backup Job
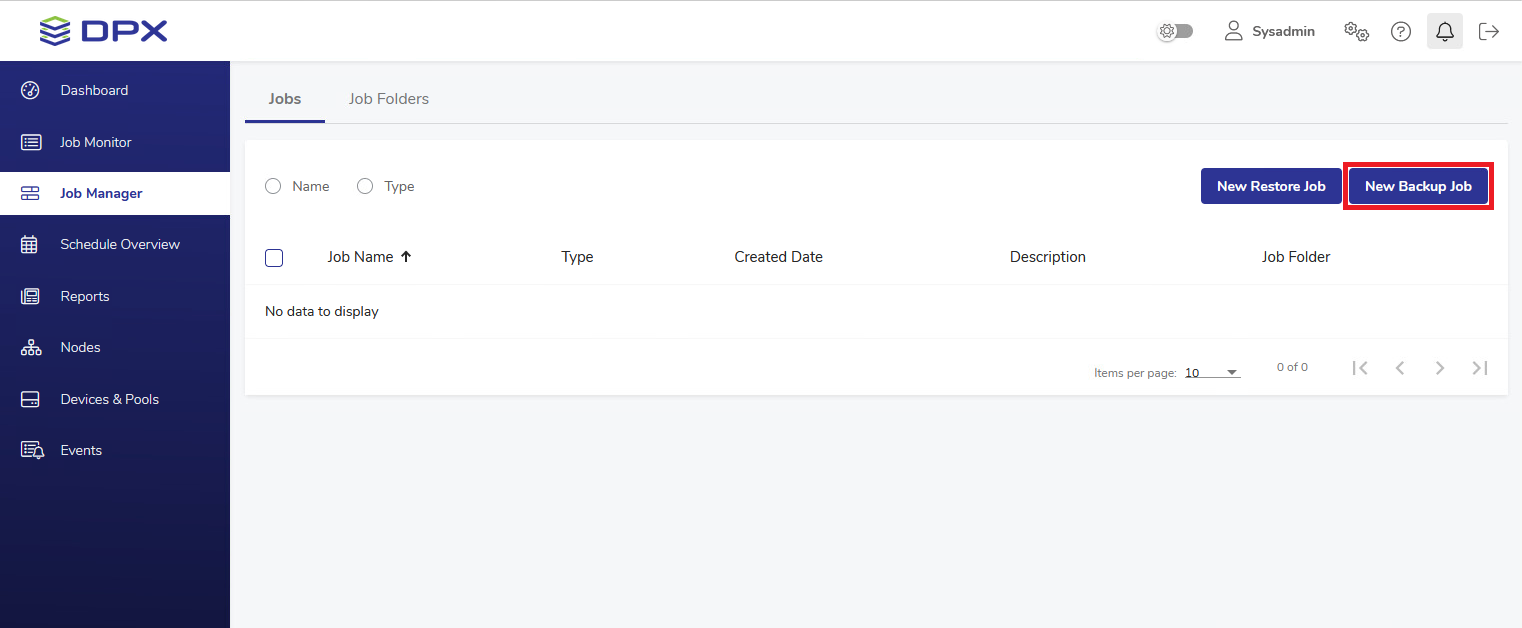
In the main web interface view, go to Job Manager in the sidebar. Then select the New Backup Job button in the upper right corner.
Specify the Job Name. For VMware Backup, this field may contain no more than 16 characters. You can also add an optional description (up to 48 characters).
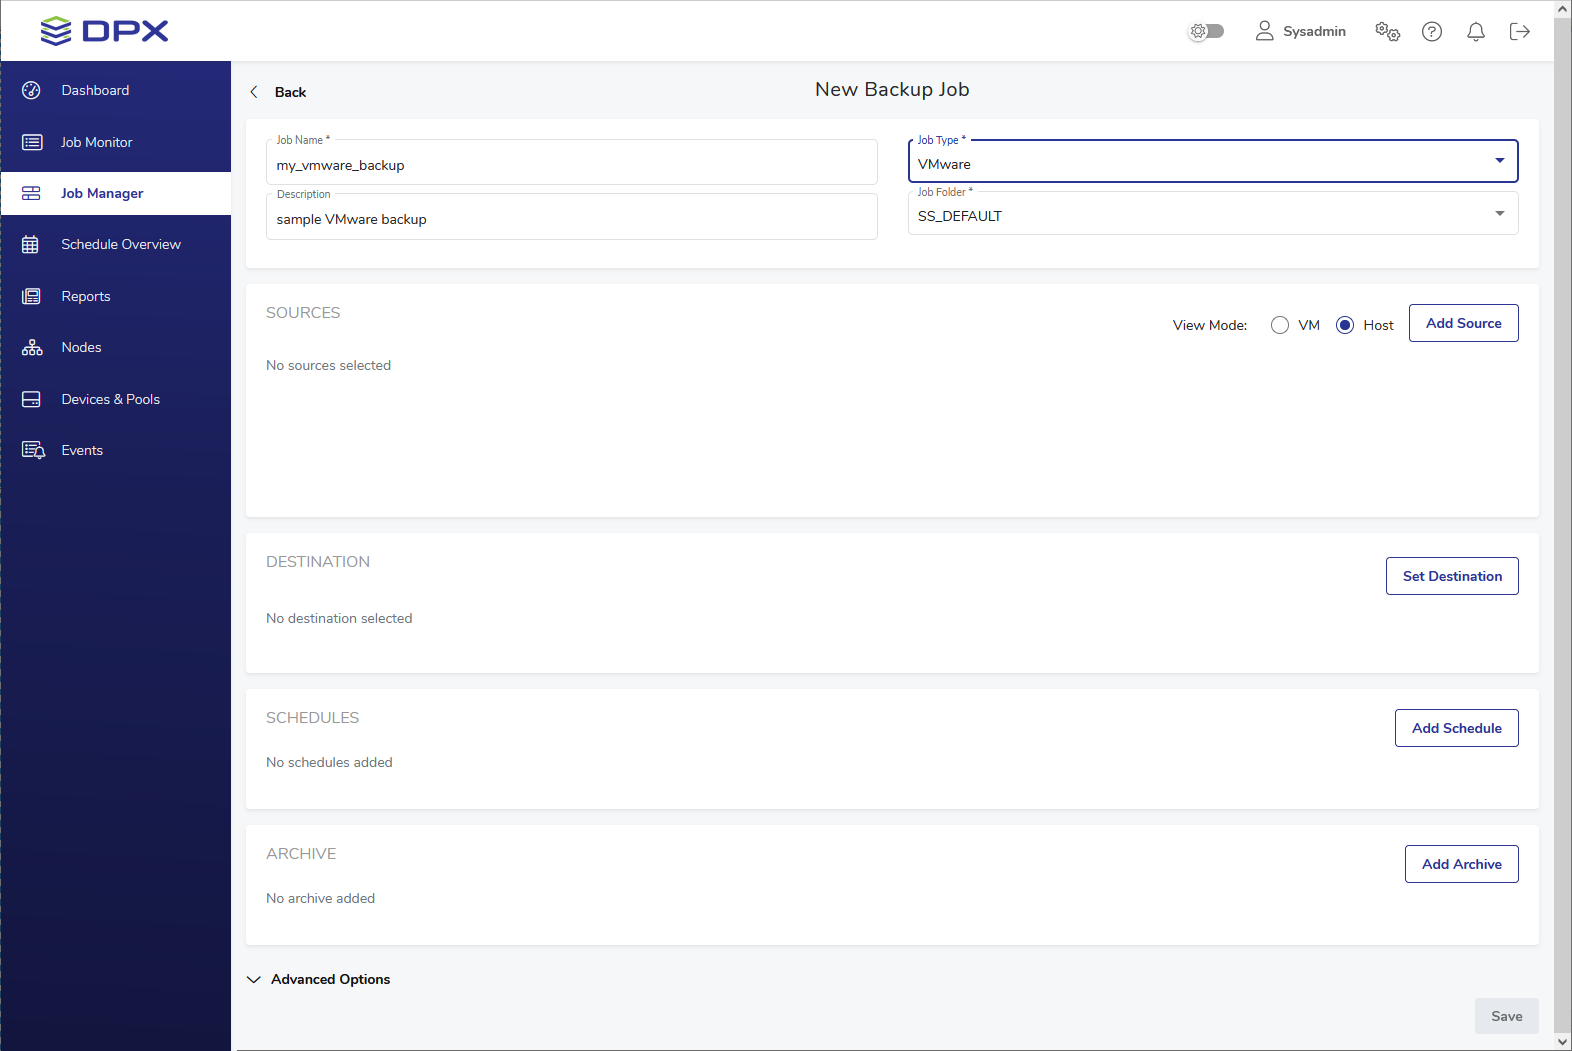
Select Job Type – VMware and the Job Folder to store the job in (see the Job Manager section for more information). By default, all jobs are stored in the SS_DEFAULT job folder.
Click Add Source in the SOURCES pane to specify which volumes you want to back up. The Source selection dialog will appear. Select the desired VMs and click Select.
Tip. You may change the Source tree display mode, using the radio button selection.
The VM view provides a list of virtual machines under each datacenter, VMs can also appear under folders on the list.
The Host view displays objects at the levels of vCenter, Datacenter, Host, Resource pool, Folder or VM. Objects under an object selected for backup can be excluded.

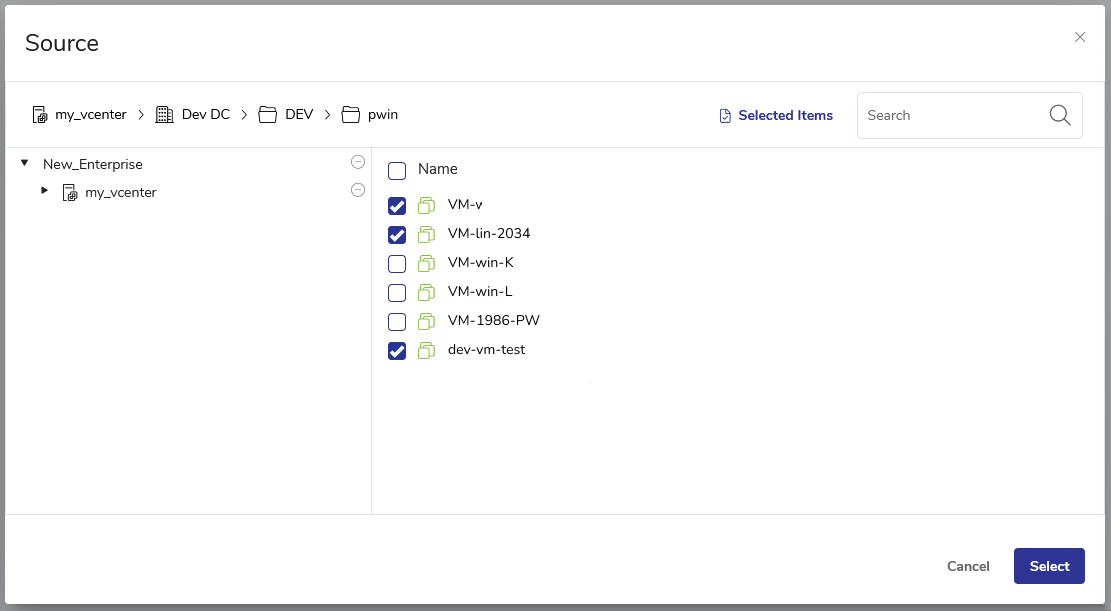
Tip. Powered-on machines are displayed with green icons, and powered-off machines are displayed with grey icons.
Agentless VMware backup is possible even when the virtual machine is powered off.
Tip. You may view your current selection at any moment, using the Selected Items button next to the search field.

You can clear each item using the “X” symbol next to the item, or clear all items at once using the Clear All button.
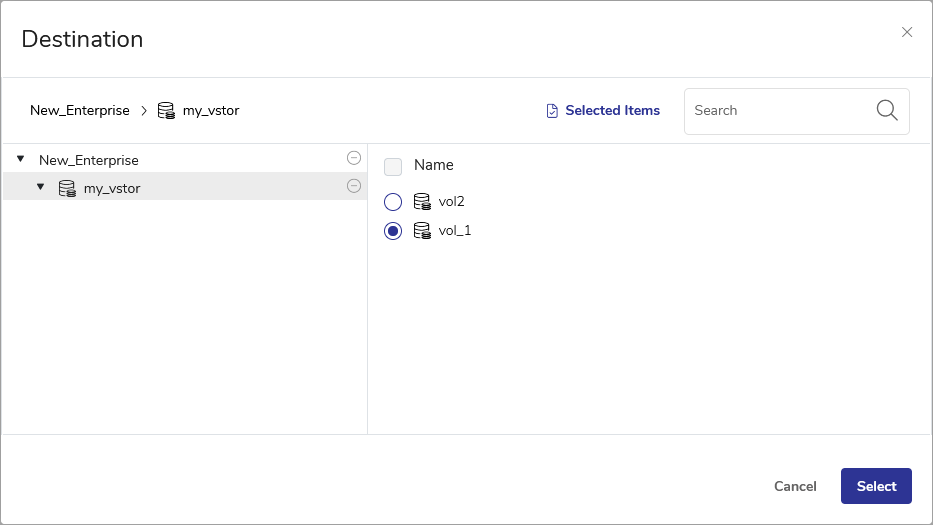
Click Set Destination in the DESTINATION pane to specify the destination for the VMware backup. The Destination dialog will appear. Choose the destination for your backup and click Select.
Important. When selecting a vStor share, ensure DPX proxy servers can access it. For more information, see Creating a new share using the vStor Web Interface in vStor 4.12 Documentation.
Important. When selecting a vStor share, ensure it is an NFS share, so that DPX can access it. For more information, see Creating a new share using the vStor Web Interface in vStor 4.11 Documentation.
You may also add a schedule in the SCHEDULES pane for the backup to be run regularly. See Scheduling a VMware Backup Job.
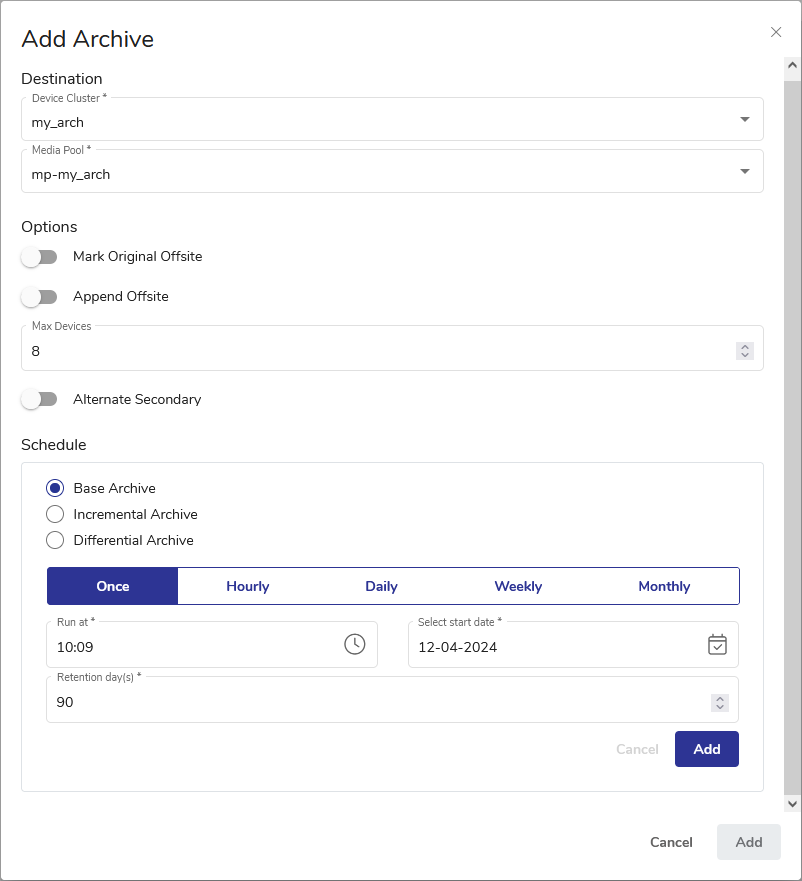
If you want to add an Archive backup to your backup job, click Add Archive in the ARCHIVE pane. The Add Archive dialog will appear.
Important. Before using this functionality, read the Archive section in the Backup chapter.
Set advanced options as desired, selecting them from the Advanced Options drop-down at the bottom of the screen (scroll down if necessary).
See also. For more information about VMware backup job options, see the following sections:
Click Save. The Run Job prompt will be shown, where you may run the job immediately, specifying the retention period (default is 90 days). If you select No, you can run the job later from the Job Manager section.
Note. For information about selecting proxy servers to use in a VMware backup job, see Selecting Proxy Servers.
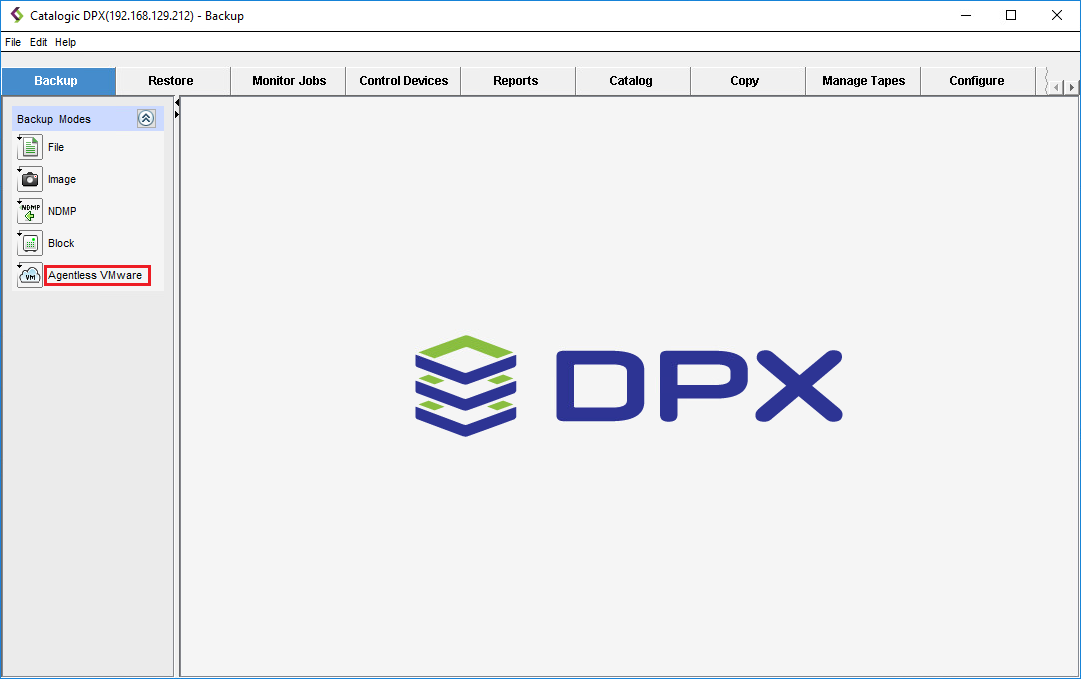
In the main desktop interface window, go to the Backup tab, and from the Backup Modes section in the task panel, choose Agentless VMware.
Two additional panes will appear. You are already in the defining new backup job view, so there is no need to click the Define New Backup Job button under Job Tasks in the task panel.
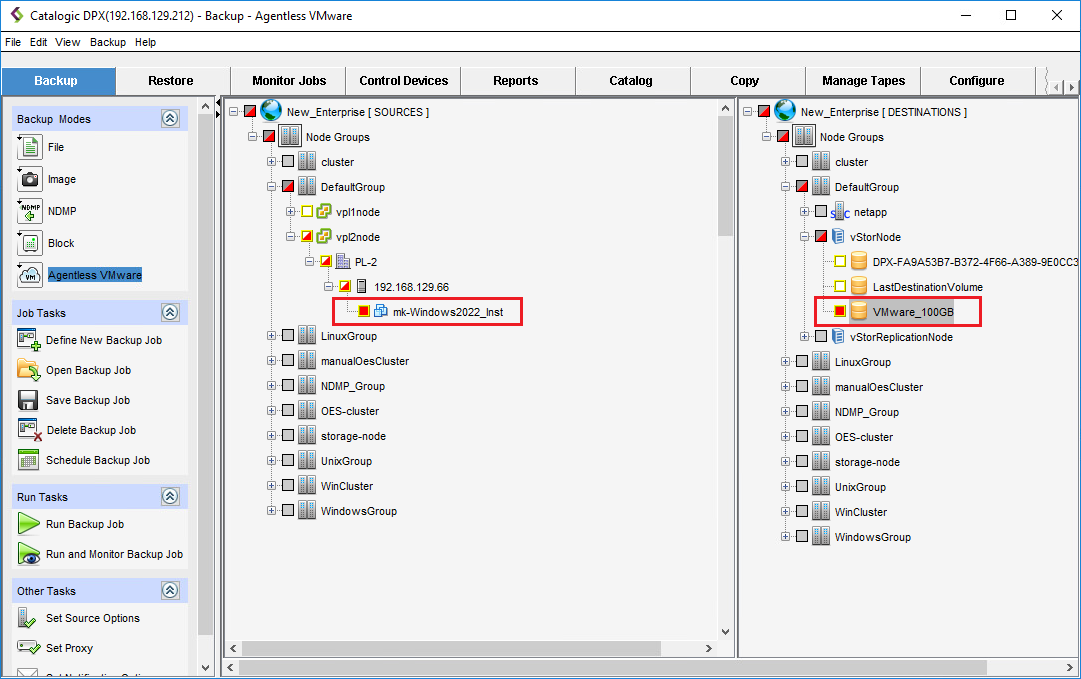
Specify VMware objects for backup. Expand the tree as necessary.
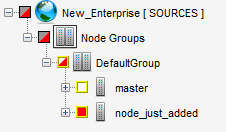
Empty checkboxes indicate a directory that will not be included. Checkboxes marked in red indicate a directory that will be fully included. Half-red checkboxes indicate that only some subdirectories/files of a given directory will be included.
Tip. You may change the Source tree display mode. Go to the View menu and select either Agentless VMware VM View or Agentless VMware Host View.
The VM view provides a list of virtual machines under each datacenter, VMs can also appear under folders on the list.
The Host view displays objects at the levels of vCenter, Datacenter, Host, Resource pool, Folder or VM. Objects under an object selected for backup can be excluded.
Specify the backup destination in the right-hand side pane. Select a vStor server, NetApp or DPX Open Storage Server (OSS). If selecting OSS, specify the volume.
Note. Before running a backup job, you need to save it. Once saved, a previously defined job can be modified, run, or deleted. If you try to leave the job creation view without saving the changes, you will be prompted to either save or discard changes before leaving.
If you select Define New Backup Job, all unsaved changes will be lost.
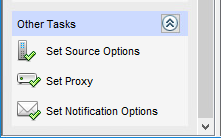
Set advanced options as desired, selecting appropriate items in the Other Tasks section of the side panel. Scroll down if necessary.
See also. For more information about VMware backup job options, see the following sections:
Save the job by doing one of the following:
Select File > Save Job
Select Save Backup Job in the Job Tasks section of the side panel
Press [Ctrl + S]
The Save Job dialog will appear.

Restrictions. The new job name must be unique throughout the entire DPX, regardless of the folder the job is stored in.
Click OK. The job is now saved.
Last updated