Creating an Agentless VMware Restore Job
Creating an Agentless VMware Restore job involves a few more steps than other restore jobs due to the need for additional information such as Target Datastore or Virtual Machine Options. The Restore Wizard is used to guide you through this process.
Navigate to the Restore tab in the main desktop interface window. From the Restore Modes section in the task panel, select Agentless VMware.
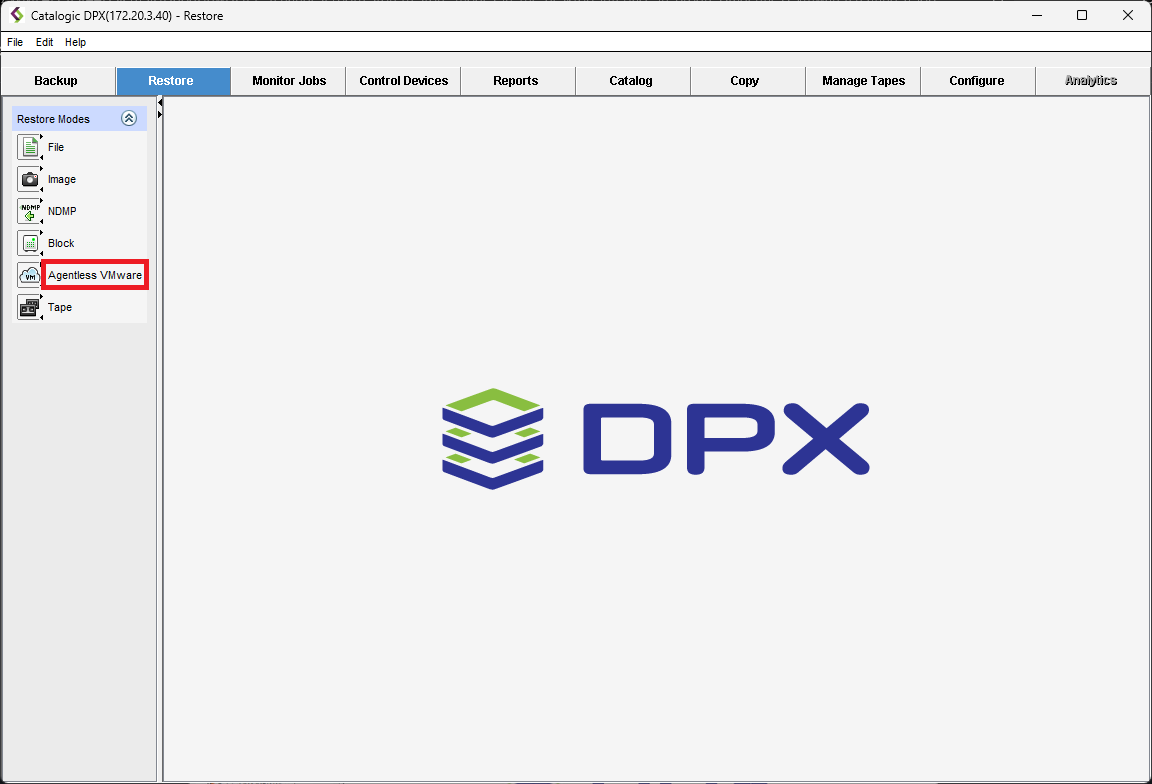
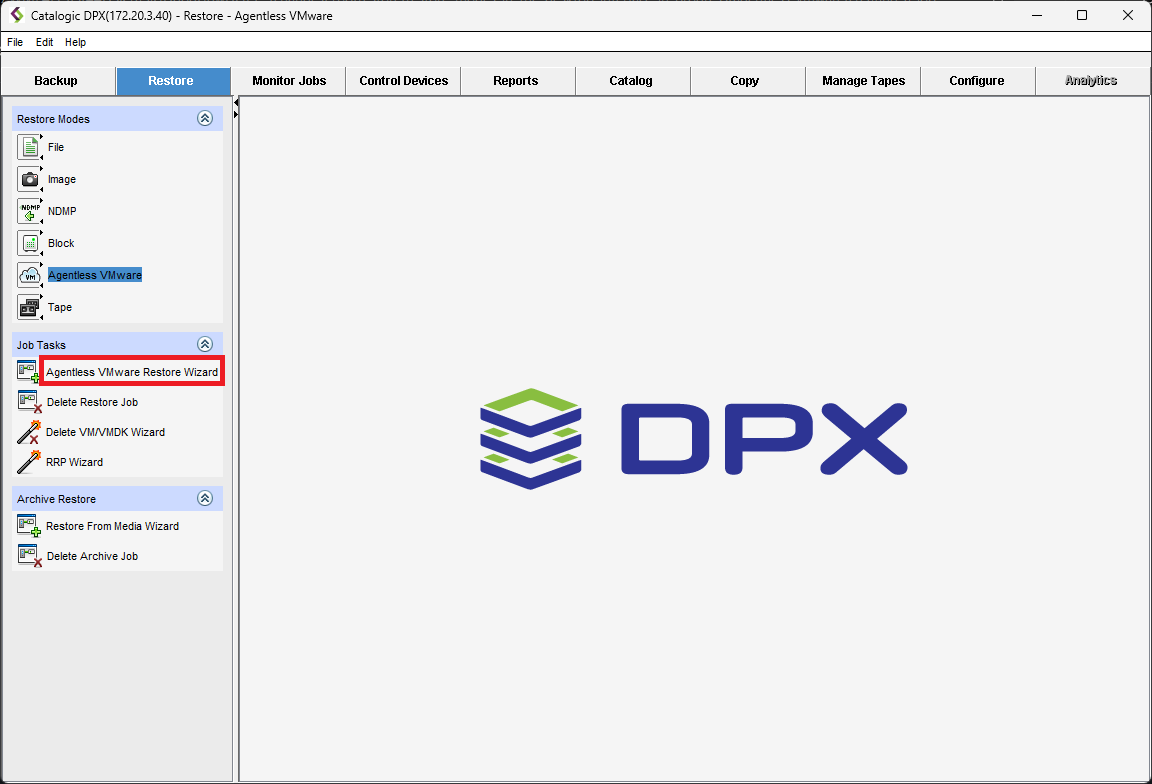
To create a new Agentless VMware Restore Job, select Agentless VMware Restore Wizard.
Click New Job to create a new job or select an existing job from the dropdown list to modify it.
Select an operation, you want your Restore job to perform. You can choose from the following options:
Instant VM Restore
Full VM Restore
Instant VMDK Restore
Full VMDK Restore
See also. To learn more about these operations, see Agentless VMware Restore Job Operations.
Browse to the snapshot you wish to restore. The steps that follow may vary slightly based on the restore option you selected in the previous step.
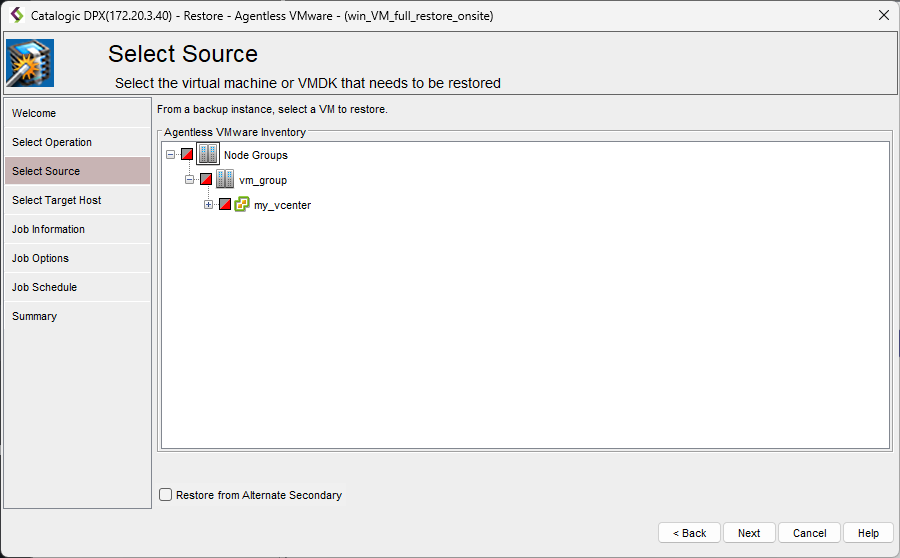
In the left pane, select the VM to restore. The right pane lists snapshots for the selected VM. If you selected one of the VMDK operations on the Select Operation page, browse to a VM that contains the VMDK to restore and select it.
In the right pane, expand a backup instance to reveal the object to restore. The selectable items, snapshots, or VMDKs, depend on your choice on the Select Operation page:
If a VMDK operation was not selected on the Select Operation page, only VM-level restore will be possible. You can view VMDKs under a VM, but they are not selectable.
If you selected a VMDK operation on the Select Operation page, you can select a VMDK to restore, but Agentless VMware Backup VM snapshots are not selectable.
Tip. The snapshot labeled LATEST is always the most recent. If you select LATEST and save the restore job, the restore job will automatically update to use the most current snapshot in the future.
Attention! If the snapshot to restore resides on an alternate secondary storage, such as a storage system at a remote site, use the Alternate Secondary section on the Select Source page to identify the storage. This is crucial in scenarios requiring disaster recovery failover from offsite NetApp SnapMirrored snapshots or vStor replication snapshots. The alternate secondary must be synced with the mirror source.
On this page, select the restore destination. The procedure differs depending on your selection on the Select Operation page:
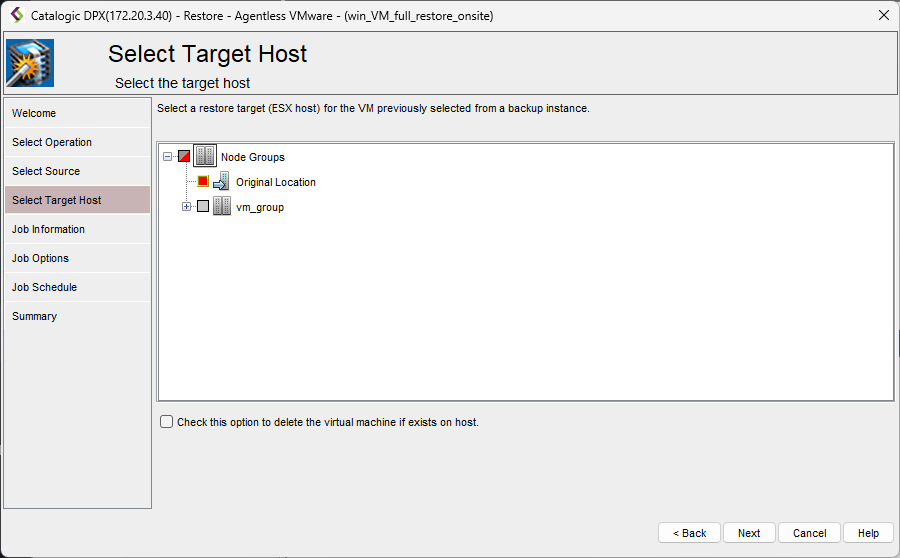
To select a target host, if you selected an operation other than VMDK Instant Access, choose a host to restore to. You can select either the original location or an alternate location. Note that when an alternate restore location is selected for a VMDK file, only VMs are selectable.
A list of data stores appears under the selected destination host. Select a datastore for the restore target.
Tip. If the option Check this option to delete the virtual machine if it exists on the target host is checked, the VM is deleted if it is not part of a resource pool. However, if the VM is part of a resource pool and this option is checked, the restore job will fail.
[Instant and Full VM Restore only] Choose the setting for your VM. The tabs contain fields populated by default with values from the source VM. For more detailed information on each available field, see the tables below:
Name
Virtual Machine Name
By default the source VM name displays.
Virtual Machine Memory (MB)
By default the source VM memory displays.
Start VM after it is created
This checkbox controls whether the restored VM powers on automatically. It's advisable to enable this feature. If left unchecked, a Full restore will resort to cloning rather than storage relocation, leading to the VM's unavailability until the cloning process is complete.
Resource
Resource Pool
Select from the dropdown list a resource pool for the new VM.
Network
Choose a network for the new VM from the dropdown list. The networks that appear are those supported by the vCenter for the host.
iSCSI Adapter
Choose a software or hardware iSCSI adapter from the dropdown list. The adapters displayed are those available on the host.
CPU Count
This value can be modified. However, it's not advisable to decrease it below the displayed source value.
Give the restore job a name and location and indicate if the job is deleted when it completes.
Set up pre-job and post-job scripts, disk provisioning, and notifications. For more detailed information on each available field and tab, see the tables below:
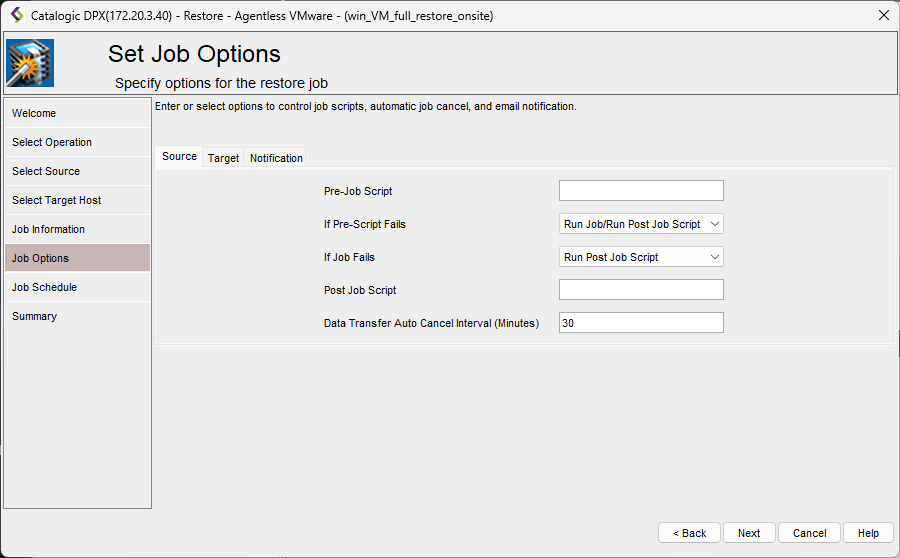
The Source tab displays options related to setting up pre-job and post-job scripts and when they are run.
The Target tab displays only for Full VM Restore or Full VMDK Restore.
Disk Provisioning
Select either Thick or Thin disk provisioning for the new virtual machine. The disk provisioning option is independent of disk provisioning on the original backup source. The default is Thick.
Consolidate VMDK and VM files in one folder
Select Yes if you prefer the VMDK to be stored alongside VM files such as VMX and VMXF files. Choosing No will store the VMDK file in a separate folder, which may be more difficult to locate. Be aware that opting for Yes can typically increase job run time. The default setting is No.
Notification
The To, Cc, and Bcc fields designate email recipients
The To field should contain only one recipient. For multiple email addresses in the Cc and Bcc fields, separate them with semicolons.
Subject
The subject line of your message can include variables such as %JOBNAME, %JOBID, %JOBTYPE, and %RC (return code) to dynamically insert job-related information. Ensure these variables start with a percent sign (%) to function correctly. If enclosed in double quotes, they will be interpreted as literal text.
Avoid using the following invalid characters in any field: < > ; and single quote.
To successfully send reports via email, verify that the SMTP Host Name and SMTP Port settings are accurately configured.
Scheduling a job is optional. If you do not want to schedule the job, click Next. To schedule the job, click Schedule.
See also. To learn more about scheduling a Restore job, see Scheduling a Restore Job in the Desktop Interface.
The Summary page displays field entries from the previous pages. If the displayed values are satisfactory, click Finish. If you did not schedule the job, you will be asked if you want to start the job.