DPX 4.11 Guide
Catalogic SoftwareKnowledge BaseMySupport
  • Welcome to DPX!
  • Introduction
    • About DPX
  • Installation and Configuration
    • How to Start – Basic Configuration
      • Protocols Used for Backup and Restore Data Transfer
    • DPX Master Server
      • Deploying DPX with VMware vSphere
        • Auxiliary Tasks for VMware Deployment
      • Deploying DPX with Microsoft Hyper-V
        • Auxiliary Tasks for Hyper-V Deployment
      • DPX Master Server Interface
      • Connecting to DPX Master Server via SSH
      • Configuration
    • DPX Client
      • DPX Client for Microsoft Windows
        • Requirements
        • Installation
        • How to Uninstall
      • DPX Client for Linux
        • Requirements
        • Installation
        • How to Uninstall
      • Automated Deployment of DPX Client
      • Further Actions with DPX Client
    • DPX Proxy Server
      • Deploying DPX Proxy Server for VMware
      • DPX Proxy Server Web Interface
    • DPX Hyper-V Agent
    • Nodes
      • Adding a Client Node to the Master Server during Client Deployment
      • Adding a Client Node from the Master Server Level
      • Adding a vStor Storage Node
      • Adding a Configured Hyper-V Host as a DPX Node
      • Adding Other Node Types to the Master Server
      • Adding a Node Group
    • Devices
      • Adding a Device Cluster
      • Adding a Device
      • Adding a Tape Library
      • Adding a Tape Library Device
    • Media
      • Adding a Media Pool
      • Adding Media Volumes
    • Tape Libraries
      • Tape Library Deployment
      • Tape Library Setup
      • Manual Tape Library Installation
      • Tape Library Verification
      • Manual Tape Library Configuration
      • Setting up LTO Tape Drives for Hardware Encryption
        • Assigning and Unassigning Media to/from Tape Library Slots
    • User Configuration
      • Configure Administrators Window
    • Other Components of the DPX Suite
  • Storage
    • Backup Destinations
    • Tape Storage
    • vStor
    • Disk Directory
    • NetApp
      • NetApp SnapVault Management
        • Terminology for NetApp SnapVault Management
        • NetApp SnapVault Management Setup and Configuration
    • Cloud Storage
      • Registering AWS S3 Cloud Storage
      • Registering a Generic Cloud Storage
  • Backup
    • Introduction and Backup Types
    • File Backup
      • Creating a File Backup Job
        • Job Source Options for File Backup
        • Job Destination Options for File Backup
        • Other Job Options for File Backup
      • Editing a File Backup Job
      • Scheduling a File Backup Job
    • Block Backup
      • Prerequisites
      • Creating a Block Backup Job
        • Job Options for Block Backup
      • Editing a Block Backup Job
      • Scheduling a Block Backup Job
      • Forcing a Base Backup
      • Backing up System State
      • Backing up System Table
      • NetApp SnapVault Management Backup
    • Application Backup
      • Microsoft SQL Server Backup
        • Creating a Microsoft SQL Server Backup Job
        • AlwaysOn Database Backup
      • Microsoft Exchange Server Backup
        • Creating a Microsoft Exchange Server Backup Job
      • Microsoft SharePoint Server Backup
        • SharePoint Installation and Configuration Requirements
        • Creating a Microsoft SharePoint Server Backup Job
      • SAP HANA Backup
      • Oracle Database Backup
        • Creating an Oracle Database Backup Job
      • OpenText GroupWise Backup
        • Creating a GroupWise Backup Job
    • Bare Metal Recovery (BMR) Backup
      • Creating a BMR Backup Job
    • Catalog Backup
      • General Considerations
      • Creating a Catalog Backup Job
        • Job Options for Catalog Backup
      • Editing a Catalog Backup Job
      • Scheduling a Catalog Backup Job
    • NDMP Backup (desktop interface only)
      • Prerequisites
      • Creating an NDMP Backup Job
        • Job Source Options for NDMP Backup
        • Job Destination Options for NDMP Backup
        • Other Job Options for NDMP Backup
      • Editing an NDMP Backup Job
      • Scheduling an NDMP Backup Job
    • Image Backup (desktop interface only)
      • Creating an Image Backup Job
      • Editing an Image Backup Job
      • Scheduling an Image Backup Job
    • Agentless Backup for VMware and Hyper-V
      • Agentless Backup for VMware
        • Agentless Backup for VMware Complements Block Data Protection
        • Agentless VMware Backup Architecture and Data Flow
        • Environmental Requirements for Agentless VMware Backup
        • Best Practices for Agentless VMware Backup
        • Creating an Agentless VMware Backup Job
          • Job Source Options for Agentless VMware Backup
          • Other Job Options for Agentless VMware Backup
        • Editing an Agentless VMware Backup Job
        • Scheduling a VMware Backup Job
        • Application-Consistent Protection
        • Architecture and Data Flow
      • Agentless Backup for Microsoft Hyper-V
        • Creating a Hyper-V Backup Job
        • Editing a Hyper-V Backup Job
        • Scheduling a Hyper-V Backup Job
    • Differential and Incremental Backups
    • Archive
      • Creating an Archive Job for Block Backup
      • Creating an Agentless VMware Archive Job
  • Restore
    • Introduction and Restore Modes
    • Restore Modes in the Web Interface
      • Full VM Restore for VMware
      • Full VM Restore for Hyper-V
      • Instant VM Restore
      • Multi-VM Restore 🆕
        • Job Options for Multi-VM Restore
        • Advanced Filters
      • Agentless File Restore
      • File Restore from Block Backup
        • Advanced Job Options
      • Instant Access
      • Virtualization
      • Application Restore
        • Microsoft SQL Server Restore
        • Microsoft Exchange Server Restore
        • Microsoft Sharepoint Server Restore
        • Oracle Database Restore
        • OpenText GroupWise Restore
      • File Restore from File Backup
        • Job Options for File Restore from File Backup
    • Restore Modes in the Desktop Interface
      • File Restore
        • Creating a File Restore Job
      • Image Restore
        • Creating an Image Restore Job
      • NDMP Restore
        • Creating an NDMP Restore Job
      • Block Restore
        • Creating a Block Restore Job
          • Block Restore Job Options
        • Specifying Mount Points
        • Restoring Block Data with Instant Access
        • Restoring BMR Data with Virtualization
        • NetApp SnapVault Management Restore
      • Agentless VMware Restore
        • Creating an Agentless VMware Restore Job
          • Agentless VMware Restore Job Operations
        • Rapid Return to Production (RRP)
      • Tape Restore
        • Creating a Tape Restore Job
      • Application Restore
      • Scheduling a Restore Job in the Desktop Interface
        • Previewing Scheduled Jobs in the Desktop Interface
      • Restore Job Source Options
    • Catalog Restore
      • Creating a Catalog Restore Job
    • Bare Metal Recovery (BMR) Restore
    • Recovering Archived Backups
      • Recovering a VMware Archive
  • Web Interface
    • Log-in Page
    • Dashboard
    • Job Monitor
    • Job Manager
    • Schedule Overview
    • Reports
      • Reports Templates
    • Nodes
    • Devices & Pools
    • Events
    • Configuring Enterprise Information
    • Configuring Custom SSL Certificates
  • Desktop Interface
    • Connect to DPX Window
    • Main Window
    • Common Menu Bar Options
    • Function Tabs Desktop Interface
      • Backup Tab
      • Restore Tab
      • Monitor Jobs Tab
      • Control Devices Tab
      • Reports Tab
      • Catalog Tab
      • Copy Tab
      • Manage Tapes Tab
      • Configure Tab
      • [Legacy] Analytics Tab
    • Common Function Window Tasks
    • Configuring Parameters
    • Configuring the Enterprises
      • Editing an Enterprise Configuration
      • Configuring Devices
  • BARE METAL RECOVERY
    • Bare Metal Recovery Overview
    • Bare Metal Recovery for Windows
    • Bare Metal Recovery for Linux
    • Recovery from a Replicated or Alternate Data Resource
  • MAINTENANCE
    • Condense
      • Starting a Condense Job
      • Scheduling a Condense Job (desktop interface only)
    • Job-Related Information
      • Job Return Codes
      • Job Status and Available Actions
    • Collecting Logs
    • Getting Node Information
    • File Exclusion Rules
    • Managing Licenses
    • Pre-Scripts and Post-Scripts
    • Updating DPX
      • Command Line Update
      • Online Autoupdate Method
      • Offline Autoupdate Method
  • Miscellaneous
    • Configuring Keyrings
      • Adding a Keyring
      • Adding a Key
    • SNMP Interface
    • Troubleshooting
      • Troubleshooting Unsuccessful Multi-VM Restore Cleanup
      • Troubleshooting Installation of the Catalogic DPX Client on UNIX and UNIX-like Systems
      • Managing the CMAgent Service
    • Technical Support
    • Terminology
    • Acronyms
    • Default Ports
Powered by GitBook
On this page
  1. Installation and Configuration
  2. DPX Proxy Server

Deploying DPX Proxy Server for VMware

PreviousDPX Proxy ServerNextDPX Proxy Server Web Interface

Last updated 9 months ago

To deploy DPX Proxy Server virtual appliance for VMware, take the following steps.

  1. Log in to the Catalogic website.

  2. Go to the DPX 4.11 product page and download the OVA file for the DPX Proxy Server. The file name is structured as shown: dpx-proxy-<version-number>-<build-number>.ova

  3. Once the file is downloaded, log in to vSphere.

  4. Right-click on the folder where you want to deploy your virtual machine.

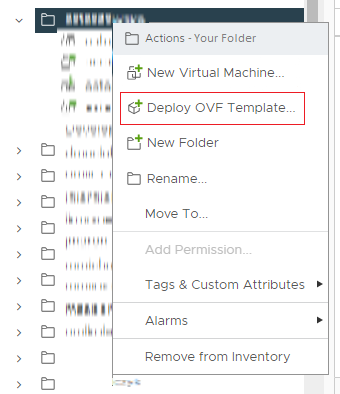
  5. Follow the instructions in the Deploy OVF Template wizard. In the License Agreements page, read the Software License Agreement (SLA), select I accept all license agreements if you agree, and proceed to the next steps.

  6. In the Customize template page, enter the following values:

    Hostname Configurations

    • Hostname: The hostname of this DPX Proxy Server virtual appliance. The hostname must be unique.

    Connection Configuration

    • Network IP Address: Enter the static IPv4 address of this virtual appliance. Or, leave it blank so that the dynamic IPv4 address is given via the DHCP.

    • Network Prefix: Enter 24 for the network prefix of this network interface if you are using the static IPv4 address.

    • Default Gateway

    • DNS Servers

    Keyboard Language Configuration

    • Keyboard Language: Select either one of the keyboard layouts for the Linux shell from US English (us), UK English (uk), German (de), French (fr), Chinese (cn), or Polish (pl). The default keyboard layout is US English.

    Timezone Configuration

    • Timezone: Enter the time zone (TZ) value for the Linux operating system. The default TZ is the US Eastern Time (America/New_York).

  1. DPX Proxy Configuration

    • DPX Master FQDN/IPv4 Address

    • DPX Master Node Group: DefaultGroup

    • DPX Master UI Username: A user name of the DPX Management Interfaces. The user must be in the Administrator role. The default user is sysadmin.

    • DPX Master UI Password: The password for this user.

    Review the configurations and launch the deployment of the virtual appliance of the DPX Proxy Server for VMware. Ensure that the new VM for the DPX Proxy Server has been created in VMware vSphere Client. Click Next.

  2. Review all the data in the final Ready to complete screen and click Finish.

  3. Upon successful deployment, power on the DPX Proxy Server virtual appliance. The appliance should be visible as a node added to the Master Server specified in Step 7.

Tip. Add the Proxy Server node as DPX Client.

See also. Refer to a list of TZ values, e.g. from WorldTimeAPI page.

Note. It may take several minutes for the DPX Proxy Server to be visible as a node in Master Server. If you cannot see the node, you may add it manually from the Master Server. See .

Timezones
Adding a Client Node from the Master Server Level
MySupport
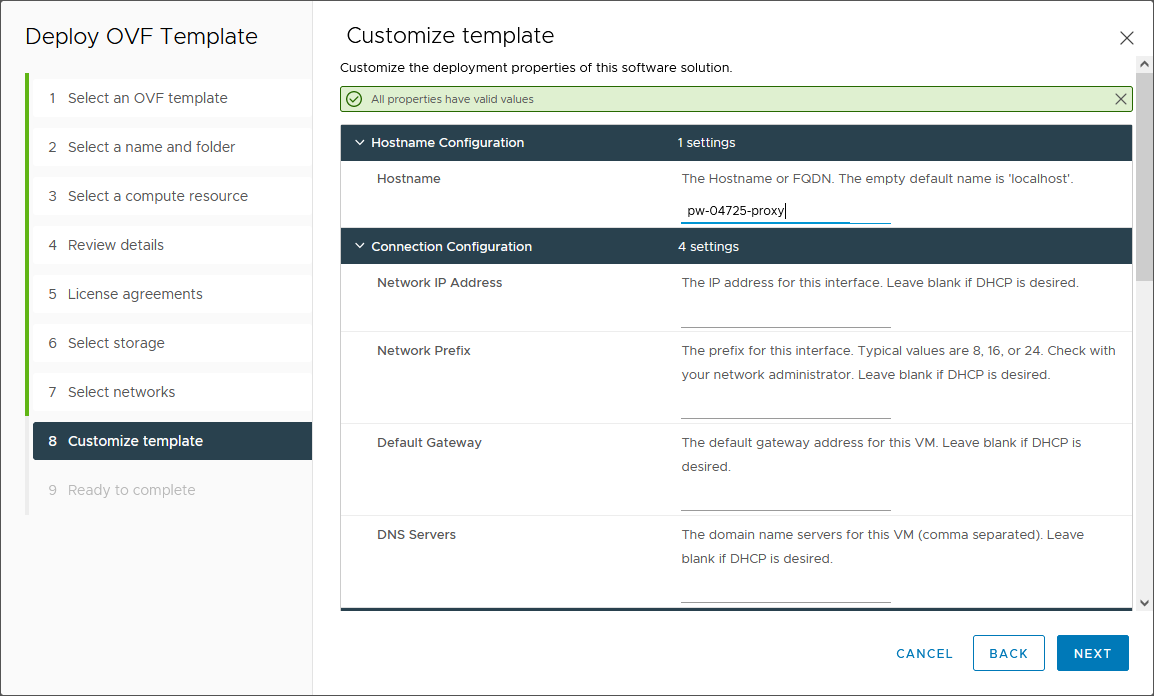
Customize template – upper part
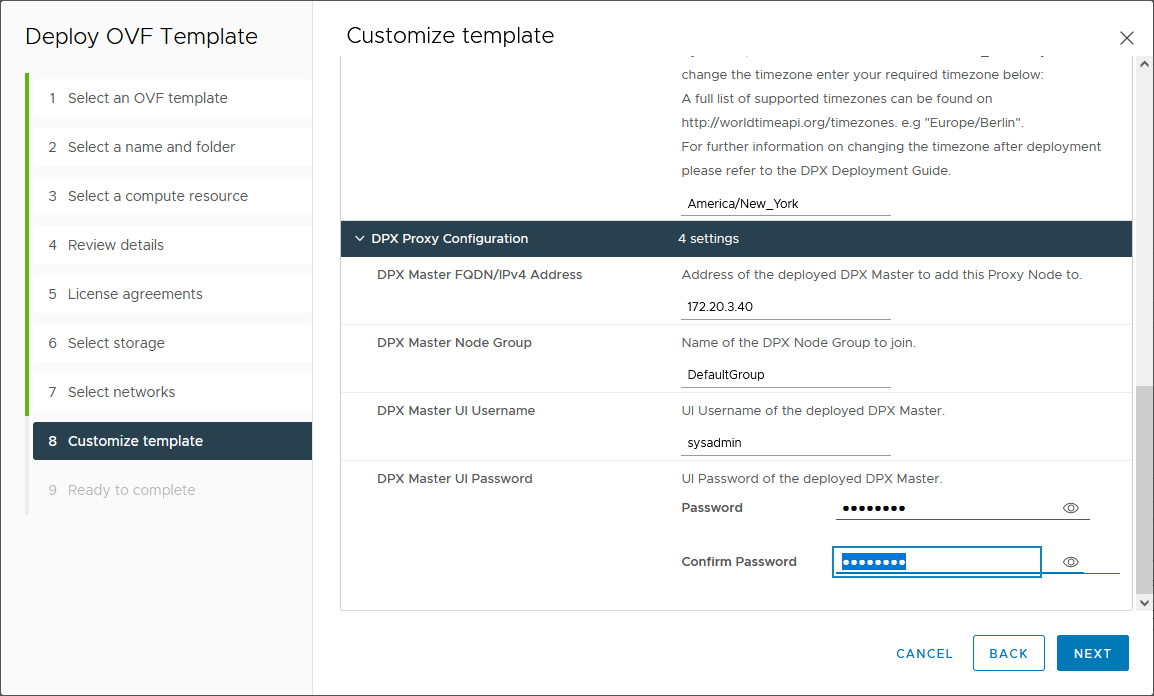
Customize template – lower part