Creating a Catalog Restore Job
Warning! Running the Catalog Restore job will overwrite your entire DPX Master Server. Before running the job, create a fresh snapshot of your DPX Master Server machine in the unlikely case the Catalog Restore fails.
Typically, the Catalog Restore job should be run on a newly deployed DPX Master Server. Restoring the Catalog on a working DPX may result in data loss.
To create a Catalog Restore job, use either of the graphical interfaces and follow the instructions below.
Note. Before you start defining the Catalog Restore job, make sure you have all the necessary device and media data at hand. See Creating a Catalog Backup Job.
Go to Job Manager in the sidebar.
Click New Restore Job to open the New Restore dialog.
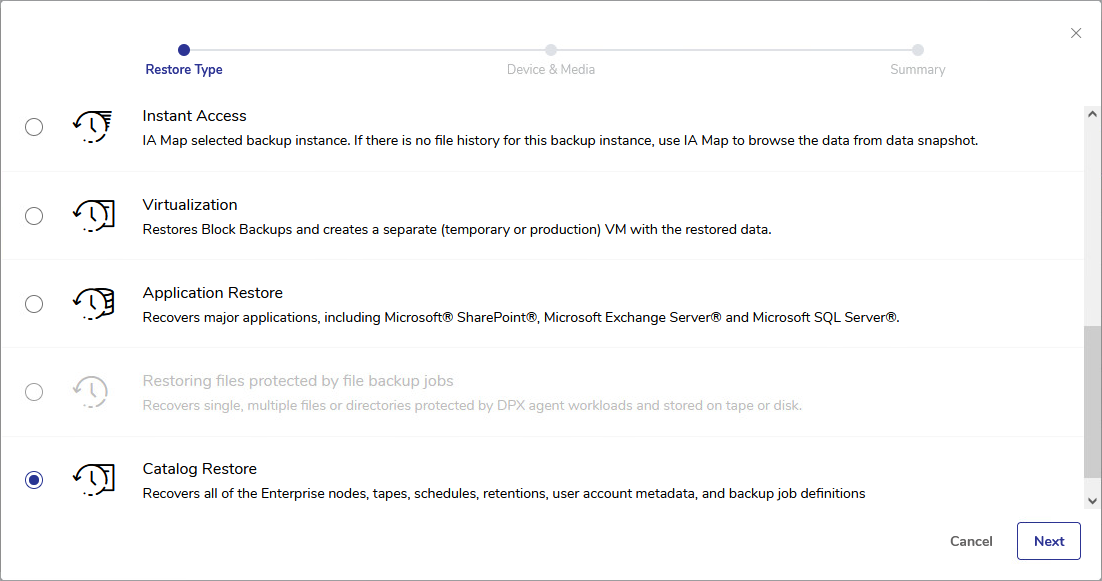
Select Catalog Restore and click Next.
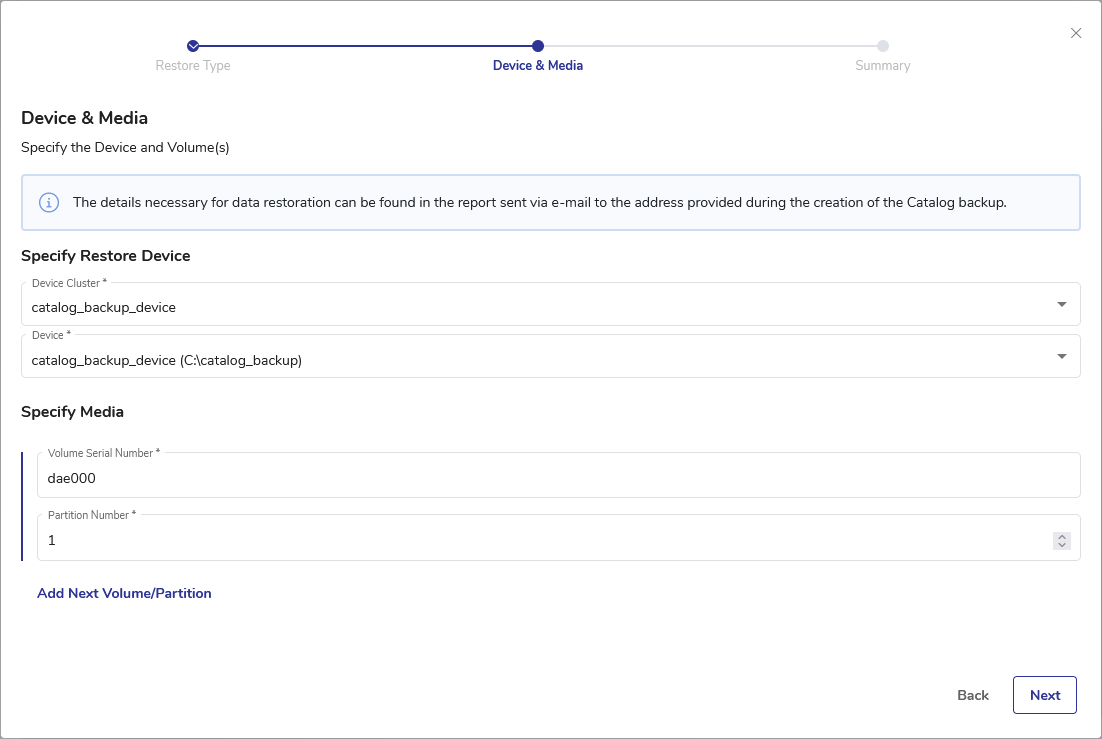
Specify the Restore Device – the device where the Catalog Backup is stored. In the web UI, there are two ways to do this. Option 1:
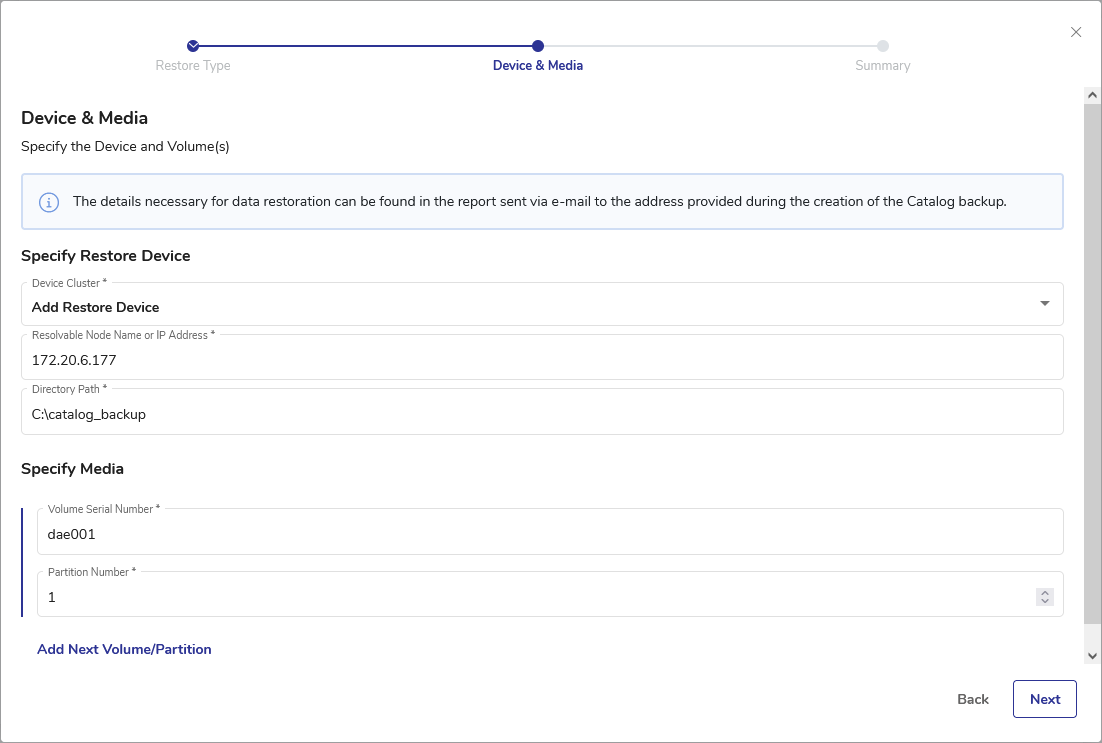
In the Device Cluster drop-down, select Add Restore Device. Two additional entry fields will appear.
Specify the Resolvable Node Name or IP Address of the device where the Catalog Backup is stored.
Specify the absolute directory to the Catalog Backup.
Option 2:
This option requires the Restore Device to be added as a node to the new Master Server. Note. This node will disappear from the DPX once the Catalog Restore is completed. It only facilitates the process of identifying the Catalog Backup file.
In the Device Cluster drop-down, select the device where the Catalog Backup is stored.
From the device drop-down, select the directory where the Catalog Backup is stored. Only directories with Catalog Backup will be listed.
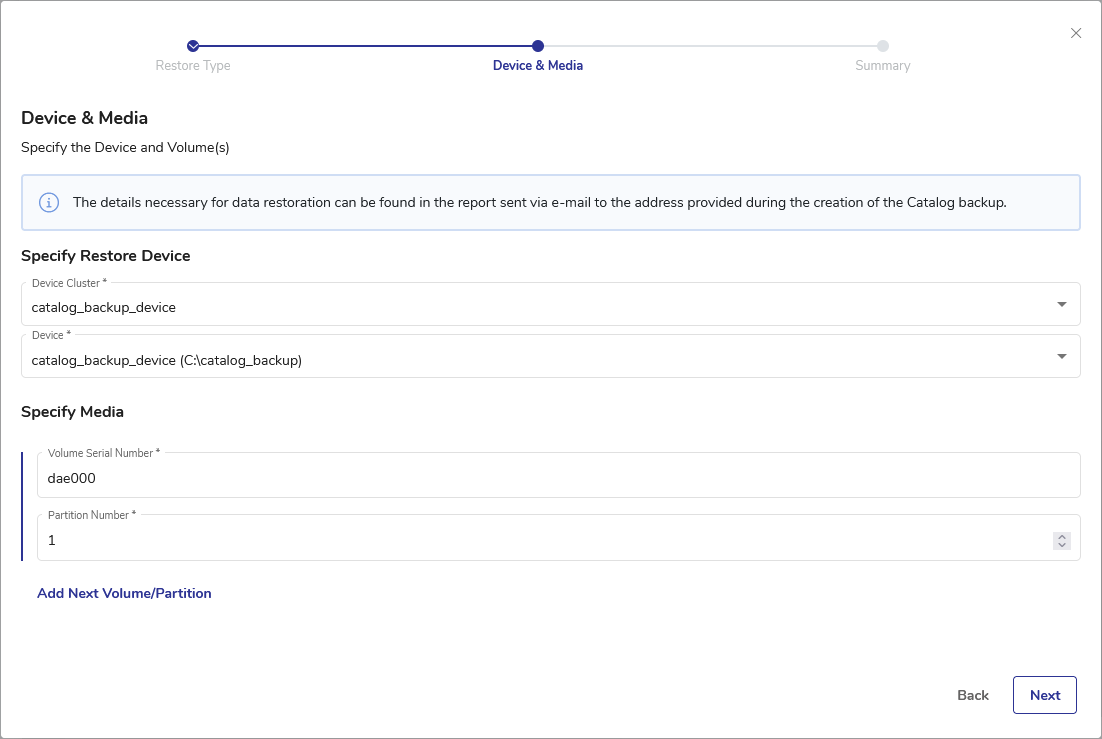
Specify the Media. The Volume Serial Number consists of three letters and three digits. For Disk Directory, the partition number is always 1. For Tape, see Catalog Backup information collected during the backup process. The necessary information can be found in the relevant Catalog Backup report. For more information, see Creating a Catalog Backup Job. Click Next.
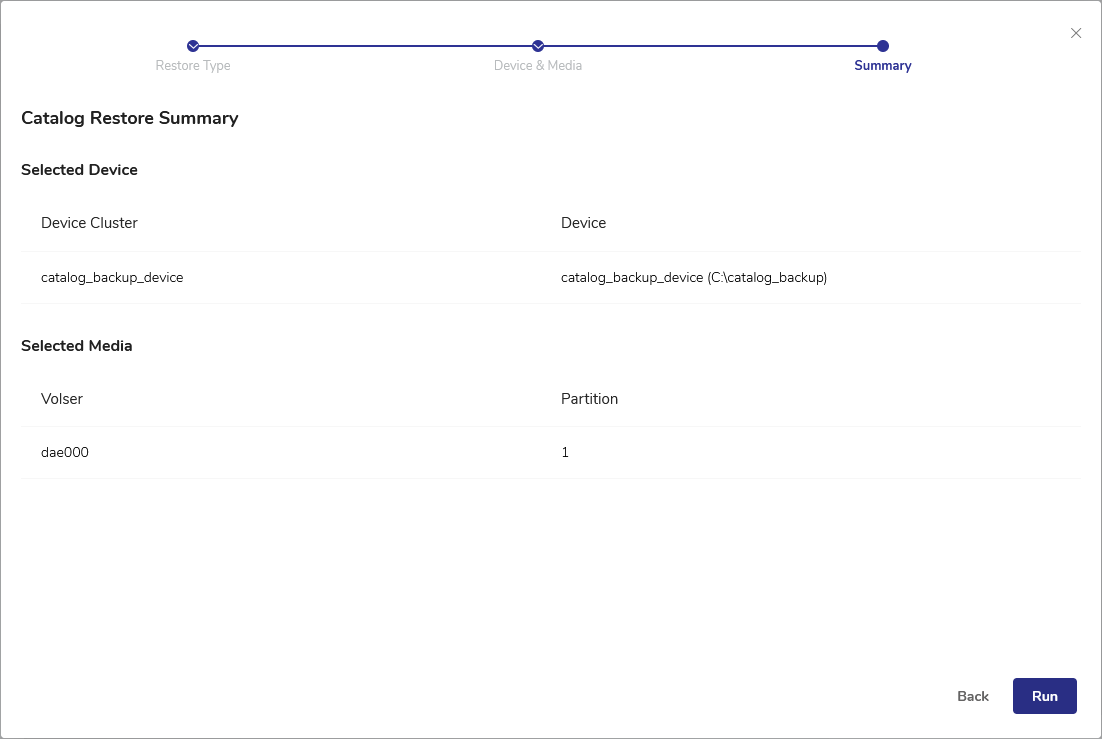
Verify all the details in the Summary screen. Click Back to make any necessary changes. To run the Catalog Restore job, click Run. A Confirmation prompt will be displayed.
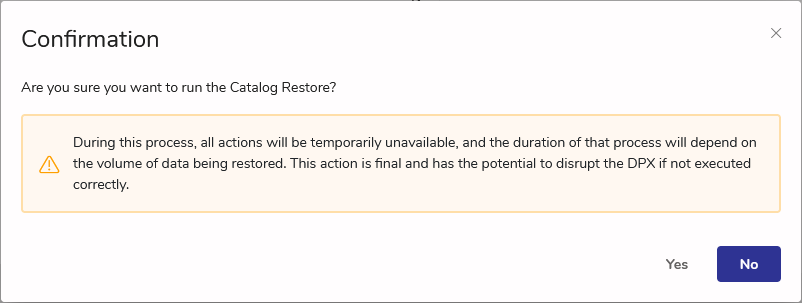
To start the Catalog Restore job, click Yes. Once started, this process cannot be stopped or reverted. The following screens will be shown, indicating the progress of Catalog Restore.
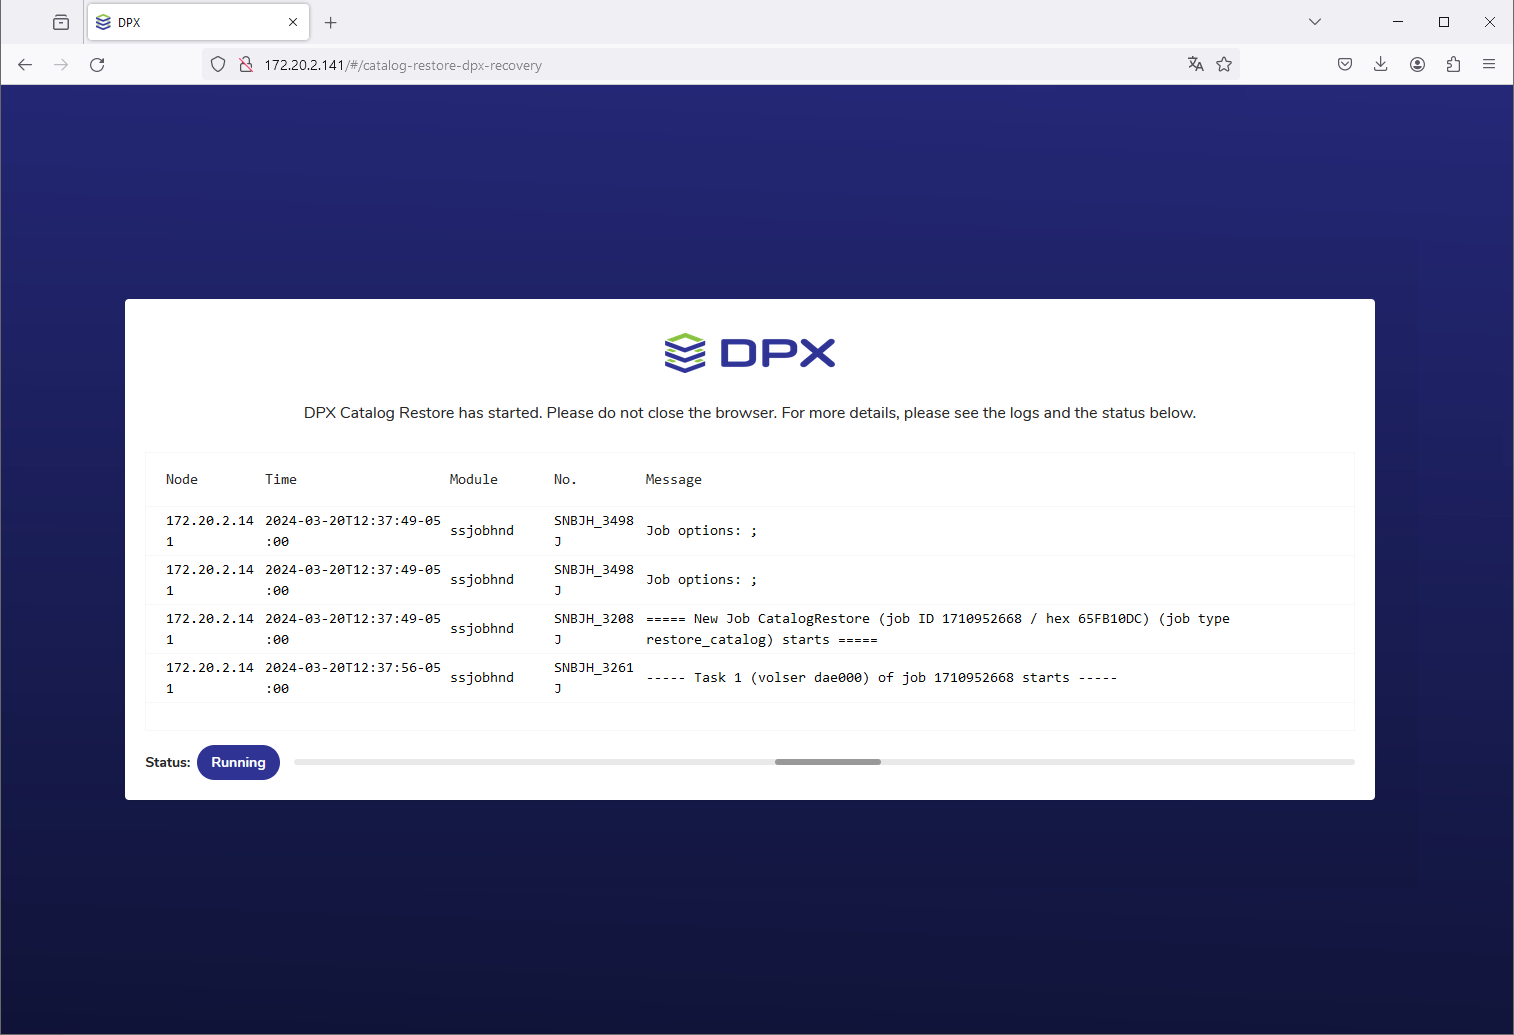
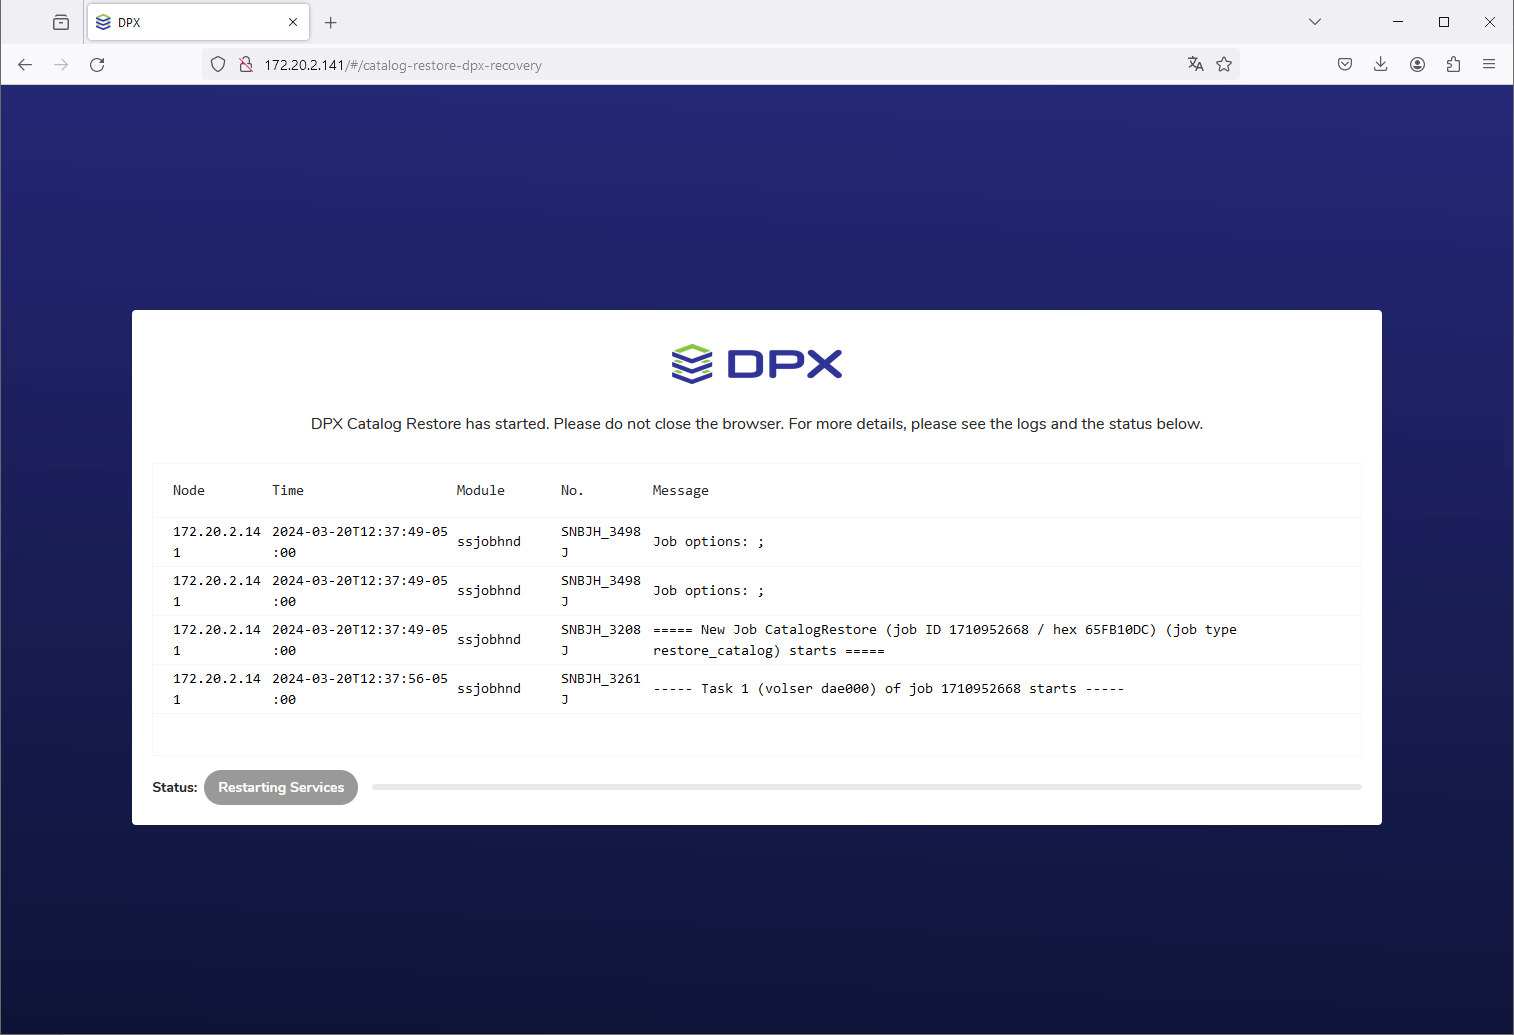
After a while, the logs will stop being displayed due to DPX services restarting.
Upon successful Catalog Restore, the final screen will be shown.
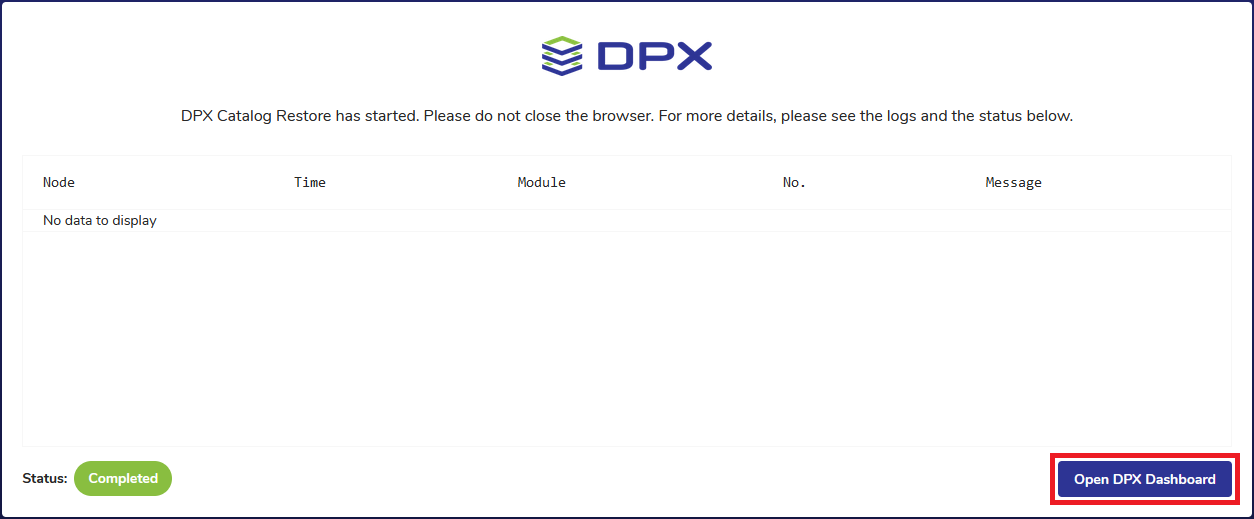
Click Open DPX Dashboard. You will be taken to your DPX Dashboard view.
In the main desktop interface window, go to the Catalog tab, and from the Catalog Operations section in the task panel, select Restore.
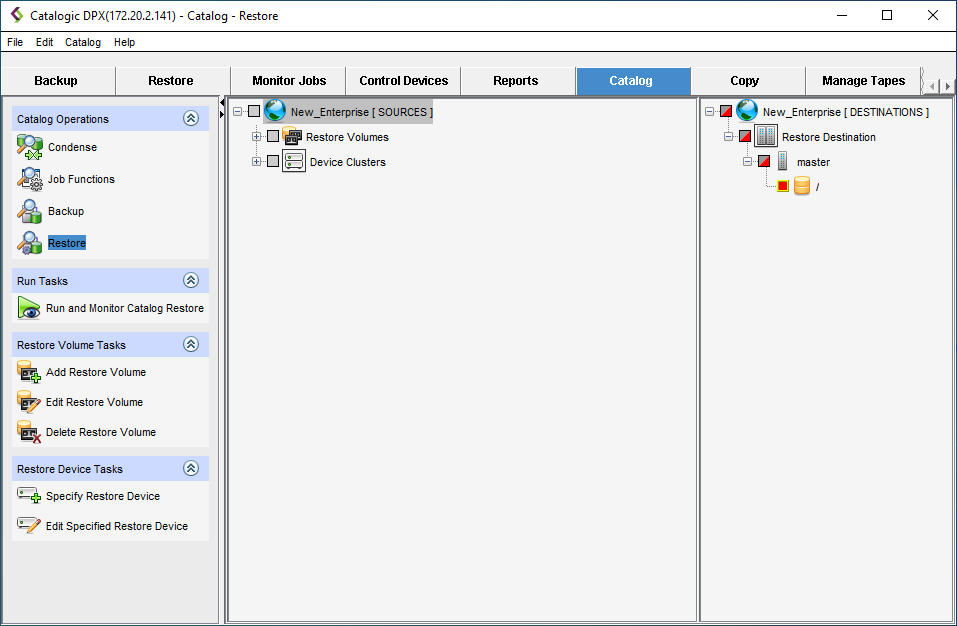
Specify the Restore Device – the device where the Catalog Backup is stored. Option 1:
Under Restore Device Tasks, click Specify Restore Device. A dialog will appear.
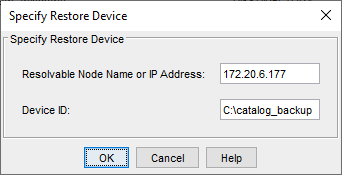
Specify the Resolvable Node Name or IP Address of the device where the Catalog Backup is stored.
Specify the absolute directory to the Catalog Backup.
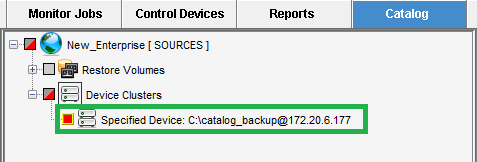
Click OK. The Restore Device will be added under Device Clusters in the Sources tree.
Option 2:
This option requires the Restore Device to be added as a node to the new Master Server. Note. This node will disappear from the DPX once the Catalog Restore is completed. It only facilitates the process of identifying the Catalog Backup file.
In the SOURCES tree, drill down into the Device Clusters item to find the device node where the Catalog Backup is stored, and select it.
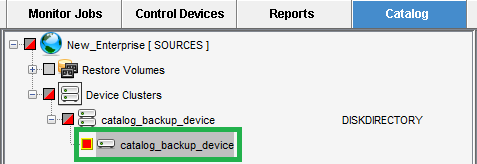
Specify the Restore Volume by selecting Add Restore Volume under Restore Volume Tasks in the task panel.
 The Volume Serial Number consists of three letters and three digits.
For Disk Directory, the partition number is always 1. For Tape, see Catalog Backup information collected during the backup process.
The necessary information can be found in the relevant Catalog Backup report. For more information, see Creating a Catalog Backup.
The Volume Serial Number consists of three letters and three digits.
For Disk Directory, the partition number is always 1. For Tape, see Catalog Backup information collected during the backup process.
The necessary information can be found in the relevant Catalog Backup report. For more information, see Creating a Catalog Backup.Click OK. The Restore Volume will be added to the Sources tree.
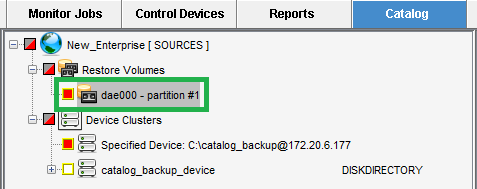
Make sure the master root directory is selected in the Destinations pane. This setting is default and cannot be changed, as the Catalog Restore job restores the Catalog to the Master Server on which the job is run.
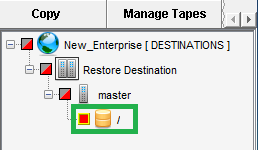
Tip. If you cannot see the master root directory as in the image above, e.g. null is selected as Destination, you may need to close and reopen the desktop interface, otherwise the job will not start. If the problem persists, contact the Catalogic Software Data Protection Technical Support team.
Review all Catalog Restore job settings. If you are sure you want to run the Catalog Restore job, select Run and Monitor Catalog Restore under Run Tasks.
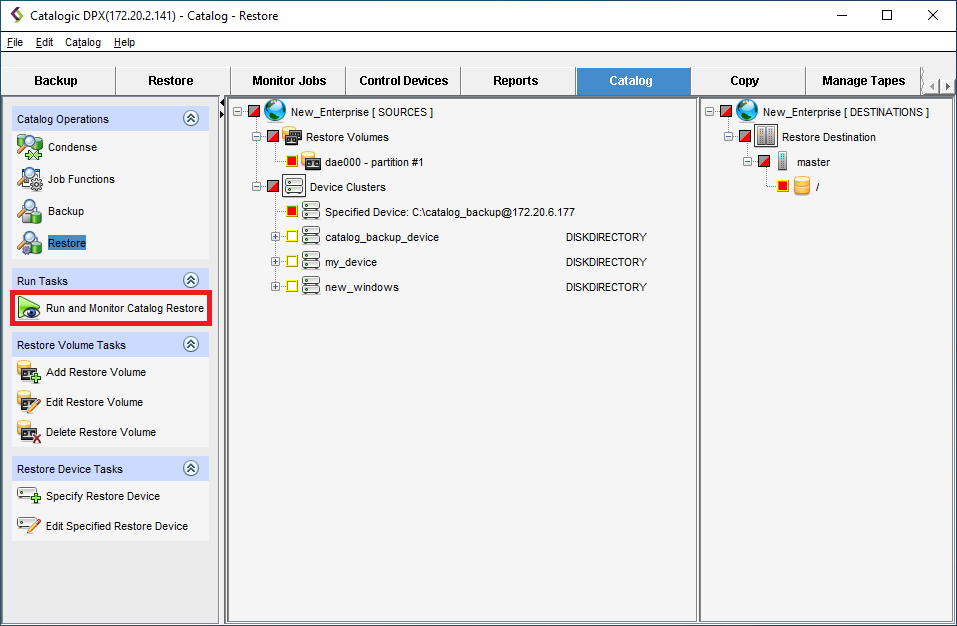
The confirmation dialog will be shown.
 To start the Catalog Restore job, click Yes. Once started, this process cannot be stopped or reverted. A new window will be open, indicating the progress of Catalog Restore.
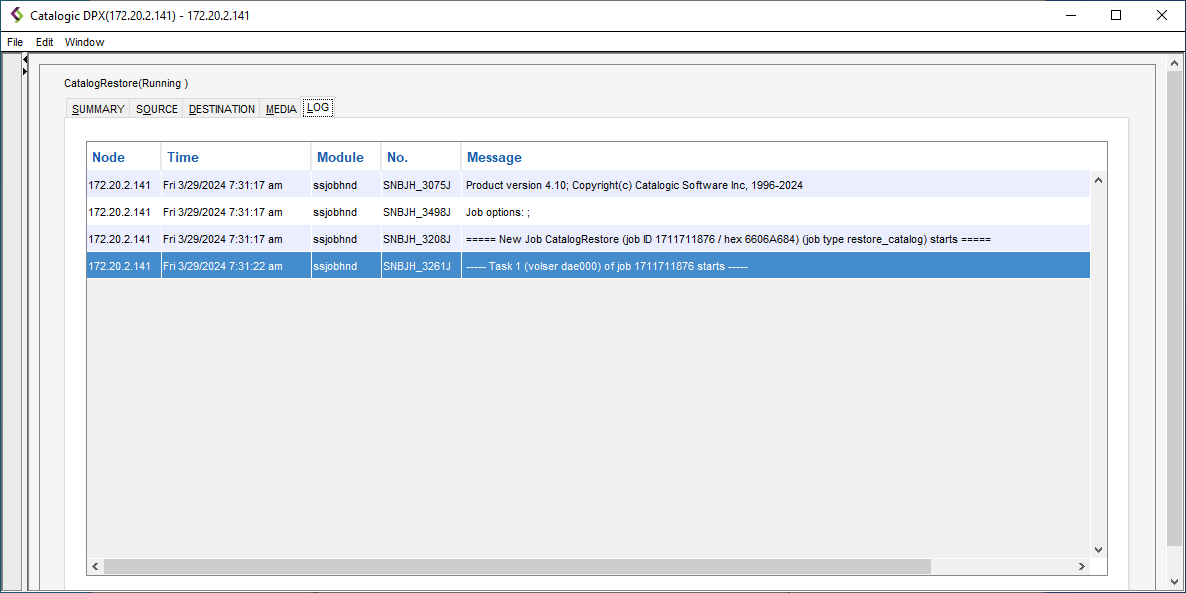
After a while, the Catalog Restore job status will change from Running to Complete.
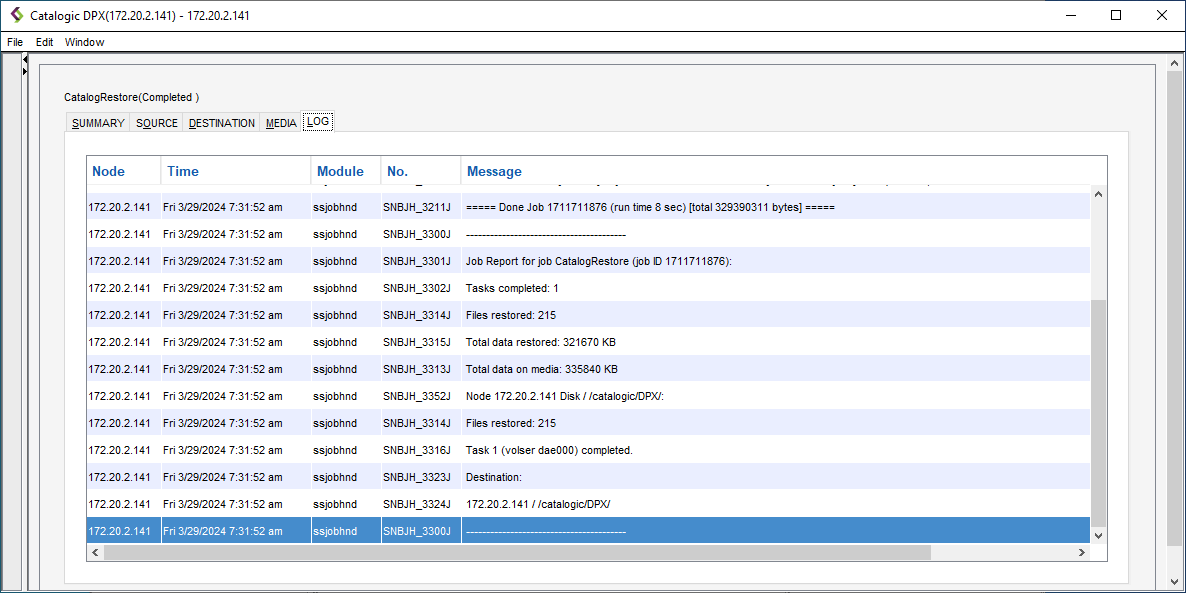
Close the status window. Your DPX is restored and is ready to use.