Job Options for Block Backup
Catalogic DPX offers a variety of job options for Block backup. All of them are available from both interfaces, but the access thereto may differ. See details for each interface below.
In the web interface, backup job options are defined in the Advanced Options section. To access them, do the following:
Go to Job Manager in the sidebar.
Open an already existing backup job. Or create a new Block backup job, by clicking the New Backup Job button in the upper right corner and then selecting Backup Type Block.
Go to the Advanced Options section at the bottom (scroll down if necessary) and expand it. Click any of the following section headers to expand it. Each field and the available choices are explained below.

The Application Options section

Microsoft SQL DB Consistency Check toggle
Tells DPX to run a consistency check on SQL Server before backing up a SQL Server database. The check runs three utilities that Microsoft recommends before a backup: DBCC CHECKDB, DBCC CHECKALLOC, and DBCC CHECKCATALOG.
Toggle on
Performs the consistency check.
Toggle off
Does not perform the consistency check.
Microsoft SQL Backup and Truncate Transaction Logs toggle
This option controls the truncation of SQL Server Transaction Logs during a Block backup. This option must be set to On in order to enable Point-in-Time restore.
Toggle on
SQL Server transaction logs are truncated on the source database server after the backup completes. To find the backed-up SQL logs, refer to the message “BACKUP LOG <database-instance> TO DISK...” in the Job Log or to Event 18265 in the Application Event Log.
Toggle off
SQL Server transaction logs are not truncated and will therefore continue to grow on the source database server. To truncate translation logs, run SQL Server maintenance on the source machine. No is the default.
Microsoft Exchange Truncate Logs
This option controls the truncation of Microsoft Exchange Logs during a Block backup.
Toggle on
After the backup is complete, DPX deletes the old Exchange logs. Yes is the default.
Toggle off
DPX does not delete any Exchange logs.
Microsoft Exchange Protect via Passive Node toggle
Determines whether DPX will back up Exchange DAG from a passive node or an active node.
Toggle on
Default setting. Back up Exchange DAG from a passive node.
Toggle off
Back up Exchange DAG from an active node.
Oracle RMAN Cataloging Control toggle
For Oracle backups, this option determines whether to synchronize the RMAN catalog after the job is completed. Yes is the default.
Toggle on
Synchronize the RMAN catalog after the job completes.
Toggle off
Do not synchronize the RMAN catalog after the job is completed. If you choose this option, the job is not cataloged in RMAN.
The File Index/History Options section

This section includes the following radio button selection:
Disable File History
Process File History on Local Client (default selection)
Process File History on Master Server
The General Options section
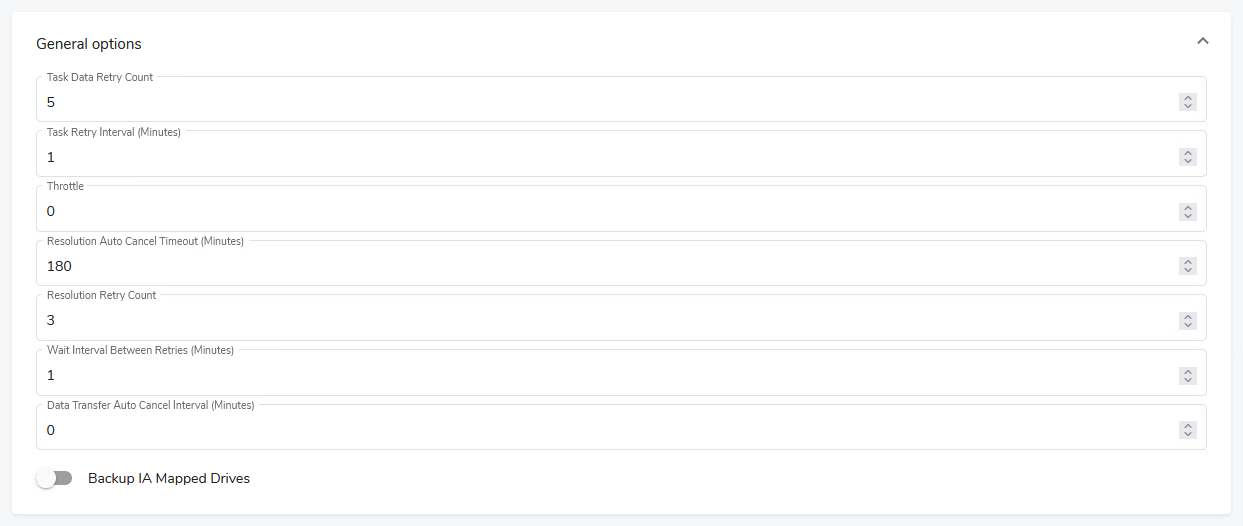
This section includes the following options:
Task Data Retry Count (default: 5)
Task Retry Interval (default: 1)
Throttle (default: 0)
Resolution Auto Cancel Timeout [Minutes] (default: 180)
Resolution Retry Count (default: 3)
Wait Interval Between Replies [Minutes] (default: 1)
Data Transfer Auto Cancel Interval [Minutes] (default: 0)
And one toggle:
Backup IA Mapped Drives (default: disabled)
The Notification Options section
The Notification Options section controls who receives messages pertaining to the current job when it is run.
This section includes the Job e-mail notification toggle.
Toggle on
The notification is sent as specified below the toggle (additional fields will appear – see below).
Toggle off
The notification is sent to the default e-mail address configured in the Administrator E-mail Settings section.
Subject
The subject of your message. The subject line usually contains a combination of straight text and variable elements. Variables, which must begin with %, are replaced with actual corresponding values. If you enclose variables in double quotation marks, those variables are treated as literal values. You can embed the following variables:
%JOBNAME%JOBID%JOBTYPE%RC
Use %RC to include the return code in the message for this run of the job, when applicable.
To
The email address of the primary recipient of your message. Only one “To” address is permitted.
Cc
Carbon Copy. The email address(es) of the secondary recipient(s) of your message. Use a semicolon to delimit multiple email addresses.
Bcc
Blind Carbon Copy. The email address(es) of the secondary recipient(s) not identified to other recipients. Use a semi-colon to delimit multiple email addresses.
Note. Note that the following characters are invalid in all fields: < > ; and '.
Note. DPX emailing must be enabled when you first configure your Enterprise. At that time, you supply general system information, including SMTP Host Name and SMTP Port. See the Administrator E-mail Settings section.
The Script Options section

Pre-Job Script
Enter the name of a script to execute prior to the actual job.
Basic usage: <script>@<node_name> <argument_list>
If Pre-Script fails
The action be taken if the Pre-Job Script fails to successfully complete:
Run Job/Run Post-Job Script
Skip Job/Run Post-Job Script
Skip Job/Skip Post-Job Script
If Job fails
The action to be taken if the Job fails to successfully complete:
Run Post-Job Script
Skip Post-Job Script
Post-Job Script
Enter the name of a script to execute after the actual job.
Basic usage: <script>@<node_name> <argument_list>
See also. For detailed information about pre- and post-job scripts, including all valid definitions, see Pre-Scripts and Post-Scripts.
In the desktop interface, backup jobs are defined exclusively through the Block Backup Wizard. See Creating a Block Backup Job. The last but one step of the Wizard, the Job Options screen contains five tabs. Each of them is explained below.
The Source tab
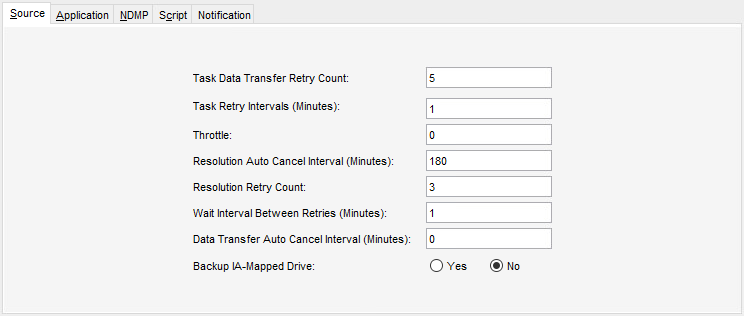
Task Data Transfer Retry Count
Controls the number of checkpoint retries of an interrupted Block backup. The retries attempt to resume the job from the last successfully backed-up data block. Enter the number of checkpoint restart attempts.
Task Retry Intervals (Minutes)
Determines how long to wait before retrying failed tasks.
When a task fails (due to permission problems, open files, interim job changes, etc.), it waits the number of minutes specified in this field before attempting that task again. Because the same failure might occur if the task is retried too soon, it is better to allow some time for an error to be corrected before retrying the task. A task is only retried once. Failing tasks appear in error message lists in the Job Log. All tasks are subject to retry.
Throttle
Enter a value in KB/s (kilobytes per second) to set the maximum transmission rate per backup task. The value 0, the default, allows the task to use the maximum bandwidth available. See Catalogic DPX Block Data Protection in the DPX 4.9 User’s Guide.
Resolution Auto Cancel Interval (Minutes)
This option comes into play when DPX attempts to retry a failed snapshot. If the retry is unresponsive, DPX initiates job auto-cancel after this interval, in minutes, has lapsed.
Resolution Retry Count
Determines how many times to retry a failed snapshot attempt.
Wait Interval Between Retries (Minutes)
Determines the amount of time (in minutes) to wait between retry attempts for a failed snapshot attempt.
Data Transfer Auto Cancel Interval (Minutes)
This option comes into play if a job does not get an indication of “active” status during the data transfer phase of the job. DPX initiates job cancellation after this interval, in minutes, has lapsed.
Backup IA-Mapped Drive
This is an option to backup IA-Mapped drives from DPX snapshots. Note: The default setting is No and should be changed to Yes to back up the drives.
The Application tab
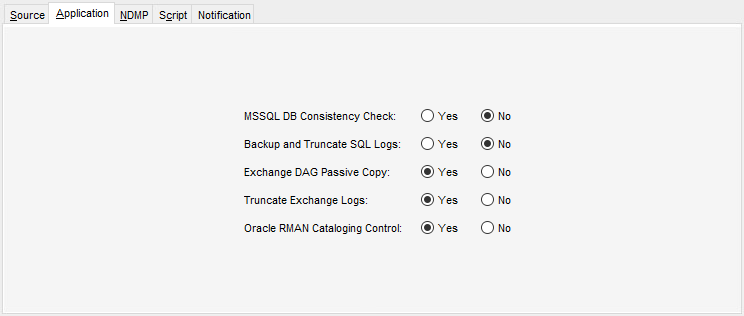
MSSQL DB Consistency Check
Tells DPX to run a consistency check on SQL Server before backing up a SQL Server database. The check runs three utilities that Microsoft recommends before a backup: DBCC CHECKDB, DBCC CHECKALLOC, and DBCC CHECKCATALOG.
No
Does not perform the consistency check.
Yes
Performs the consistency check.
Backup and Truncate SQL Logs
This option controls the truncation of SQL Server Transaction Logs during a Block backup. This option must be set to Yes to enable Point-in-Time restore.
Yes
SQL Server transaction logs are truncated on the source database server after the backup completes. To find the backed up SQL logs, refer to the message “BACKUP LOG <database-instance> TO DISK...” in the Job Log or to Event 18265 in the Application Event Log.
No
SQL Server transaction logs are not truncated and will therefore continue to grow on the source database server. To truncate translation logs, run SQL Server maintenance on the source machine. No is the default.
Exchange DAG Passive Copy
Determines whether DPX will back up Exchange DAG from a passive node or an active node.
Yes
Default setting. Back up Exchange DAG from a passive node.
No
Back up Exchange DAG from an active node.
Truncate Exchange Logs
This option controls the truncation of Microsoft Exchange Logs during a Block backup.
Yes
After the backup is complete, DPX deletes the old Exchange logs. Yes is the default.
No
DPX does not delete any Exchange logs.
Oracle RMAN Cataloging Control
For Oracle backups, this option determines whether to synchronize the RMAN catalog after the job is completed. Yes is the default.
Yes
Synchronize the RMAN catalog after the job completes.
No
Do not synchronize the RMAN catalog after the job is completed. If you choose this option, the job is not cataloged in RMAN.
The NDMP tab
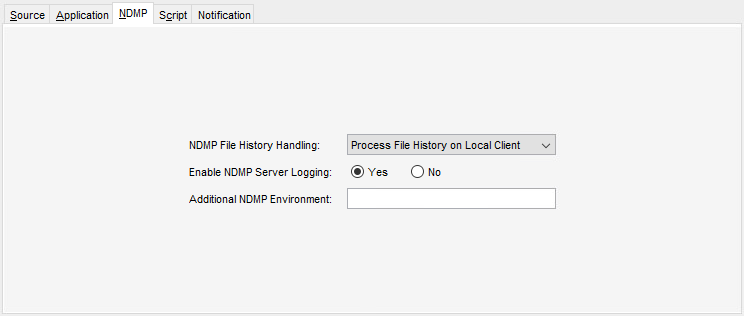
NDMP File History Handling
Controls file history generation for NDMP and Block backup tasks. For Block backups, recovery through the use of Instant Access provides for granular file-level restore regardless of whether file history was generated or not. Instant Access allows Block backups to be run very frequently by eliminating the need to include file histories during backup. For information on using Instant Access for file-level restore, see Instant Access as a File History Alternative in the DPX 4.9 User’s Guide.
Disable File History
Disables NDMP server file history generation.
Process File History on Local Client
Enables NDMP server file history generation and processes the file history data on the NDMP client node. This is the default.
Process File History on Master Server
Enables NDMP server file history generation but transmits the file history data to the master server node for processing.
Enable NDMP Server Logging
Controls the routing of NDMP server-generated log messages to the job log file.
Yes
All NDMP server log messages will be routed to the master server’s job log file. Yes is the default.
No
The NDMP server log messages will be logged locally in the NDMP client node log file instead of in the master server’s job log file.
Additional NDMP Environment
This option allows you to introduce any additional NDMP environment variables that are necessary for the backup task. Specify your environment variables as an ASCII string with an environment variable name and value pairs using the following syntax:
Note. Syntax validation is not performed on the specified value at job definition time, but rather at run time. Only valid entries are added to the NDMP operation environment.
Note. Alternative syntax, e.g. env1name value;env2name value;... (semicolon-delimited, no equal sign) or env1name valueenv2name value... (no delimiter, no equal sign) may be displayed in the interface. However, for the sake of clarity, the env1name=value,env2name=value,... version is strongly recommended.
Attention! Do not specify any of the following NDMP environment variables in your variable string because DPX controls these specifically:
BASE_DATE
DEBUG
DIRECT
DUMP_DATE
EXTRACT
FILES
FILESYSTEM
HIST
LEVEL
PREFIX
RECOVER_FILEHIST
SINCE_TIME
TYPE
UPDATE
VERBOSE
Specifying the variables above may cause unexpected results due to the unpredictability of the order in which they are evaluated.
NDMP servers from different vendors may support different NDMP environment variables. Except for a few well-known environment variable names, there is currently no standardized set of such variables. This option allows you to add environmental variables specific to your NDMP server.
The Script tab
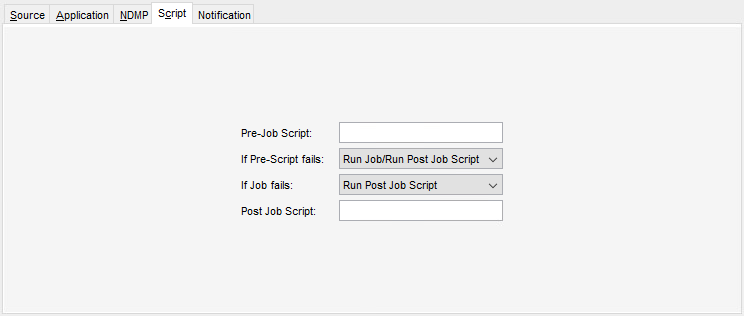
Pre-Job Script
Enter the name of a script to execute prior to the actual job.
Basic usage: <script>@<node_name> <argument_list>
If Pre-Script fails
The action to be taken if the Pre-Job Script fails to complete successfully:
Run Job/Run Post-Job Script
Skip Job/Run Post-Job Script
Skip Job/Skip Post-Job Script
If Job fails
The action to be taken if the Job fails to complete successfully:
Run Post-Job Script
Skip Post-Job Script
Post-Job Script
Enter the name of a script to execute after the actual job.
Basic usage: <script>@<node_name> <argument_list>
See also. For detailed information about pre- and post-job scripts, including all valid definitions, see Pre-Scripts and Post-Scripts.
The Notification tab
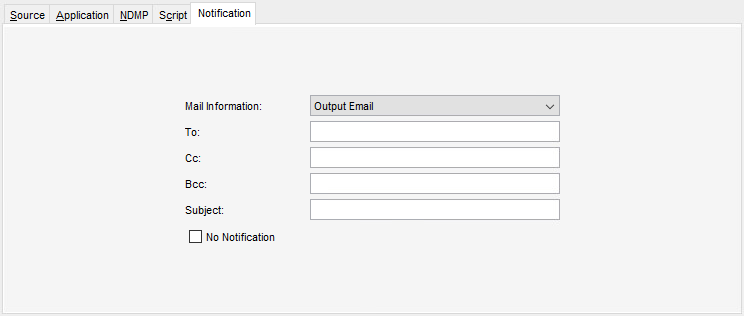
Mail information
Two sets of mail information can be specified:
Output Email
Specifies that the subsequent fields apply to reports that are sent when a job has completed.
Operator Email
Specifies that the subsequent fields apply to mount requests, error messages, and informational messages that are sent during a job.
To
The email address of the primary recipient of your message. Only one “To” address is permitted.
Cc
Carbon Copy. The email address(es) of the secondary recipient(s) of your message. Use a semicolon to delimit multiple email addresses.
Bcc
Blind Carbon Copy. The email address(es) of the secondary recipient(s) not identified to other recipients. Use a semi-colon to delimit multiple email addresses.
Subject
The subject of your message. The subject line usually contains a combination of straight text and variable elements. Variables, which must begin with %, are replaced with actual corresponding values. If you enclose variables in double quotation marks, those variables are treated as literal values. You can embed the following variables:
%JOBNAME%JOBID%JOBTYPE%RC
Use %RC to include the return code in the message for this run of the job, when applicable.
No Notification
Selecting this check box option temporarily disables notifications for the job without deleting the currently defined job notification data.
Note. Note that the following characters are invalid in all fields: < > ; and '.
Note. DPX emailing must be enabled when you first configure your Enterprise. At that time, you supply general system information, including SMTP Host Name and SMTP Port. See Editing an Enterprise Configuration.
Last updated