Recovering a VMware Archive
Recovery of archived backups is a procedure used when the actual backup is beyond reach and an archived copy needs to be restored instead.
Restrictions. In Catalogic DPX version 4.12, only the desktop interface supports Archive recovery.
Recovering a VMware Archive
Recovery of an archived agentless backup is done in two steps. In Step 1, you restore the backup instance from media to a vStor volume. In Step 2, you complete the initially intended recovery by restoring your backup instance from vStor.
For Step 2, follow the procedure in Agentless VMware Restore. Step 1 is described below.
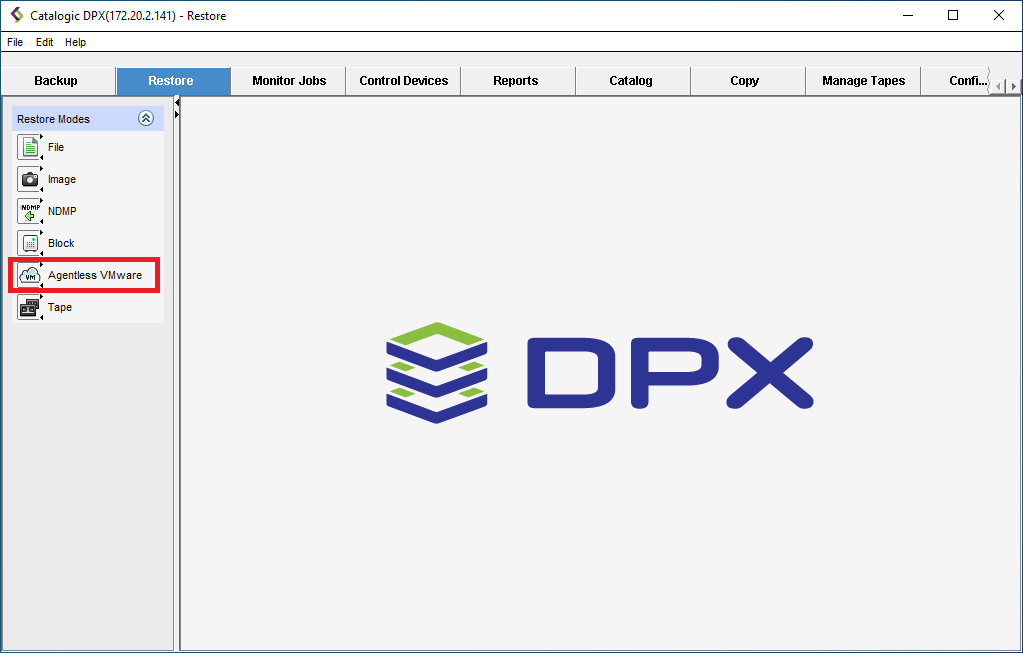
Navigate to the Restore tab in the main desktop interface window. From the Restore Modes section in the task panel, select Agentless VMware.
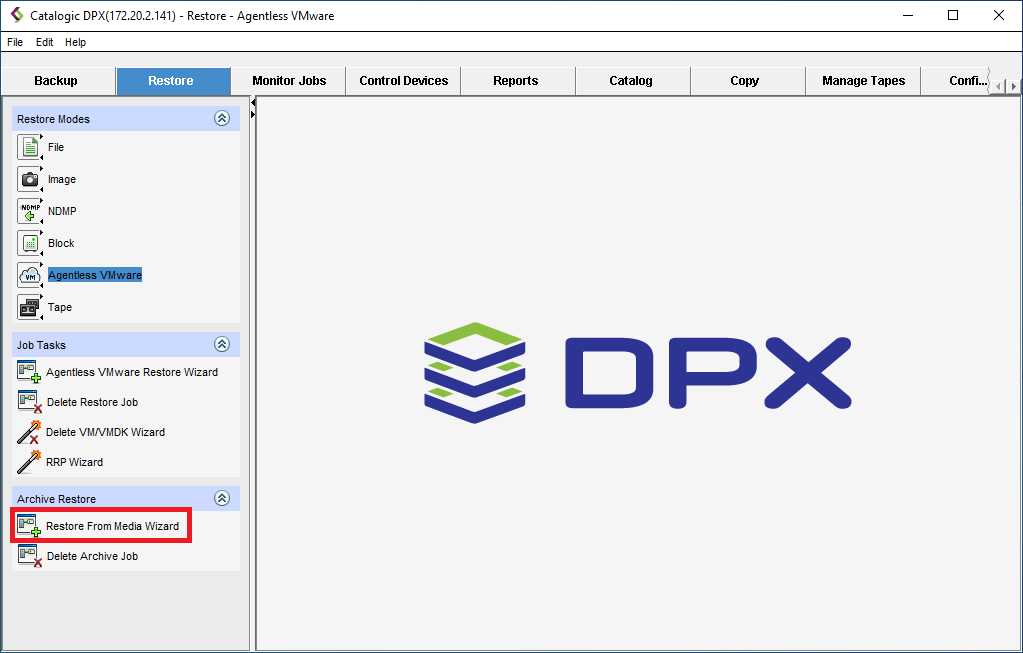
On the task panel, under Job Archive Restore, select Restore from Media Wizard.
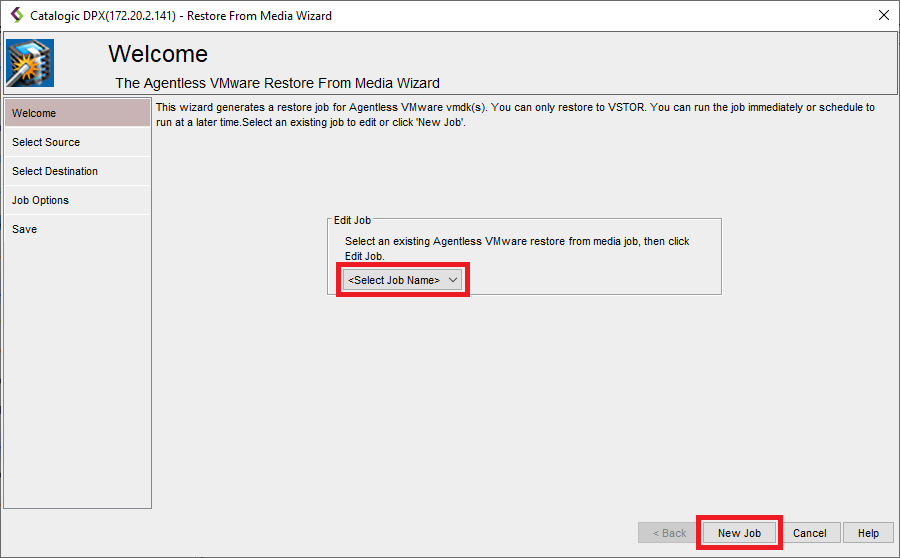
Click on New Job to create a new job or select an existing job from the dropdown list to modify it.\
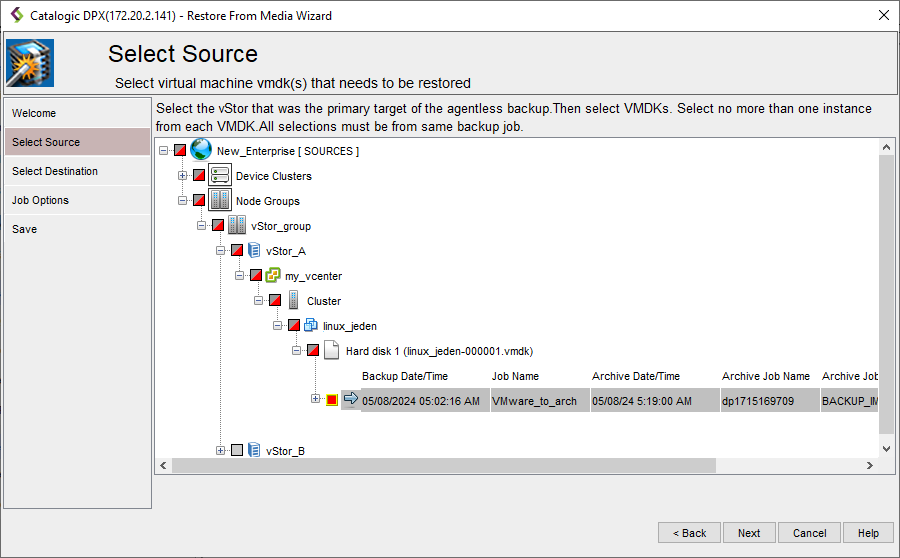
Select the vStor where the VMware backup, the source for Archive, resides. Click Next.
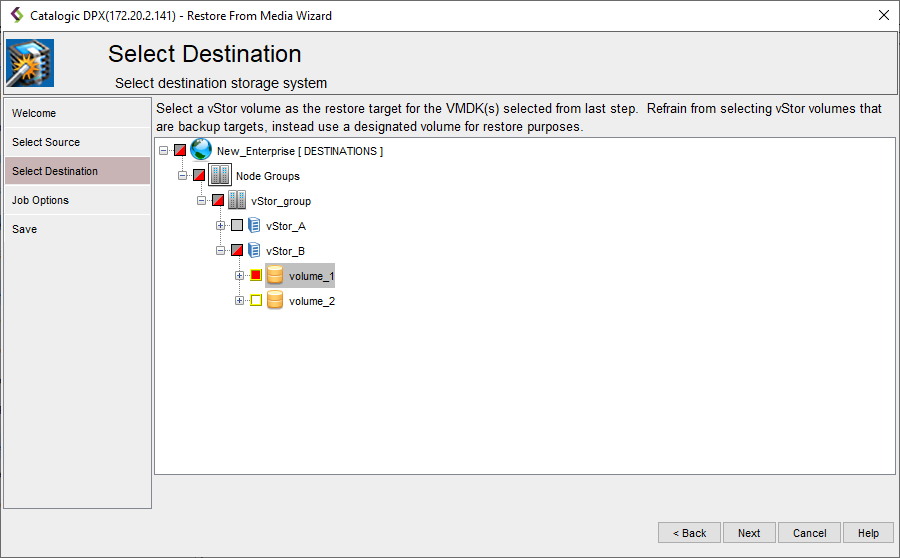
Select the destination for the restored Archive recovery point. Click Next.
Tip. It is recommended to use a separate vStor volume that is not used as a backup target.
In the Set Job Options step, define the job options for the archive restore job. Click Next.
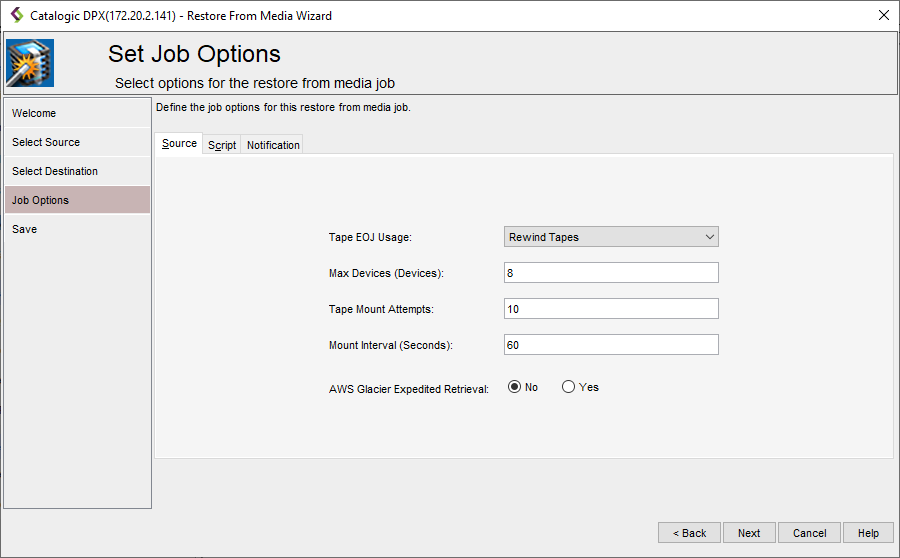
Job Options
The Source tab
Tape EOJ Usage
Determines what to do with the tape when the backup job is complete. For selection details, see the Tape EOJ Usage option in Job Destination Options for File Backup.
Max Devices (Devices)
Limits the number of storage devices valid for use with this job. Use this option if you want to stop DPX from using all the drives in the selected device cluster so that some drives will be available for other purposes.
Tape Mount Attempts
The maximum number to check a tape in a standalone tape device.
Mount Interval (Seconds)
The number of seconds to wait between checking the availability of a tape in a standalone tape device.
AWS Glacier Expedited Retrieval
Beginning from Version 4.8.1, you can select the archive retrieval option for Amazon S3 Glacier from either “Standard” or “Expedited”.
See also. For more information about the Amazon S3 Glacier Archive Retrieval options, refer to the following document:
AWS Documentation: Amazon S3 Glacier Developer Guide: Retrieving S3 Glacier Archives
The Script tab
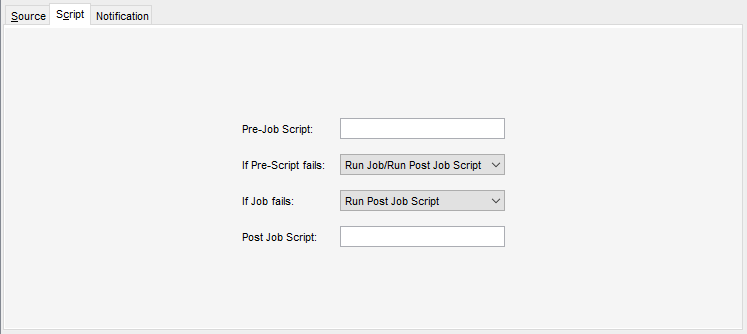
Pre-Job Script
Enter the name of a script to execute before the actual job.
Basic usage: <script>@<node_name> <argument_list>
If Pre-Script fails
The action be taken if the Pre-Job Script fails to complete:
Run Job/Run Post-Job Script
Skip Job/Run Post-Job Script
Skip Job/Skip Post-Job Script
If Job fails
The action to be taken if the Job fails to complete:
Run Post-Job Script
Skip Post-Job Script
Post-Job Script
Enter the name of a script to execute after the actual job.
Basic usage: <script>@<node_name> <argument_list>
See also. For detailed information about pre- and post-job scripts, including all valid definitions, see Pre-Scripts and Post-Scripts.
The Notification tab
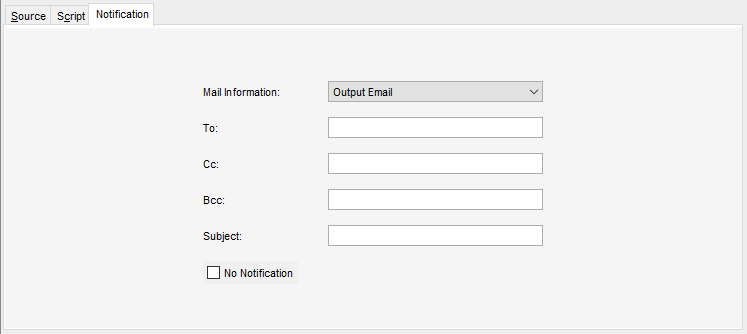
Mail information
Two sets of mail information can be specified:
To
The email address of the primary recipient of your message. Only one “To” address is permitted.
Cc
Carbon Copy. The email address(es) of the secondary recipient(s) of your message. Use a semicolon to delimit multiple email addresses.
Bcc
Blind Carbon Copy. The email address(es) of the secondary recipient(s) not identified to other recipients. Use a semi-colon to delimit multiple email addresses.
Subject
The subject of your message. The subject line usually contains a combination of straight text and variable elements. Variables, which must begin with %, are replaced with actual corresponding values. If you enclose variables in double quotation marks, those variables are treated as literal values. You can embed the following variables:
%JOBNAME%JOBID%JOBTYPE%RC
Use %RC to include the return code in the message for this run of the job, when applicable.
No Notification
Selecting this check box option temporarily disables notifications for the job without deleting the currently defined job notification data.
Note. Note that the following characters are invalid in all fields: < > ; and '.
Note. DPX emailing must be enabled when you first configure your Enterprise. At that time, you supply general system information, including SMTP Host Name and SMTP Port. See Editing an Enterprise Configuration.
In the Save step, specify the job name enter the Job Name (max. 64 characters) and specify the Job Folder to store the job in (the default folder is SS_DEFAULT). You may also add a comment to the job definition or set up a schedule, by clicking Schedule Job.
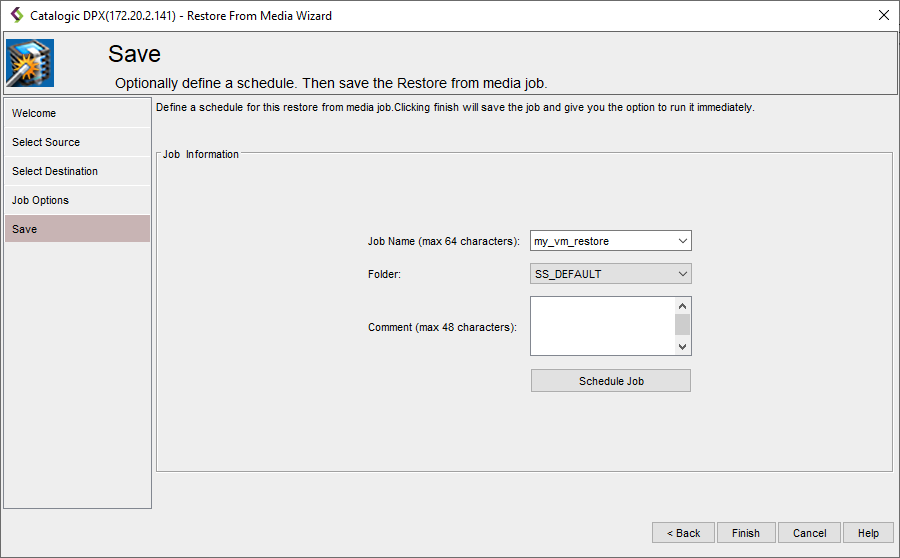
Click Finish. The Final Job Run Settings dialog box will appear.
 You may choose to run the job immediately or save it without running.
Last updated