Job Status and Available Actions
You can use the job list to take actions, such as starting a new job, releasing a held job, or resuming a suspended job, depending on the job status.
You can check the status for each job in either of the DPX interfaces:
Web interface:
From the navigation pane, go to Job Monitor. You can see the job list with the Status column.
Desktop interface:
From the Functions Bar, open the Monitor Jobs Tab. You can see the job list with the Status column.
The following table outlines the job status and typical actions available:
Waiting
You can force a job to begin by selecting the job or jobs you want to start, then select Start or Resume job. The job status changes to Running.
Held
You can release and reactivate the scheduled jobs that were held. Follow the instructions in Holding and Releasing Scheduled Jobs.
Suspended
You can resume a job by selecting the job or jobs you want to resume, then selecting Start or Resume job. If the job was running when it was suspended, the job status changes to Running. If the job was waiting when it was suspended, the job status changes to Waiting.
Completed or Failed
You can create and run a new instance of the job by selecting the job or jobs you want to restart, and then selecting Start or Resume job. The job status of the new job changes to Waiting and then Running.
Suspending Jobs
Prerequisites for suspending jobs
The job status must be Running or Waiting;
A running Block backup job cannot be suspended;
You can only suspend the instance of a job that appears in the job list of the Job Monitor or Monitor Jobs tab;
The job will be suspended only after the current task within this job is completed.
Restrictions. The suspend job functionality is not supported for VMware agentless backup jobs.
Perform the following steps to suspend a scheduled job:
Go to Job Monitor.
Select the job you want to suspend.
Right-click the job record or click the More Actions ⋯ button and select Suspend.
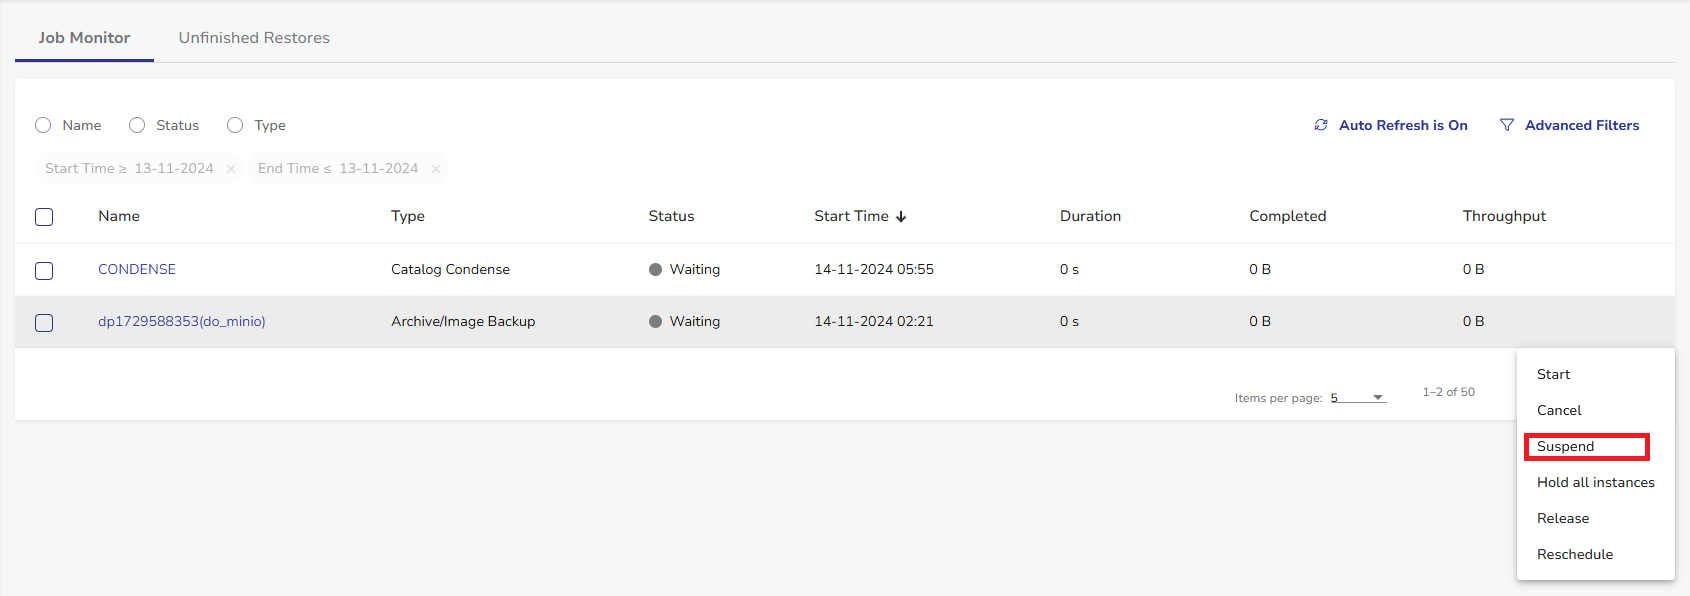
Tip. Multi-selection is possible. Select multiple jobs using checkboxes, then select Suspend from the button bar.
![]()
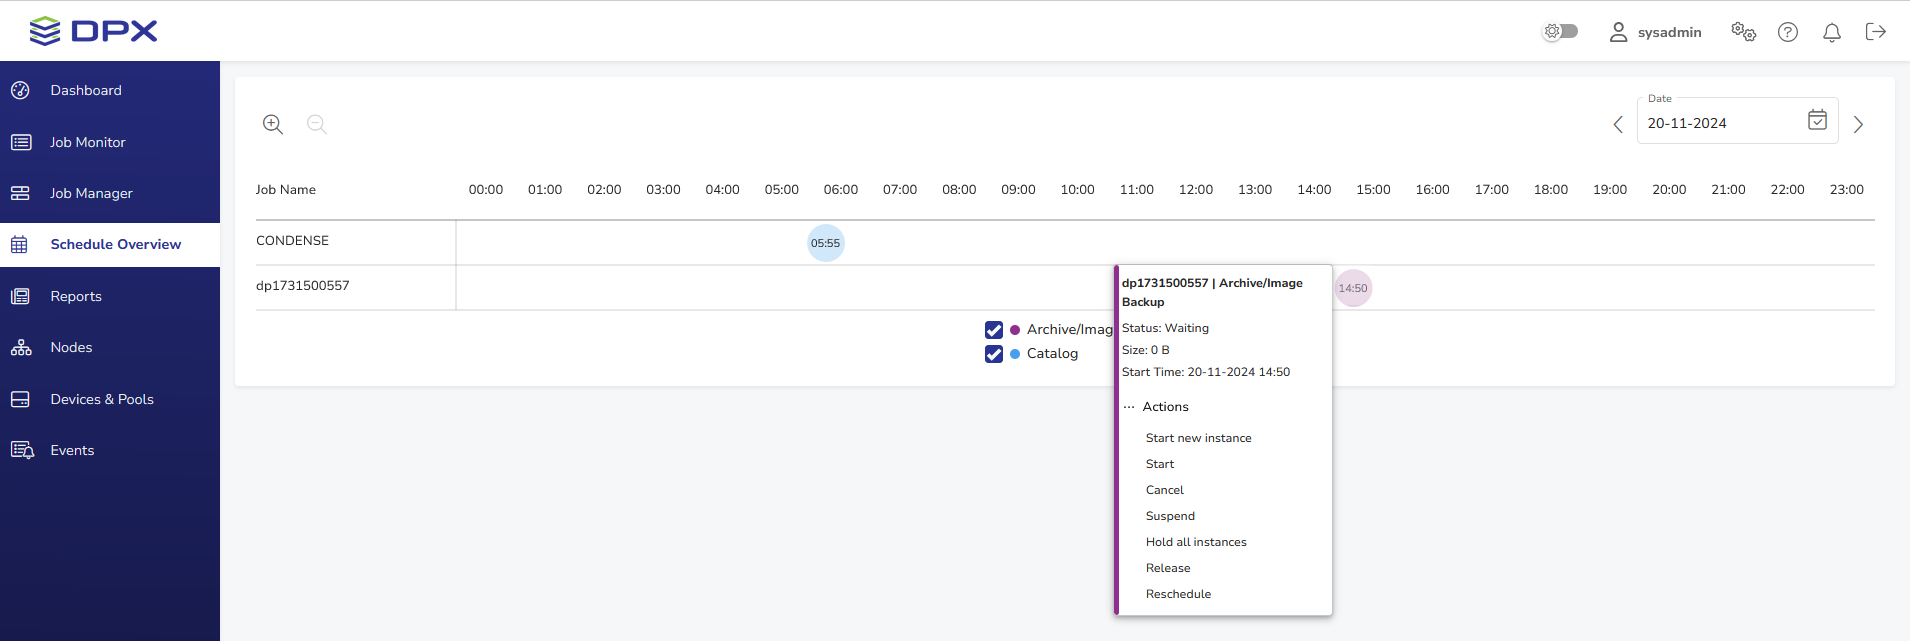
Alternatively, you can hold scheduled jobs in the Schedule Overview section:
Go to Schedule Overview.
Hover your mouse over the scheduled job you want to hold, then select Actions > Suspend.

On the Job List, select the job or jobs you want to suspend. Multiple job selection is supported using standard [Ctrl] and [Shift] operations, or by clicking Select All or Select None on the task bar.
On the task panel, click Suspend Job.
When the job is suspended, the job status changes to Suspended.
Note. Unlike Hold, Suspend can pause a running job, and acts on a single instance of a backup job, whereas Hold acts on all instances. See Holding and Releasing Scheduled Jobs.
Canceling Jobs
You can cancel jobs whose status is Running, Suspended or Waiting.
To cancel one or more jobs:
Go to Job Monitor.
Select the job you want to cancel.
Right-click the job record or click the More Actions ⋯ button and select Cancel.
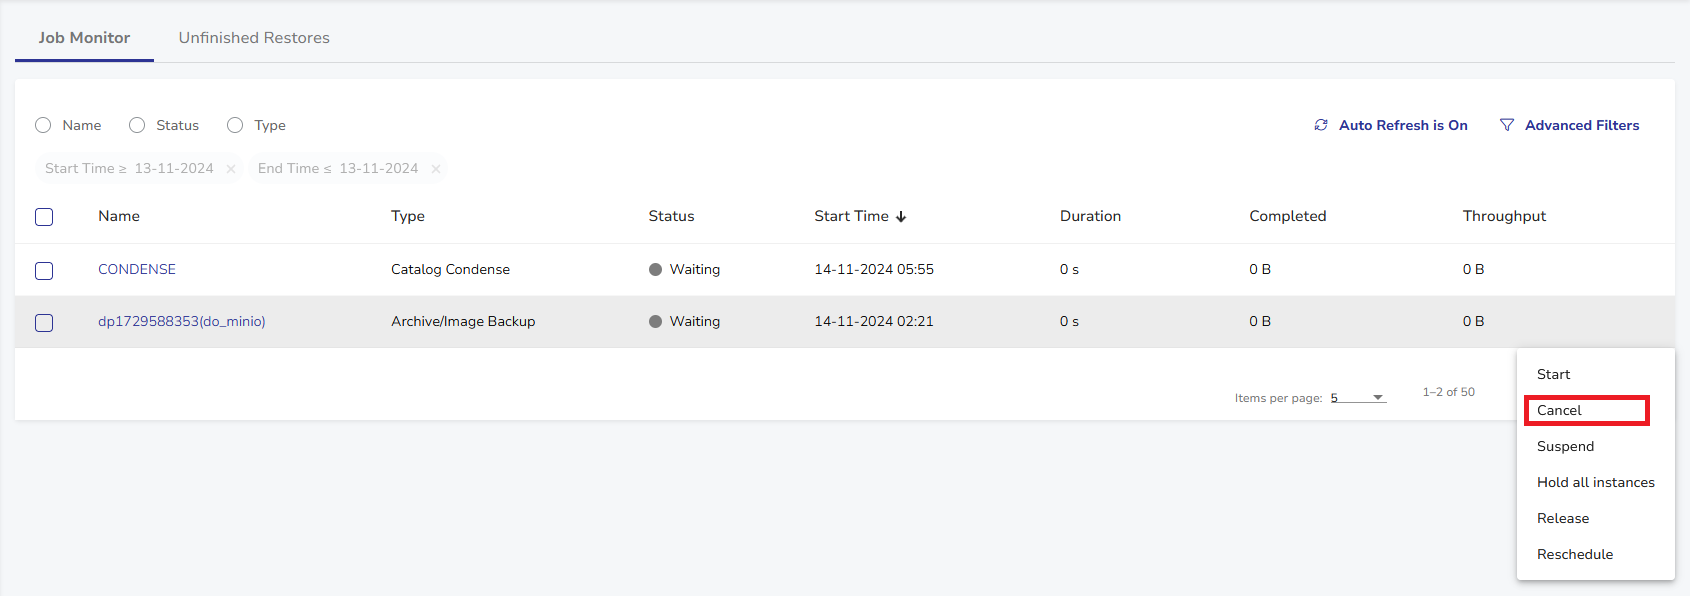
Tip. Multi-selection is possible. Select multiple jobs using checkboxes, then select Cancel from the button bar.
![]()
Alternatively, you can cancel scheduled jobs in the Schedule Overview section:
Go to Schedule Overview.
Hover your mouse over the scheduled job you want to hold, then select Actions > Cancel.
Open the Monitor Jobs tab.
Select jobs to cancel. Use [Ctrl] to select multiple items.
On the task panel, click Selection-Based Operations > Cancel Job.
Ensure that the status of the jobs has changed to Canceled.
Holding and Releasing Scheduled Jobs
You can hold scheduled jobs and prevent these from running, and release the held jobs to reactivate the schedule.
Prerequisites
You can hold all future scheduled instances of a defined job from running until you are ready for the job to proceed. The jobs to hold must meet the following prerequisites:
The job definition must be in the Catalog and scheduled;
The job type must be one that you can create in the user interface;
You cannot hold a DAILY_SCHED job.
Note. If you hold a job that is currently running, has been run in the past, suspended, or never run, all future scheduled instances of the job will be placed on hold. Unlike Suspend, Hold does not affect a running job, and Hold acts on all instances of the defined backup, whereas Suspend acts on a single backup instance. See Suspending Jobs.
Note. You can run a held job anytime by performing the Run operation on the job.
Attention! Modifying and resaving a held job releases the Hold. To hold a resaved job, you must select and put it on Hold again.
Holding Scheduled Jobs
Perform the following steps to hold a scheduled job:
Go to Job Monitor.
Select the job you want to hold.
Right-click the job record or click the More Actions ⋯ button and select Hold all instances.
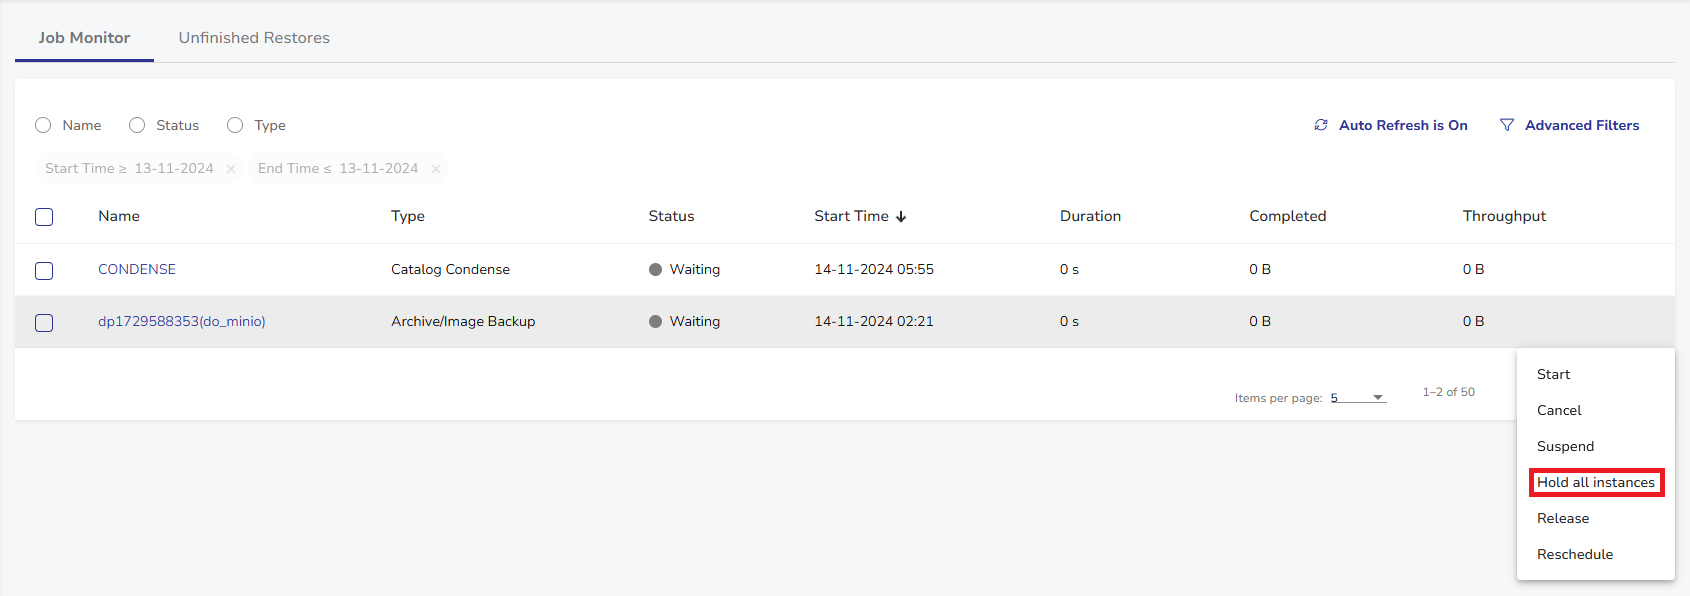
Tip. Multi-selection is possible. Select multiple jobs using checkboxes, then select Hold all instances from the button bar.
![]()
Alternatively, you can hold scheduled jobs in the Schedule Overview section:
Go to Schedule Overview.
Hover your mouse over the scheduled job you want to hold, then select Actions > Hold all instances.
Right-click a job name or icon to select the job and display a context menu. Then select Hold.
From the menu bar, select Scheduler > Hold Future Job.
On the task panel, click Hold Future Job to open the Hold Future Job dialog.
Select the Job Type of the job you want to hold. The selections in the Job Name pull-down list vary to match the job type. Select the job you want to hold by name, then click OK. In some cases, you will have to enter additional specifications in the other dialog.
Click OK to hold the job.
Note. Held jobs that have passed their scheduled run time display with the status Passed.
Releasing Scheduled Jobs
Perform the following steps to release a held scheduled job:
Go to Job Monitor.
Select the job you want to release.
Right-click the job record or click the More Actions ⋯ button and select Release.
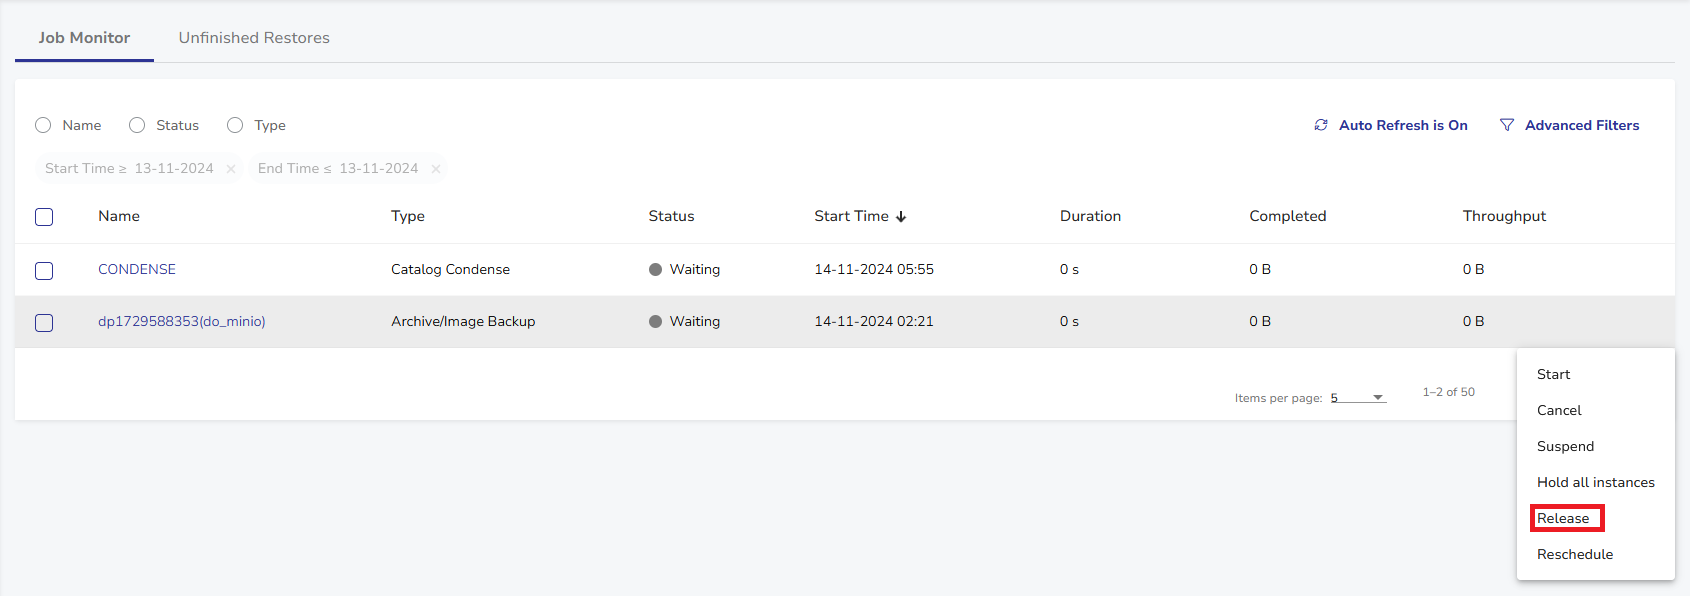
Tip. Multi-selection is possible. Select multiple jobs using checkboxes, then select Release from the button bar.
![]()
Alternatively, you can hold scheduled jobs in the Schedule Overview section:
Go to Schedule Overview.
Hover your mouse over the scheduled job you want to hold, then select Actions > Release.
To release held jobs, do one of the following:
Release a job that has been held by doing one of the following:
Right-click the selected job name or icon to display a context menu. Then select Release.
From the menu bar, select Scheduler > Release Held Future Job.
On the task panel, click Release Held Future Job.
The Release Held Future Job dialog appears.
Select the Job Type of the held job being released. The Job Name pull-down list changes to match the job type. Select the job you want to start by name, then click OK. In some cases, you will have to enter additional specifications in the other dialog.
Click OK to start the job.