Proxmox VE
SSH Transfer
SSH Transfer strategy:
supports Proxmox 5.0+
supports only QCOW2 disk images
supports incremental backups
supports over iSCSI

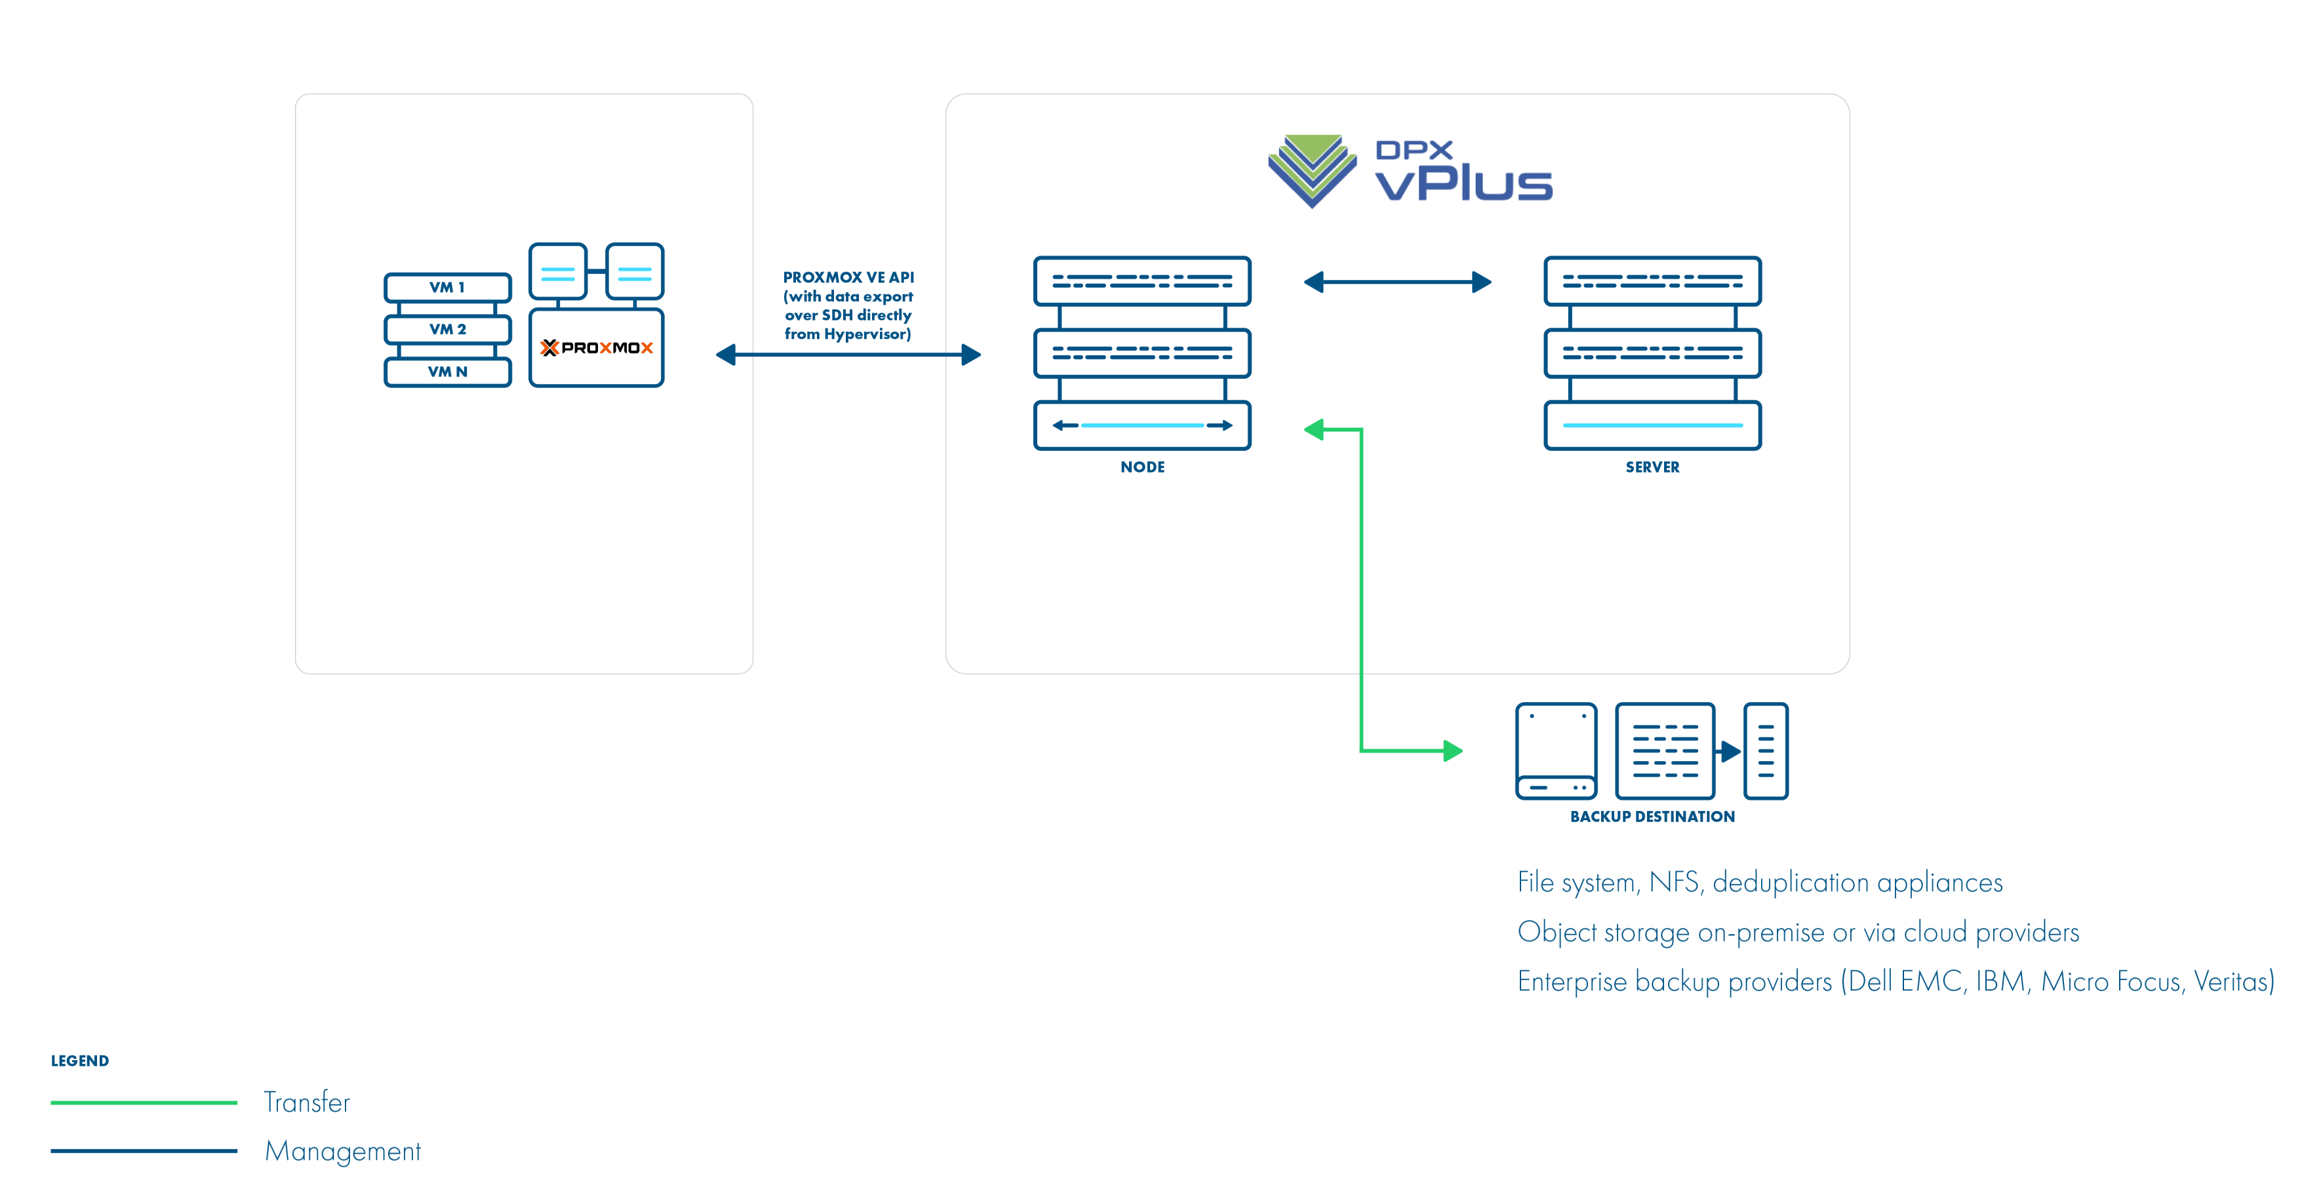
Backup is done by transferring QCOW2 disk images over SSH directly from the hypervisor (optionally using Netcat for transfer). Metadata is backed up only in the full backup. This method supports incremental backups where the last snapshot is required for the next incremental backups. The resulting backup has separate files for each disk + metadata, so you have the option to exclude specific drives as well.
Backup Process (SSH Transfer)
QCOW2 - file-based storage only
crash-consistent snapshots created using hypervisor CLI over SSH
optionally, FS freeze can be executed before snapshot can be executed (FS thaw once the snapshot is completed) if enabled and guest tools installed inside
QCOW2 snapshots mounted locally on the hypervisor and exported via SSH (optionally with netcat)
for incremental backups, both last and currently created snapshots are mounted and block-difference is sent via SSH
metadata exported via SSH • restore imports metadata and overwrites empty disks with data from a merged backup over SSH
Export storage repository
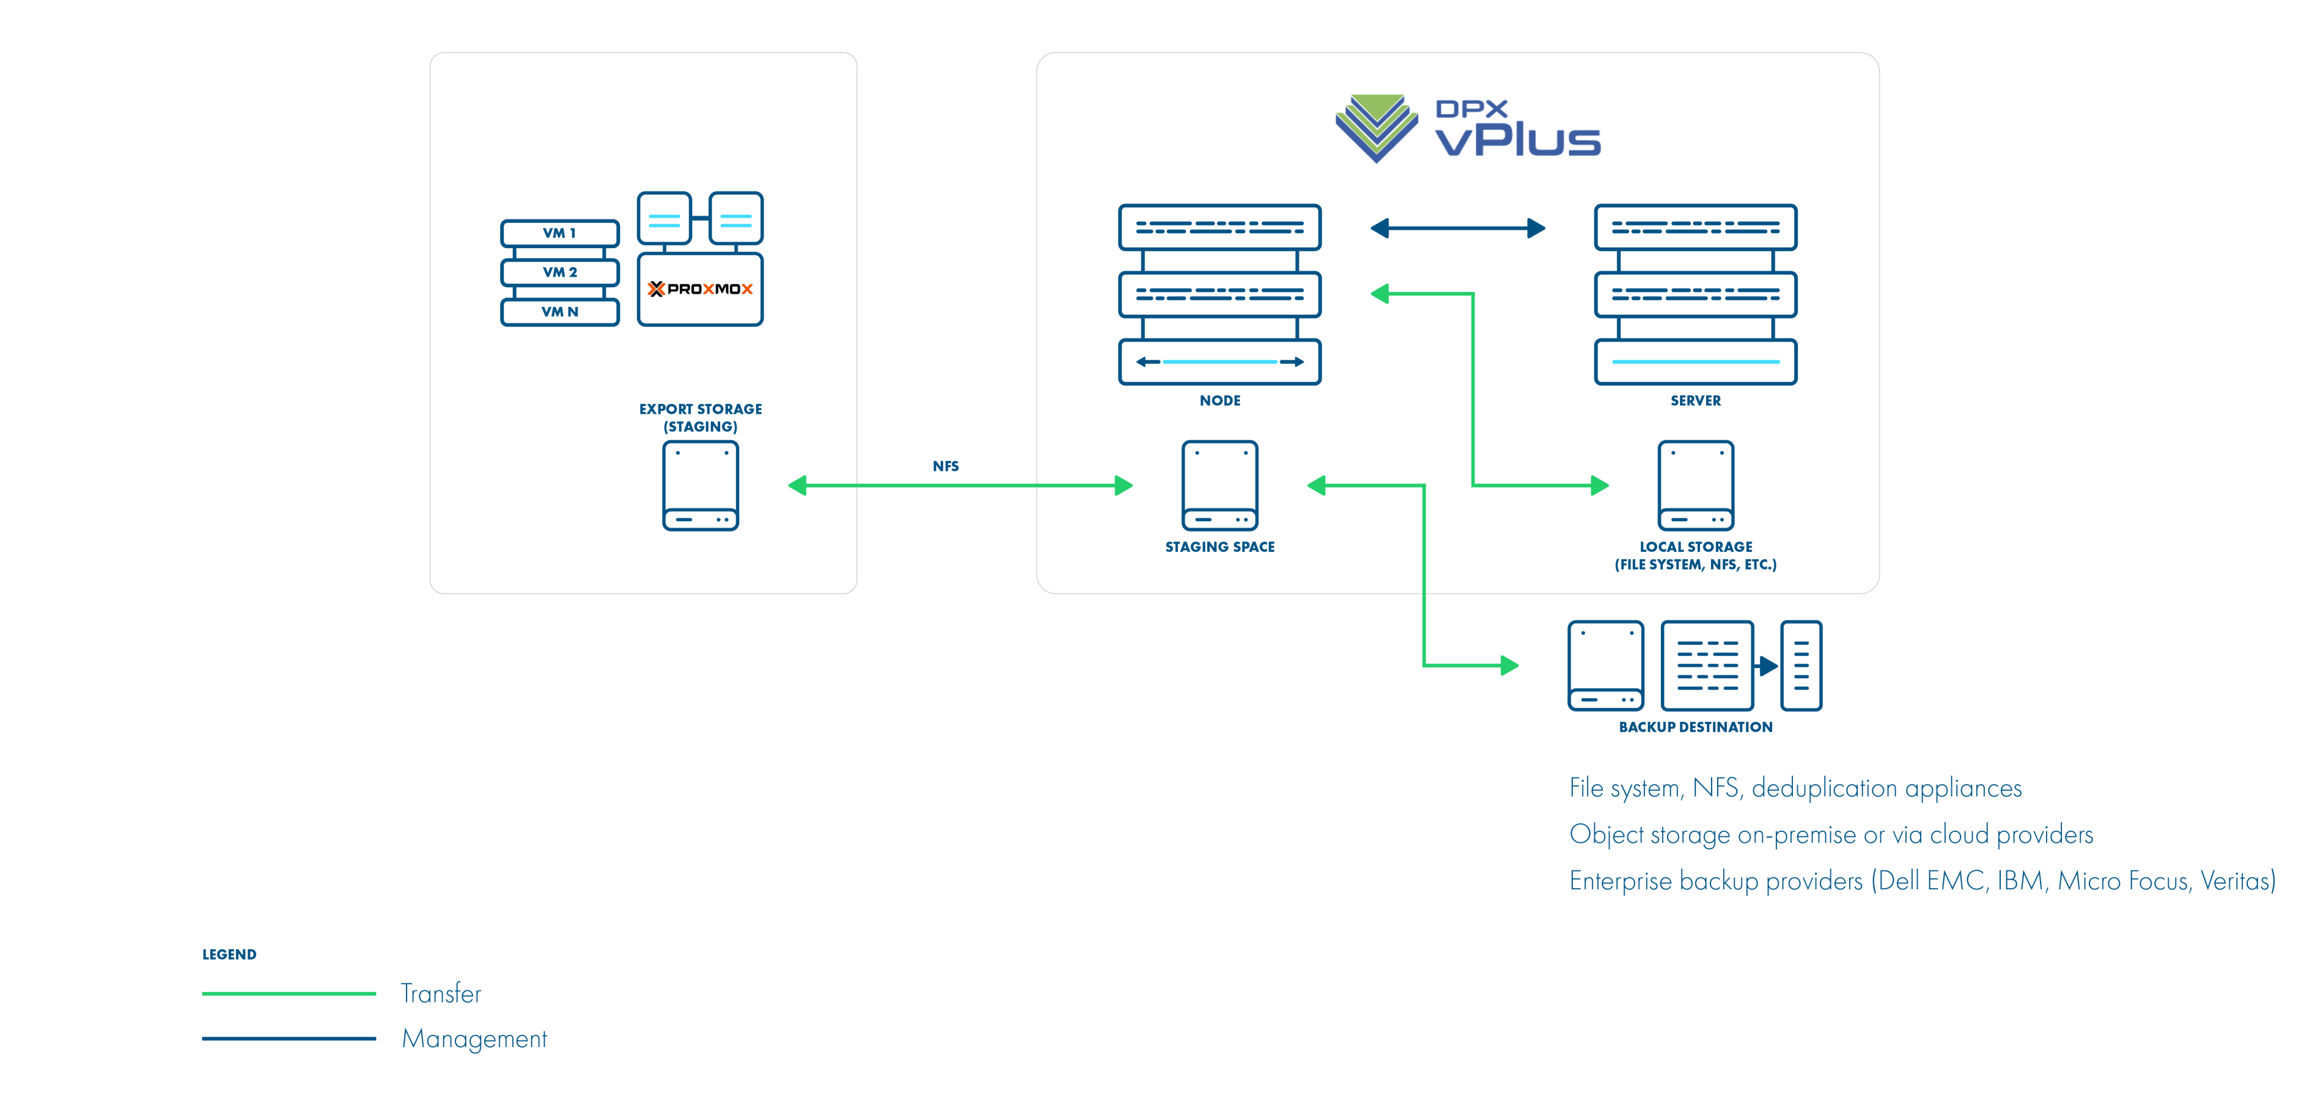
The Proxmox virtual environment requires you to create storage used for VM export. Export storage should also be accessible to vPlus Node in its staging directory. This implies that storage space doesn't have to be exported by vPlus Node - it can be mounted from an external source. The only requirement is to have it visible from both Proxmox VE hosts and the Node itself. Keep in mind that ownership of the files on the share should allow both vPlus and Proxmox VE to read and write files.

Backup Process (Export storage repository)
native VM export is done to the prepared NFS storage (staging space on vPlus) using SSH access to the hypervisor
crash-consistency - FS freeze used for VMs, LVM snapshot for containers
optional application consistency using pre- / post-export command execution for VMs (pre- / post-snapshot) for containers
data and metadata are in a single VMA image
only full backups are supported • restore imports VMA image to the hypervisor
How to set up export storage repository backup
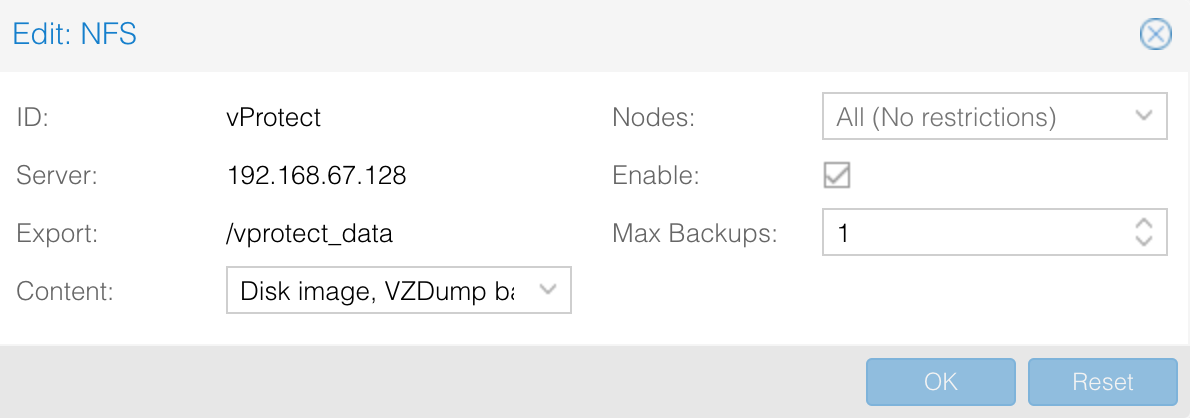
Proxmox virtual environments require backup storage to be defined on each server. This storage must be a location accessible from vPlus Node (the simplest setup, when you use only 1 node, is to create a NFS share for the staging path on vPlus Node)
Create storage from NFS share (Content-type: only VZDump)

Export share must be set to use the UID and GID of the
vprotectuserExample export configuration in
/etc/exportsto the selected hypervisor in the cluster:where
anonuid=993andanongid=990should have correct UID and GID returned by command:Both import and export operations will be done using these NFS shares – restore will be done directly to this storage domain, so you can easily import the backup into Proxmox VE
backups must be restored to the export path (the node automatically changes names to the original paths that are recognized by Proxmox VE).
A name for storage must be provided later in the node configuration (
Hypervisor -> Proxmoxsection)

File-level restore support for VMA images
Prepare the VMA extractor on vPlus Node - you have 2 options:
build VMA extractor like this (requires Internet on the node):
download VMA extractor from the repository and install it