
Nutanix Acropolis Hypervisor (AHV)
General
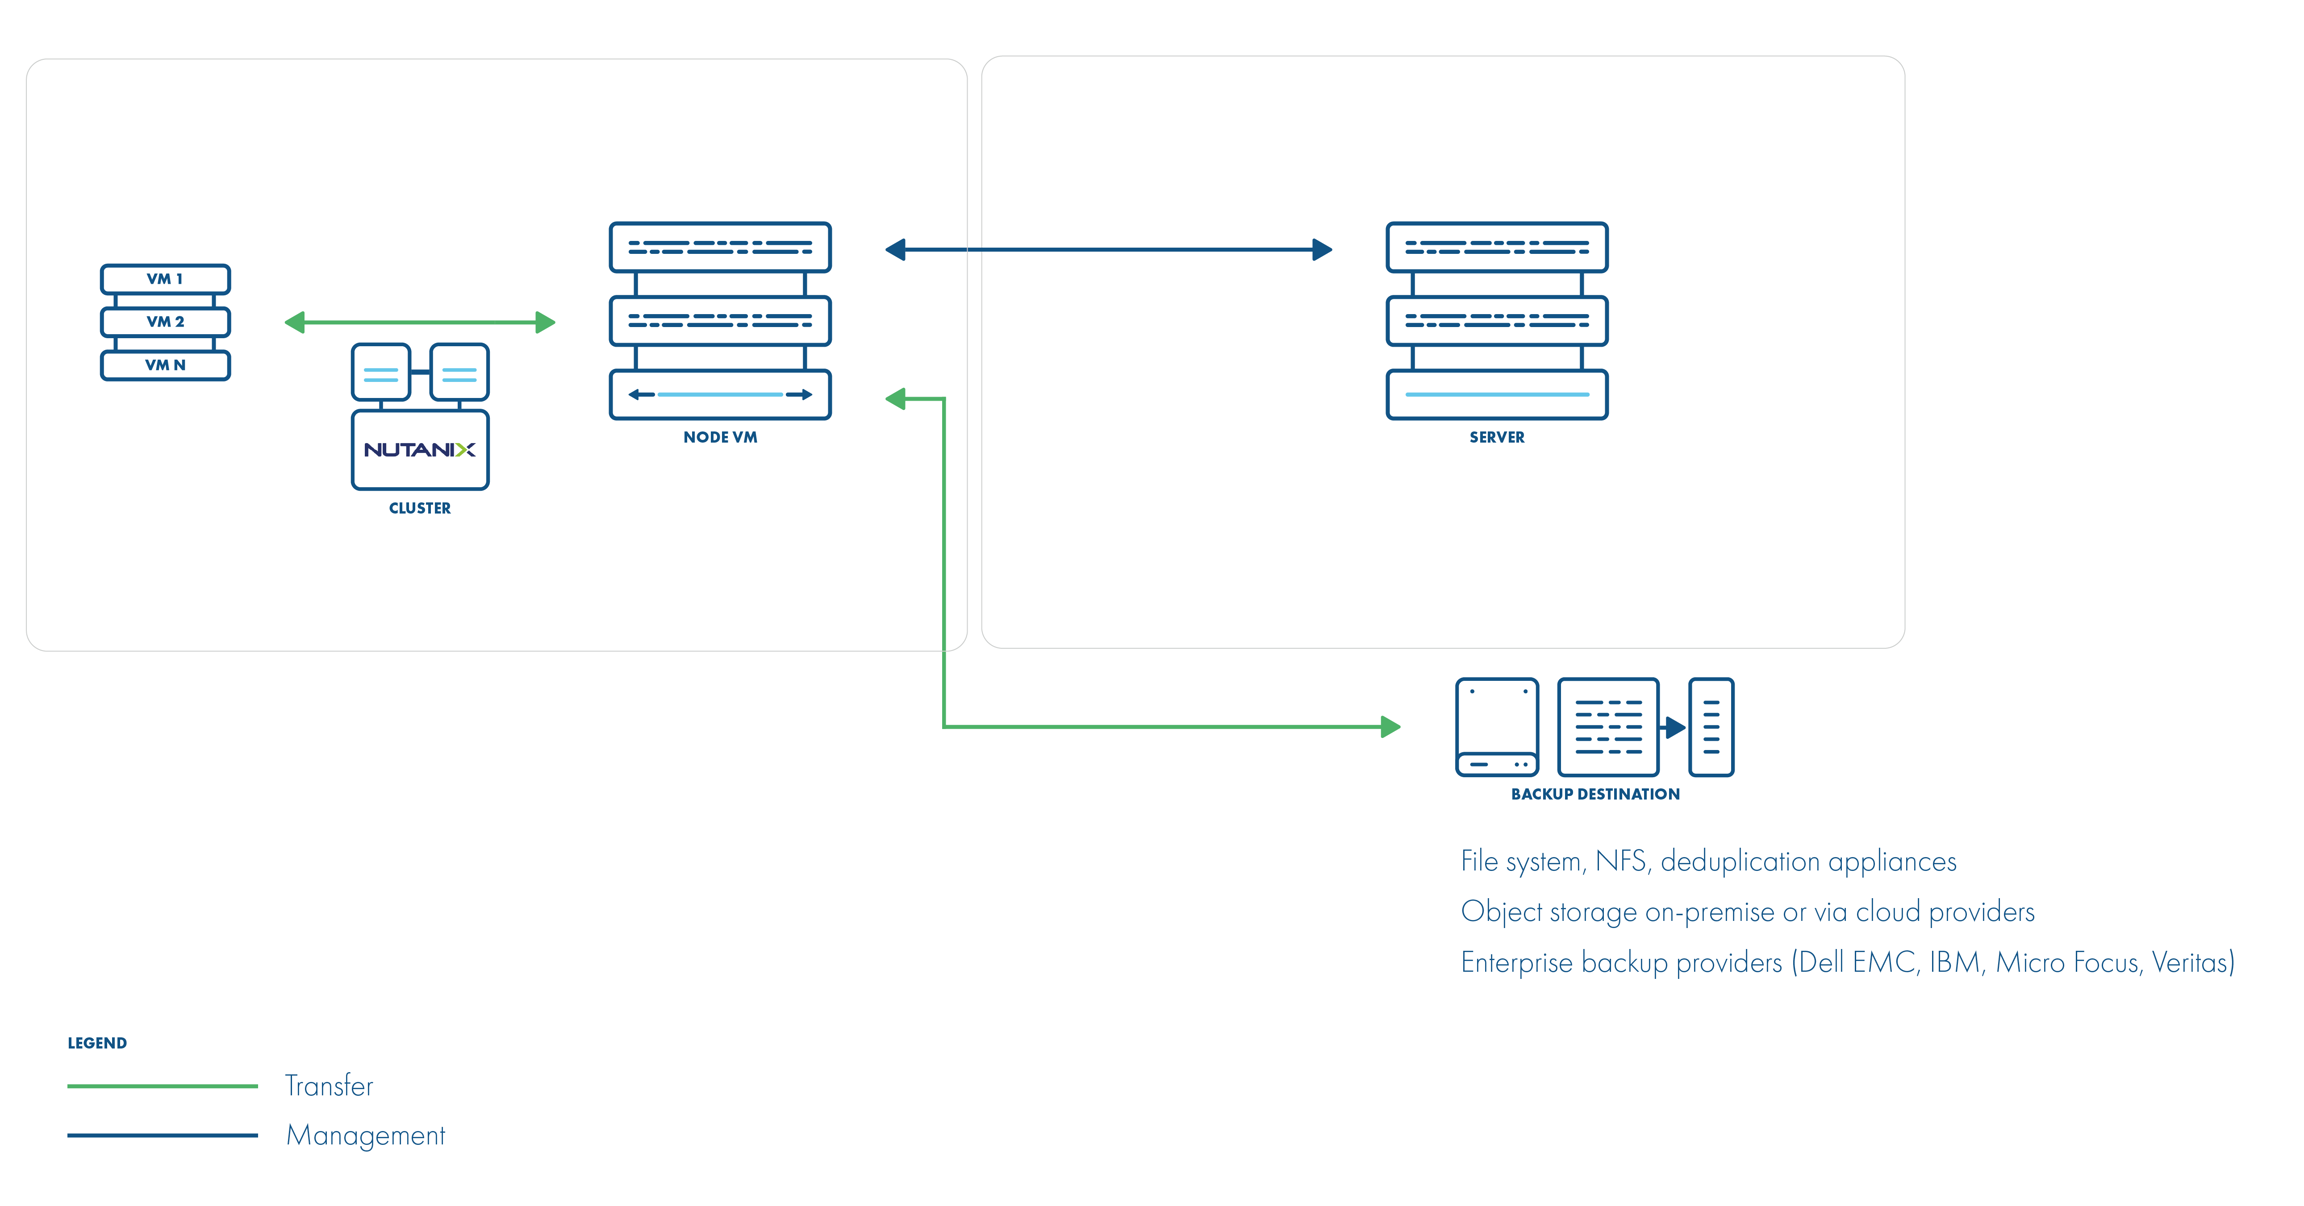
vPlus supports the Nutanix AHV platform by using a VM called “Proxy VM”. The node invokes commands on your hypervisor manager to snapshot and attach drives of a specific VM to itself (Proxy VM). The proxy VM is able to read the data from the attached disk snapshots and forward them to the backup provider.
This strategy allows you to exclude drives from a backup that you do not need. Remember that you need to install at least 1 Proxy VM per cluster so that the drives the node tries to attach are reachable.
Backup Process
crash-consistent snapshot using hypervisor's API
optionally, application-consistent snapshot can be done if enabled and guest tools installed inside - the type of snapshot is selected based on is QuiesceBeforeSnapshot setting and passed as part of the snap request. The created snapshot might end up being of a different type (depending on the presence of tools)
optional application consistency using pre- / post-snapshot command execution
metadata exported from API
snapshot disks are mounted one by one to the Proxy VM
data read directly on the Proxy VM
incremental backups using CBT API - only changed blocks are read from the attached disk
the last snapshot kept on the hypervisor for the next incremental backup (if at least one schedule assigned to the VM has the backup type set to incremental)
restore creates empty disks on the Proxy VM, imports merged data then recreates VM and reattaches volumes to the target VM
A general explanation of "The dynamically attached disks slot offset" parameter for vPlus Node proxy VM
Our best practice is to use a proxy machine with one disk device for the purposes of the operating system if you are using the "Disk attachment" backup strategy. Due to the simplification of the configuration of the environment, we also do not achieve any benefits for this element of the environment.
Our experience shows that after adding a new node to the environment, it is good to perform a test backup and check the logs from which disk device vPlus node want to start the backup. Depending on the proxy virtual machine configuration, vPlus will select the appropriate disk, or you need to manually set the offset parameter. Rather, we do not encounter this type of situation when a virtual machine has only one disk device.
Recommendations on how to set up the environment for vPlus
As the backup strategy for the Nutanix environment depends on attaching and detaching disk devices to Proxy VM, we recommend simplifying the hardware configuration of this machine. If your backup destination allows having staging space on the same storage as the backup destination, one disk device should be sufficient for the proxy virtual machine's operating system purposes.
If it is not possible to have only one disk device for Proxy VM, please read the Example section. We explained what you need to do to make sure your vPlus backups are good.
If your backup destination requires that Proxy VM need to have staging space on a local disk device, then Staging space must be on a volume coming from container storage. Otherwise, vPlus may select the wrong device during backup.
Our recommendation is also to configure LVM filters on Proxy VM. You need to add all OS disks and partitions, please follow these steps: LVM setup on vPlus Node for disk attachment backup mode
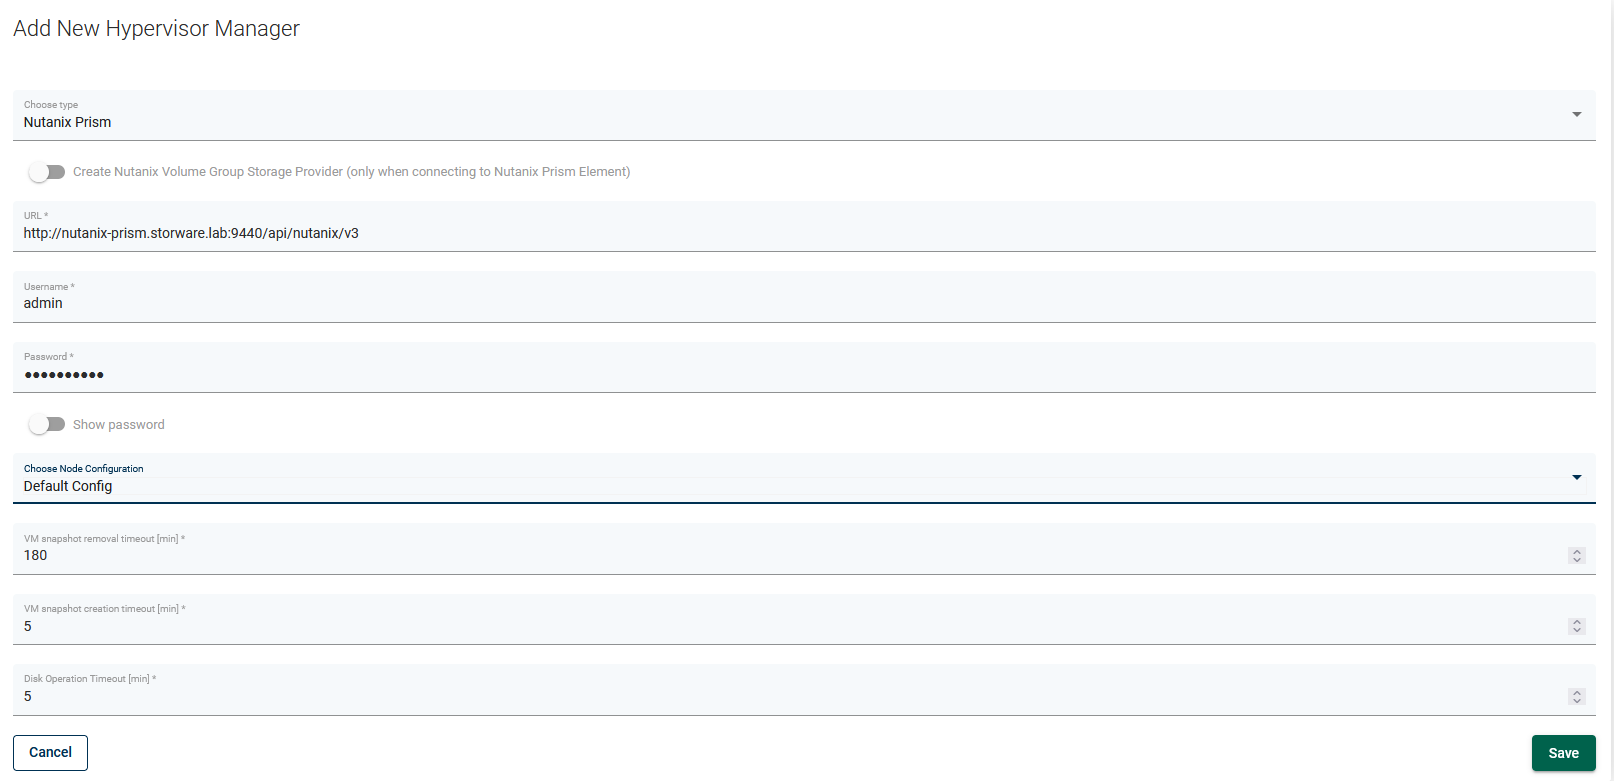
Things to Know About "How to Add Nutanix Hypervisor Manager to vPlus"
When adding Nutanix hypervisor managers, use a URL similar to the following:
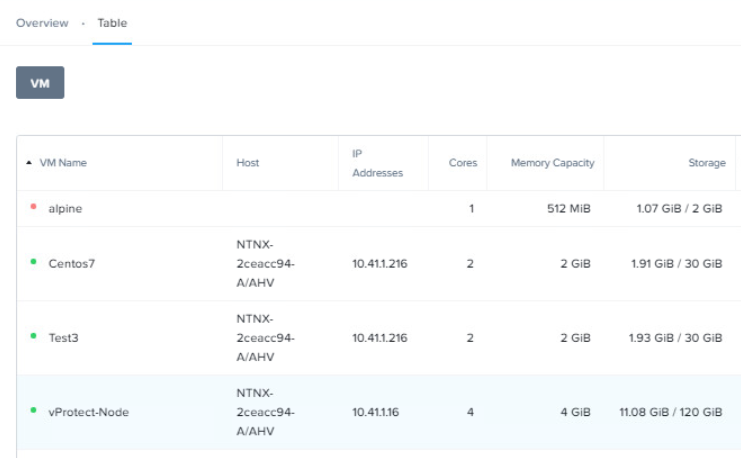
Nutanix environments require the vPlus node to be installed in one of the VMs residing on the Nutanix cluster. vPlus should automatically detect the VM with the vPlus node during the inventory synchronization operation.
vPlus requires that there be a user with "cluster-admin" privileges on Prism, to process the backup/restore job.
You can specify either a Prism Element or a Prism Central as hypervisor manager. If Prism Central is specified, credentials for Prism Central and each Prism Element must be the same.
Hypervisor tags are supported only with Prism Central
Volume groups attached to the VMs are not affected by snapshot, hence neither backup nor snapshot revert on such volumes is going to include them.
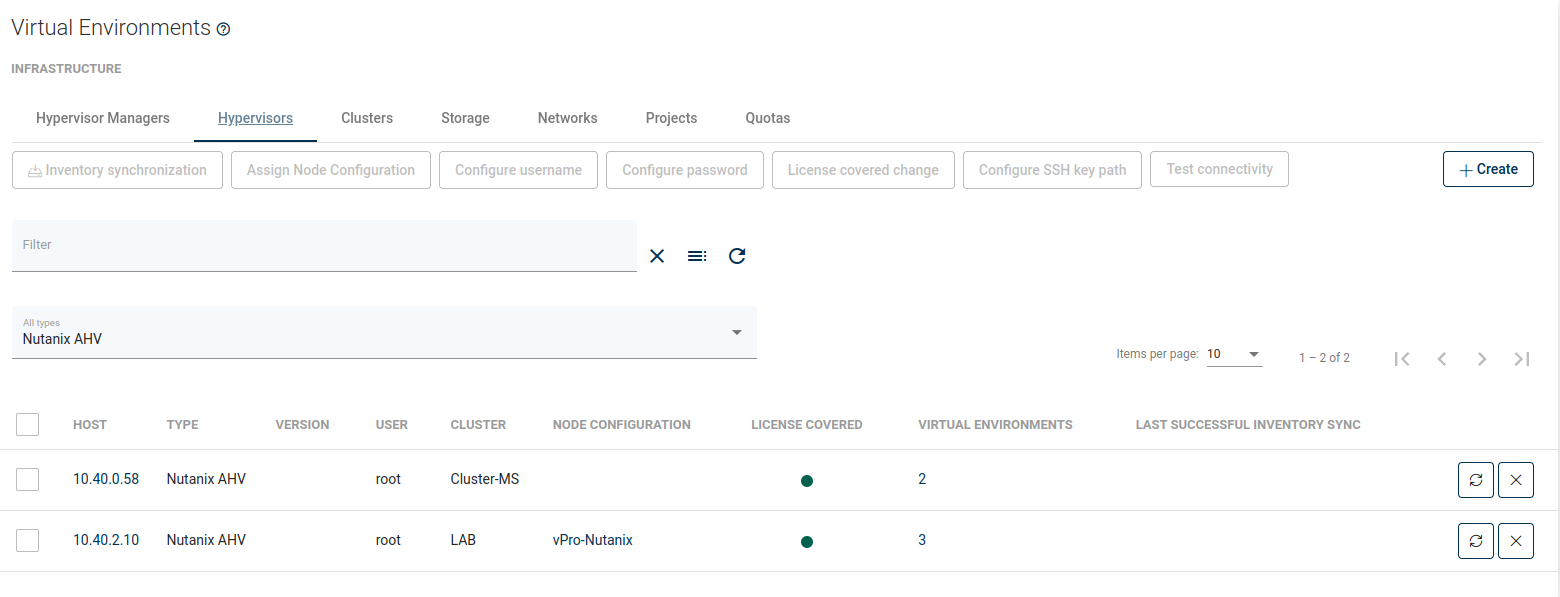
You can deploy more nodes in each cluster and map individual hypervisors to them:
This should statically load balance jobs based on a hypervisor
Each node will handle VMs that reside on the particular hypervisor (which because of data locality may be faster than backup of VMs from other hosts)
VMs that don't have hypervisor assigned are handled by the node from the hypervisor manager
Each node needs to run inventory synchronization to record its Proxy VM UUID on which it is installed
Example
How to start back up for Nutanix AHV Hypervisor
Create Proxy VM into Nutanix cluster (with one of the supported OS: Platform Requirements)
Install vPlus Node
Login to vPlus Dashboard and add Virtualization Provider Remember that if you add prism central all credentials must be the same (for prism elements and prism central)
Run inventory synchronization task, after that you should see all Nutanix hosts under the hypervisor tab
As we describe above, we can back up Nutanix VMs thanks to the disk attachment backup strategy. As this is one of the most demanding methods, at this point we recommend that you perform a few easy tests to make sure that the backup you are going to perform is correct.
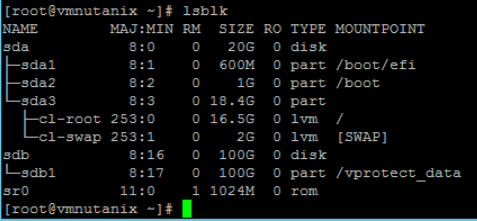
Please connect via SSH to the Proxy VM. Enter "lsblk" to check the disk devices that belong to the machine. In this example, we have two disk devices:
1. /dev/sda - with three partitions /dev/sda1, /dev/sda2, /dev/sda3
2. /dev/sdb - with one partition /dev/sdb1
This information will be needed for the next steps: configuring the lvm filter and checking if we need to correct the value of the parameter "dynamically disk attachment offset".
We'll start by configuring the lvm filter.
Global article about LVM: LVM setup manual
Remember to reboot VM after changes
Remember that the structure of this file is important, and you need to put the filter lines back in their original place. Open in a text editor
/etc/lvm/lvm.confuncomment and replace the line:filter = [ "a|.*|" ]to
filter = [ "a|^/dev/sda|", "a|^/dev/sda1|", "a|^/dev/sda2|", "a|^/dev/sda3|", "a|^/dev/sdb|", "a|^/dev/sdb1|", "r|.|" ]and
global_filter = [ "a|.*|" ]to
global_filter = [ "a|^/dev/sda|", "a|^/dev/sda1|", "a|^/dev/sda2|", "a|^/dev/sda3|", "a|^/dev/sdb|", "a|^/dev/sdb1|", "r|.|" ]
Now we can move on to the "dynamically disk attachment offset" tests. You need to do this only if Proxy VM has more than one disk device for OS purposes
Switch vPlus Node logs (Proxy VM) to Debug mode: How to Enable Debug mode
Run a test backup - try to choose a small VM to not wait too long
After the backup is complete, download the log file from our dashboard
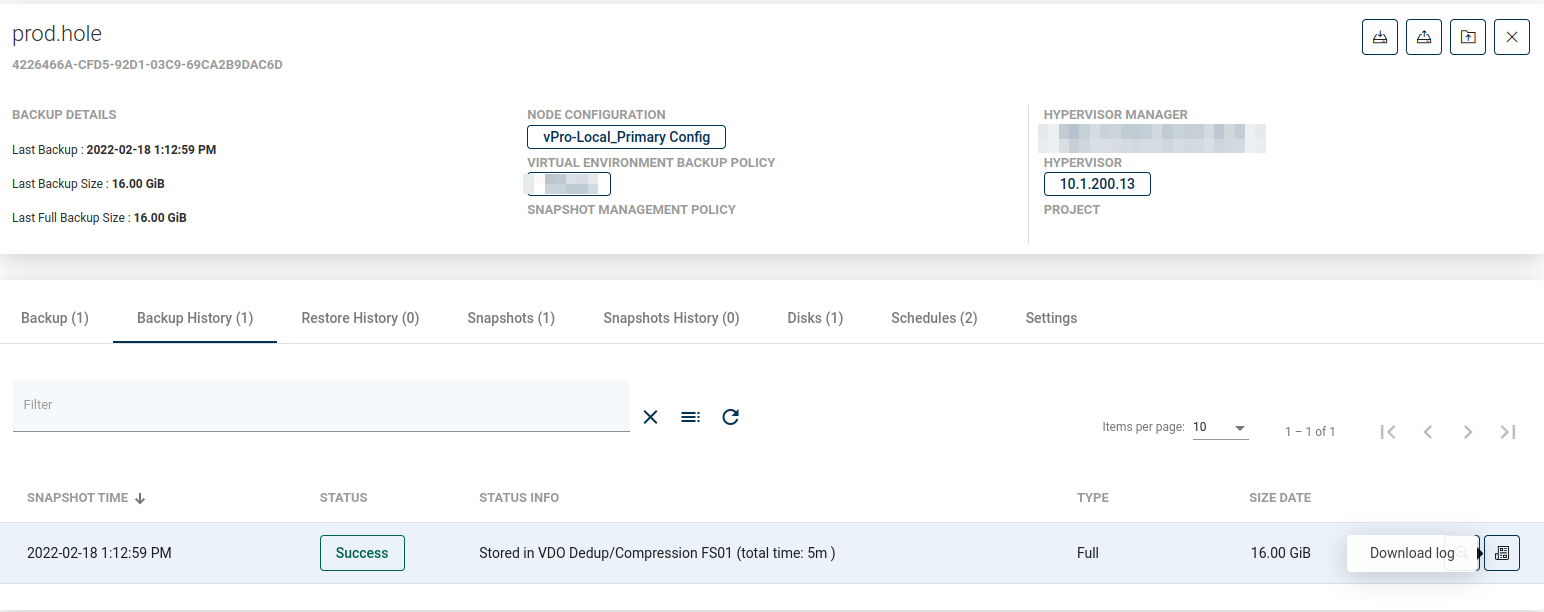
As we can see in the logs, we do not need to correct the "offset" value. vPlus wants to start a backup from /dev/sdc, which is correct behavior because this disk device does not belong to Proxy VM.
Troubleshooting
If vPlus attempts to back up its own disk device, you'll need to adjust the Dynamically attached disks slot offset parameter. Here's how to address this issue:
Identify the starting disk for backup:
Check the vPlus node log file, accessible via: a. vPlus Dashboard: Top right corner → Logs → Download vprotect_daemon.log b. SSH: Connect to vPlus node, navigate to /opt/vprotect/logs/<node_name>
Determine the correct offset value:
The offset should be set to the number of OS disks that need to be skipped.
Examples: a. Three OS disks (/dev/sda, /dev/sdb, /dev/sdc):
If logs show backup starting from /dev/sdb, set offset to 2
If logs show backup starting from /dev/sdc, set offset to 1 b. Two OS disks (/dev/sda, /dev/sdb):
If logs show backup starting from /dev/sdb, set offset to 1
Apply the offset:
Go to Nodes → Node Configurations in the vPlus dashboard.
Edit the configuration for your vPlus Node proxy machine.
On the General tab, find "Dynamically attached disks slot offset".
Enter the calculated offset value and save the configuration.
After applying changes, perform a test backup to confirm vPlus is backing up the correct disk device.
This adjustment ensures vPlus starts backing up from the first non-OS disk, preventing potential data corruption or backup failures.
Limitations
Backup of VMs with vTPM enabled is not supported.
Last updated