
Managing Storage Pools in Catalogic vStor
To view information about each storage pool, use vstor pool show CLI command.
Creating a Storage Pool
To create a storage pool manually:
Ensure unused disks are available.
Use the
vstor pool createcommand.Specify a display name and disk list.
Select options like enabling/disabling compression, deduplication, and synchronous writes.
You can also update the settings later using:
vstor pool updateNote. Disabling synchronous writes risks data loss during abrupt shutdowns. Disabling this option is not recommended.
You can also create a storage pool using the vStor Web Interface by navigating to the Storage tab, clicking Create New Pool, and specifying its details:
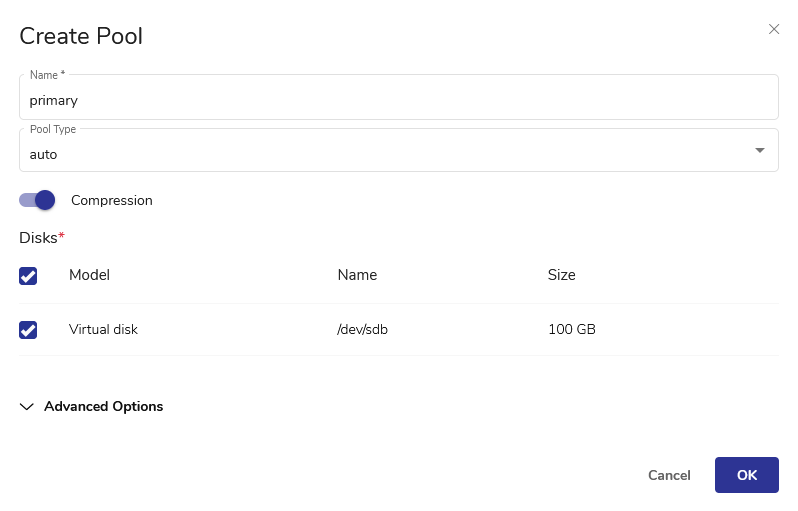
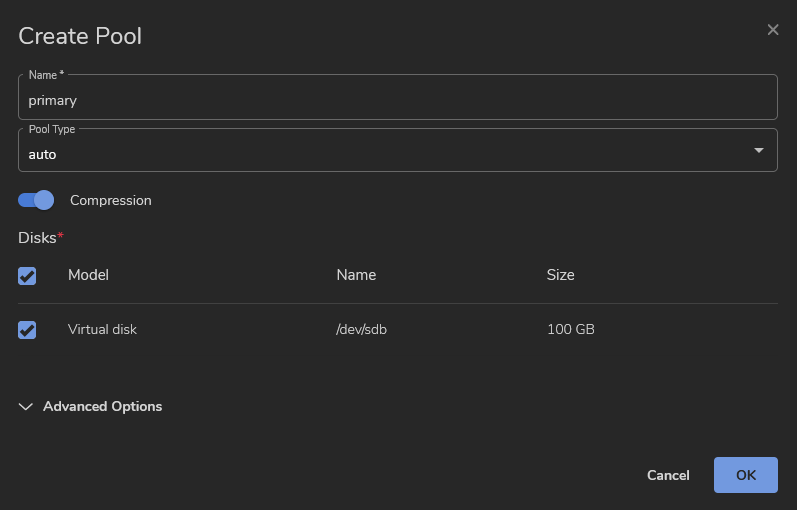
Now, select a pool, which specifies the redundancy of the pool:
raid0: Assumes external disk redundancy.raid5: Creates RAID5 groups for redundancy.raid6: Forms RAID6 groups for enhanced redundancy.
Expanding a Storage Pool
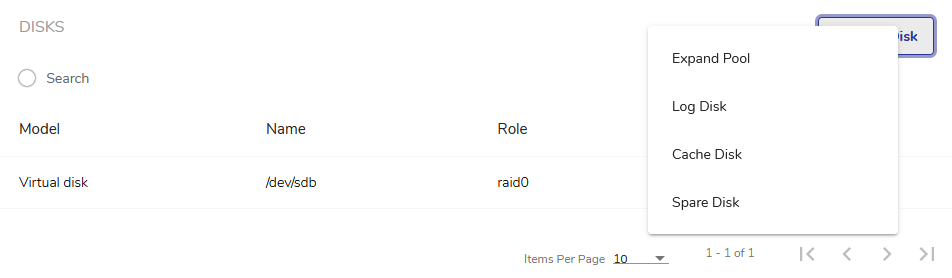
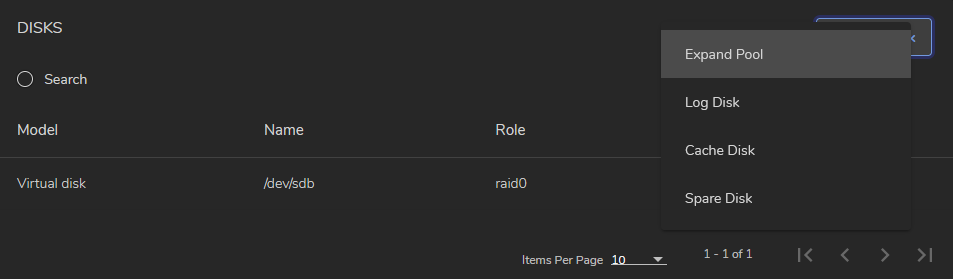
Before expanding a pool, ensure one or more unused disks are available.
To expand a storage pool from the vStor Web Interface, navigate to the Disks section of the pool. select Add Disk -> Expand Pool and select the disk you want to add:
To expand a storage pool from the CLI, use:
Disabling a Storage Pool
To temporarily make a storage pool inaccessible, such as for maintenance, you can disable it. When a pool is disabled, you can’t change its volumes. The only actions you can take are to edit the pool’s settings, delete it, or re-enable it.
To disable a pool from the CLI, run:
To disable a pool from the vStor Web Interface, simply click on its current status (e.g., Online) and confirm that you want to change the status.


See also. For more details on best practices for backup storage, see Backup Storage: Best Practices.
Last updated