Using vStor Snapshot Explorer
Attention! Disks added to the VM using Logical Volume Management (LVM) will not be visible after mounting the snapshot.
vStor Snapshot Explorer lets you quickly mount RAW or VMDK disk images from your VMware backups to easily browse the filesystem content using the vStor web interface. This functionality is also compatible with snapshots created by Catalogic DPX’s Agentless Backups for VMware and Bare Metal Recovery (BMR) features, providing versatile access to your backed-up data across different DPX backup scenarios.
Attention! vStor Snapshot Explorer does not support the BTRFS (B-tree File System) or ReFS (Resilient File System) file systems.
Mounting Disk Images
Viewing and Selecting Snapshots
In the navigation menu, select Storage.
Select your volume of interest and click its name to see the detailed view.
Go to the Snapshots tab.
Locate the snapshot containing the disk images you wish to mount.
Hover over the name of the snapshot and click the Mount button. The Mount dialog will open.

Specify the name for the new mounted volume, or use the default name. The default name for a mounted volume uses the following convention:
mount-<volume_name>-<timestamp>.The Select images list will contain all compatible .RAW or .VMDK disk images. Select the images you want to mount and confirm your selection.

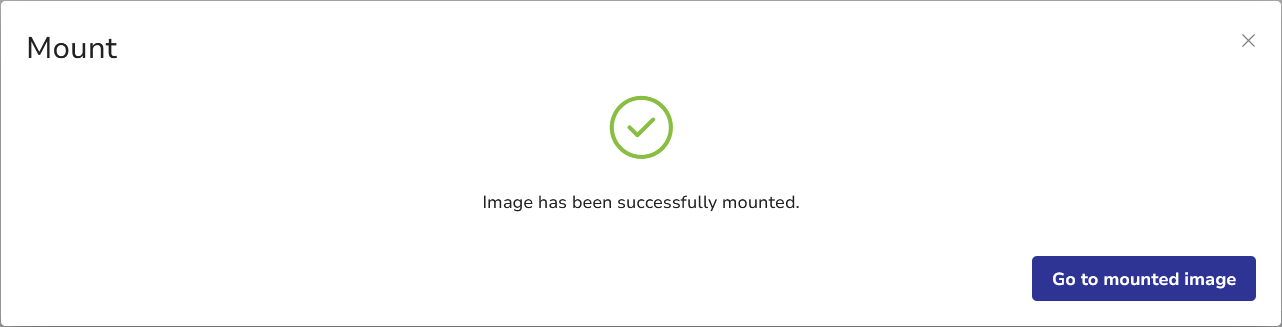
Depending on the size of the selected volumes, the process may take some time. When the process is finished, click Go to mounted image to browse the file system.
Accessing the Mounted Filesystem
See also. After mounting your filesystem, you can use the GuardMode Scan feature to check for potential security threats. This scan helps ensure the integrity of your data before a restore. For details, see Using GuardMode Scan.
Upon completion, the interface will redirect you to the volume details screen, featuring the Mounted File System tab.
Tip. Your mounted snapshot will also be visible as a volume in the Volumes table on the Pools screen.

To download specific files or directories, click the checkbox next to them and click the Download… button to launch the File Download dialog window.

Continue with the default name (
gfr-<timestamp>) or specify your custom .ZIP name.Use radio buttons to choose between retaining or flattening the directory structure of downloaded items.
Click Download. Your selected files will be downloaded as a
.ziparchive. Depending on the data size, this may take a while.
Note. Symbolic links (symlinks) on Linux systems may break. They will be inactive in the mounted file system view:

Scanning for Potential Threats
After mounting a filesystem, it is crucial to ensure the integrity of your data before proceeding with any restore operations. vStor Snapshot Explorer offers a powerful feature called GuardMode Scan to scan for potential ransomware infections or data encryption. To initiate a GuardMode scan:
In the volume view of your mounted filesystem, go to the GuardMode Scan tab.

Click the Scan with GuardMode… button to launch the Scan with GuardMode dialog window.

Select the scan scope: Incremental after a specified date or Full, and click Scan. The GuardMode scan will start.
See also. For detailed information on using this feature, as well as interpreting and acting on scan results, see Using GuardMode Scan.
Restoring Files to Network Share
See also. Before restoring files to a network share, it’s highly recommended to perform a GuardMode scan on the mounted filesystem. This ensures that you’re not inadvertently restoring compromised or encrypted data For details, see Using GuardMode Scan.
Instead of downloading the .ZIP archive to your local machine, you can restore the selected directories or files directly to a network share. This functionality provides a more efficient way to restore large amounts of data or to restore files to a specific network location.
Tip. Ensure you have the correct permissions to write to the specified network share before initiating the restore process.
For large restores, consider the available space on the network share and the time it may take to complete the operation.
Running Restore to Network Share
Mount a disk image as described in the Mounting Disk Images section.
Select files or directories for restore and click the Restore to network share… button to launch the File Download dialog window.

Provide the following information:
SMB/CIFS Details:
Hostname or IP address of the network share
Path to the shared folder (must start with a slash or backslash, e.g.,
/shared_folderor\shared_folder)
SMB/CIFS Credentials (optional):
Username
Password
ZIP Settings
Continue with the default name (
gfr-<timestamp>) or specify your custom .ZIP name.Use radio buttons to choose between retaining or flattening the directory structure of downloaded items.
Click Restore. vStor Snapshot Explorer will begin the restoring process. The files will be restored as a .ZIP archive to the selected network share. Depending on the data size, this may take a while.
Cancelling Restore to Network Share
To cancel the ongoing process of restoring to a network share:
Go to the Tasks view.
Find the task you want to cancel. You can filter by Type:
GFR to directory.Hover over the task record and click Cancel, or right-click the record and select Cancel from the context menu.

Confirm your decision in the confirmation dialog:

The task will be canceled.

Unmounting Disk Images
To unmount the disk image:
Click the Unmount button in the upper volume view bar.

You will be prompted to confirm your decision.

Click Unmount. The disk image will disappear from the volumes list.
Last updated