Managing Volumes
In Catalogic vStor, you can create three types of volumes: Filesystem, MinIO, and LUN. Filesystem volumes are used in NAS environments and rely on the server’s backing storage. MinIO volumes use the embedded MinIO server on vStor; this type requires creating a bucket. LUN volumes are suitable for SAN environments.
Creating a volume using the vStor Web Interface
To add a volume to Catalogic vStor using the vStor Web Interface:
Open the vStor Web Interface by connecting to
https://<vStor_hostname_or_IP>:8900.Log in as
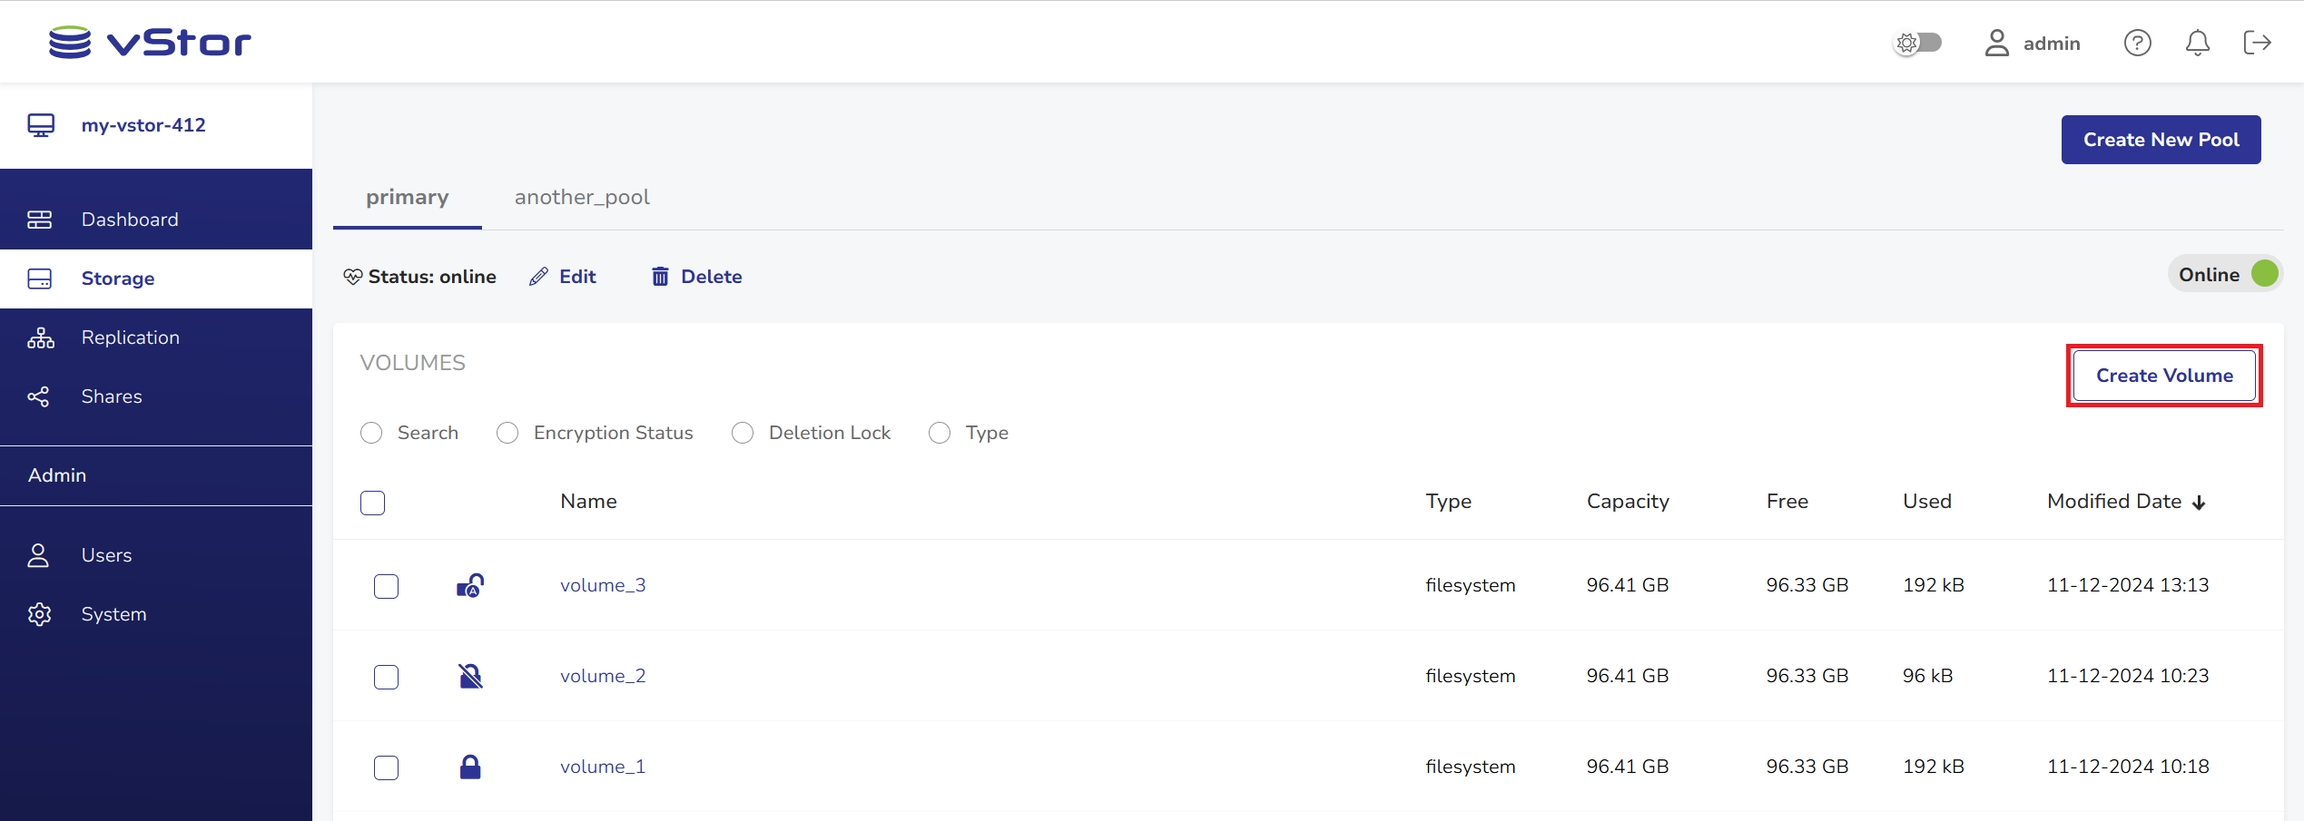
admin.In the navigation menu, click Storage.
Select a pool and click Create Volume.
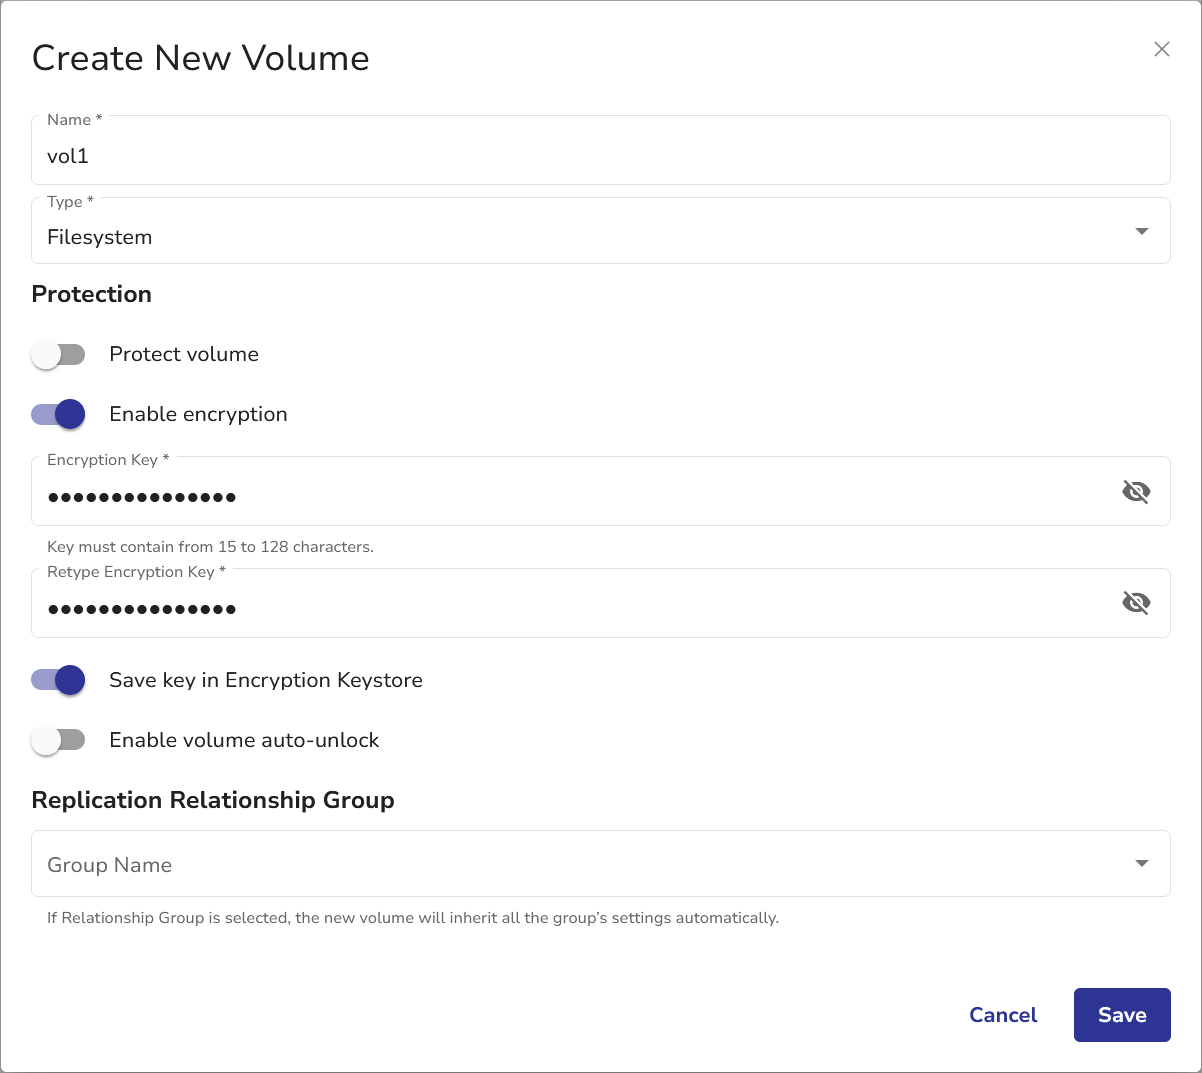
In the Create new Volume dialog:
Enter the volume name. The maximum length is 128 characters.
Select the type (Filesystem, MinIO, or LUN).
For LUN: specify size and unit.
For MinIO: input the server port number (range 9000–9100). Ensure a MinIO bucket is already created.
See also. For more details on managing hosts for LUN volumes, see Managing Hosts for LUN Volumes in Catalogic vStor.
Attention! To use MinIO for storage, you need to add a custom certificate to your vStor instance.
(Optional) Select the Enable encryption to enable encryption on the volume. Encryption may only be applied to volumes of type Filesystem and Lun. If encryption is enabled, set an encryption password. Optionally, enable Save key in Encryption Keystore to store the password securely.
See more. To learn more about storing and managing encryption passwords, see Using Remote Keystore.
(Optional) Select the Protect Volume to make this volume immutable, preventing any modifications or deletions by unauthorized users. For details, see Volume Deletion Protection.
See also. To use deletion protection features, you need to add MFA to your vStor account. For details, see Using Multi-factor Authentication (MFA).
Click OK to add the volume. For Filesystem volumes, set up a share as needed. For details, see Managing Shares.
Ensure you can see the new volume in the Volumes table on the Pools screen. If you have enabled Protect Volume, your volume will have a shield icon in the volume view.
Attention! You cannot delete a volume that contains protected snapshots.
Creating a volume using vStor CLI
To add a volume to Catalogic vStor using vStor CLI:
The output of this command is structured in the following way:
Note. The only supported vStor volume_type for a backup destination is filesystem.
For a complete list of available configuration options use:
Migrating a volume between storage pools
Migrating a volume using the vStor Web Interface
To migrate a volume using the vStor Web Interface:
In Storage, locate a volume you want to migrate.

Click More Actions (•••) and select Move to different pool to open the Move to Different Pool dialog window.

Select Destination Pool and click Move.
Restrictions. Volumes with established replication relationships cannot be moved. If you attempt to move such pool, you will be prompted with an error message dialog.
Select Detach to continue or Cancel to cancel. You will be prompted to confirm your decision.

Click Yes to confirm. The volume transfer will start. This may take a while.
See also. For more details on best practices for backup storage, see Backup Storage: Best Practices.
Last updated