Huawei OceanProtect
Create DataTurbo user
-
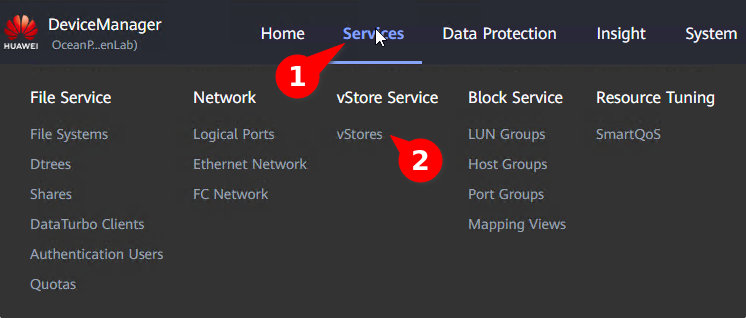
Go to Services -> vStore Service -> vStores
-
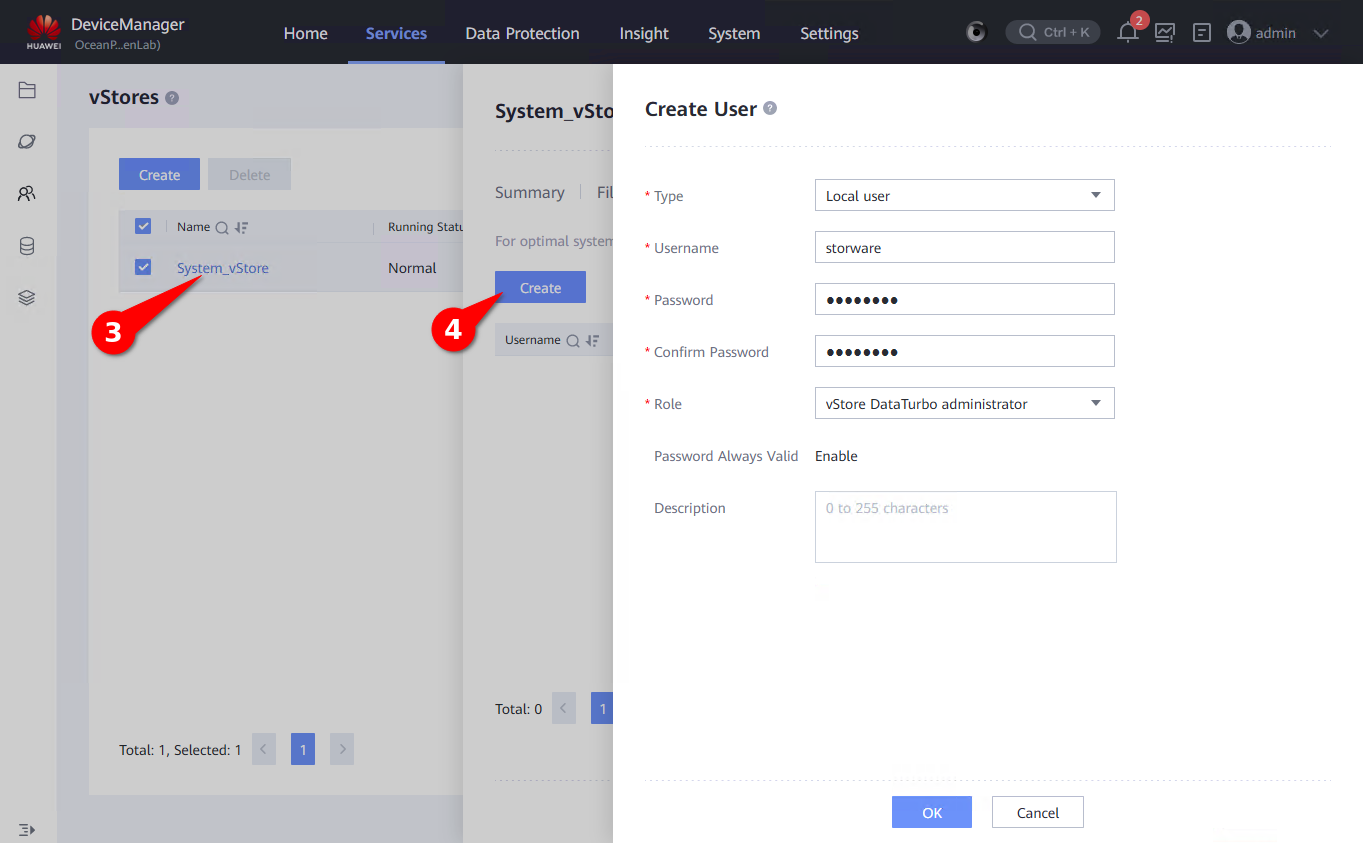
Select vStore -> Create new user with role "vStore DataTurbo administrator"
Create logical port
-
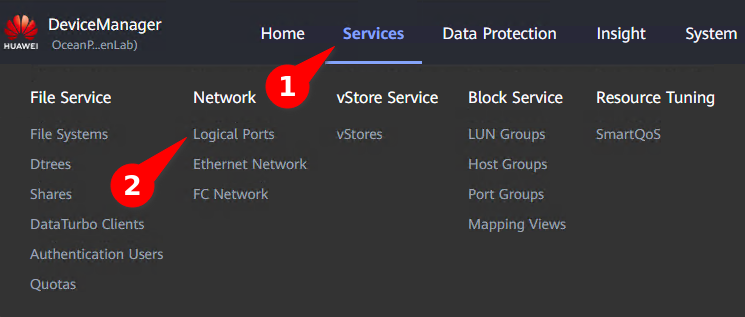
Go to Services -> Network -> Logical Ports
-
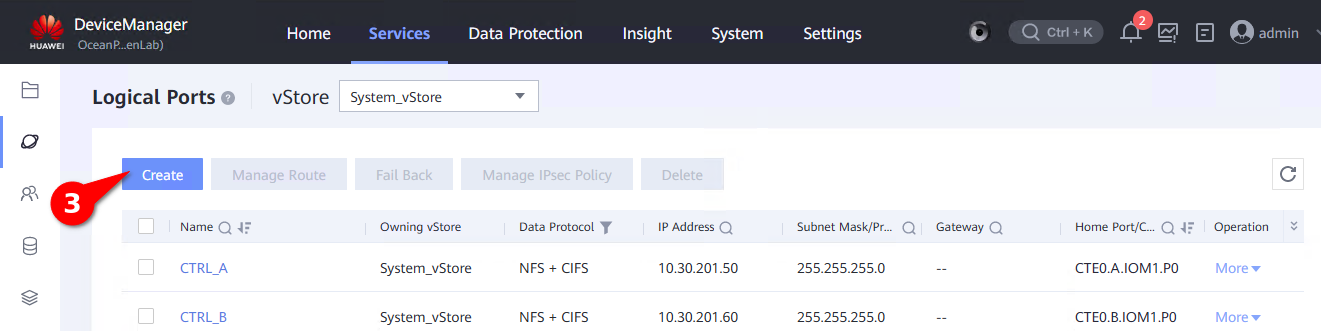
Create new logical port
-
Settings for NFS
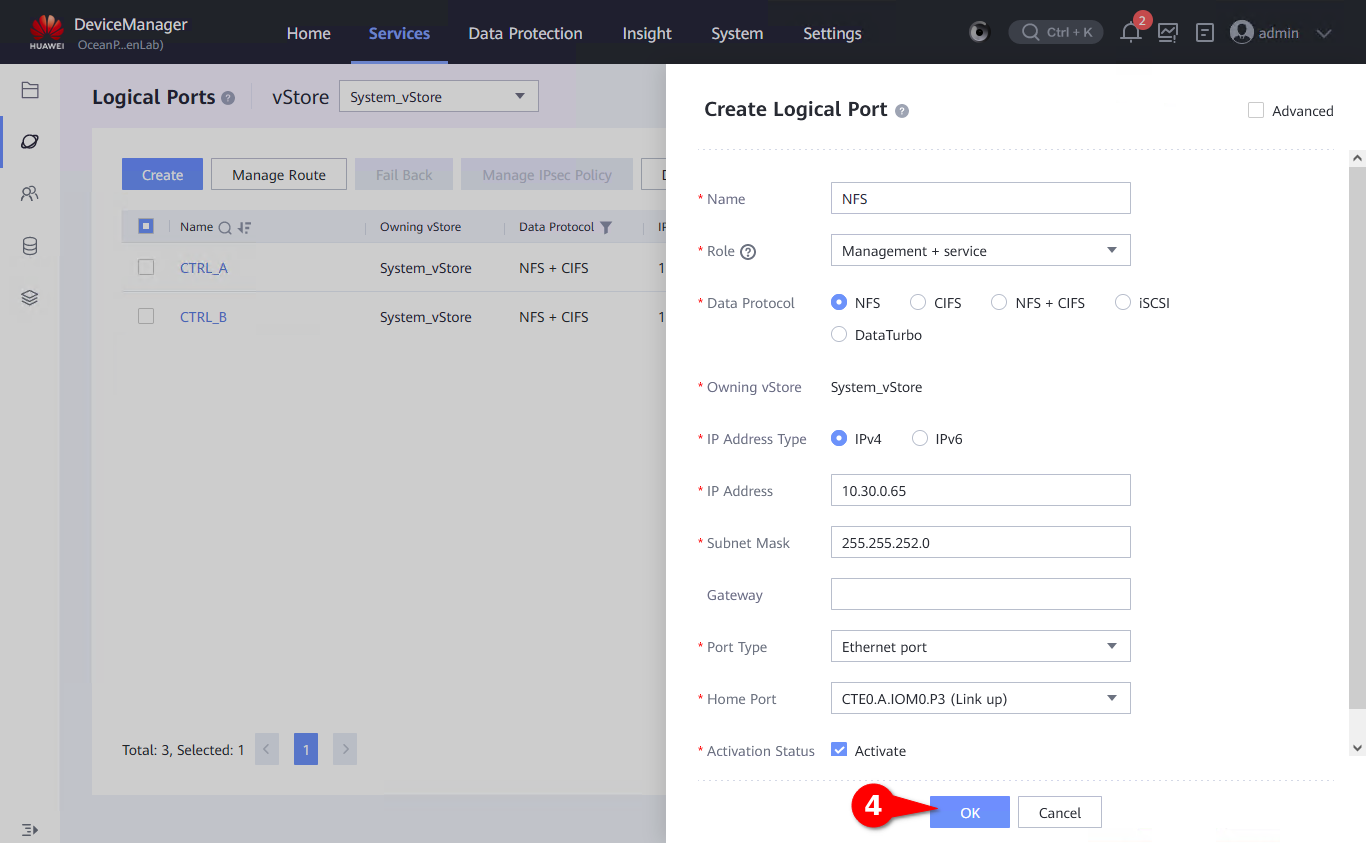
-
Settings for DataTurbo
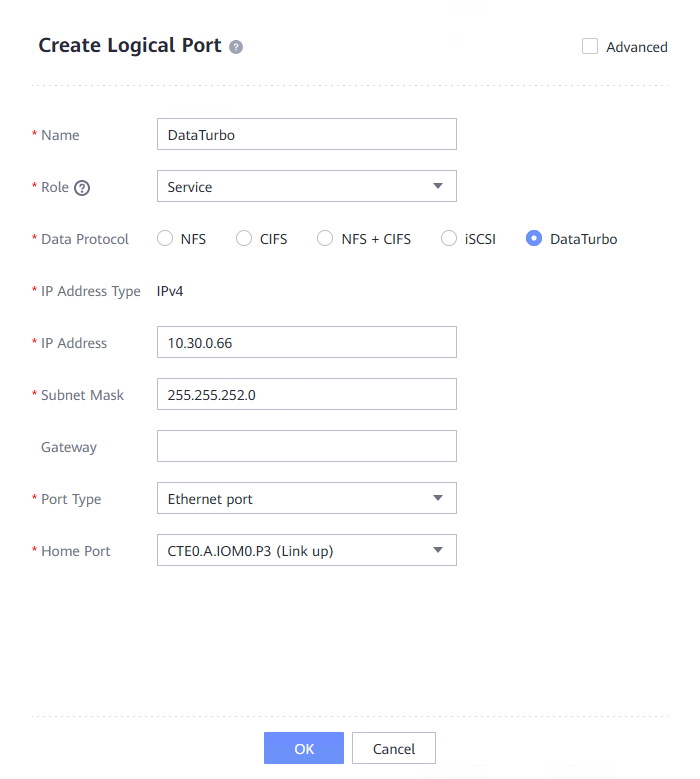
Create Filesystem
-
Go to Services -> File Service -> File Systems
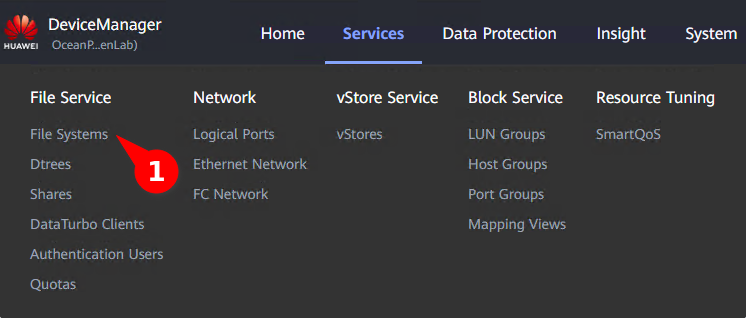
-
Create new file system
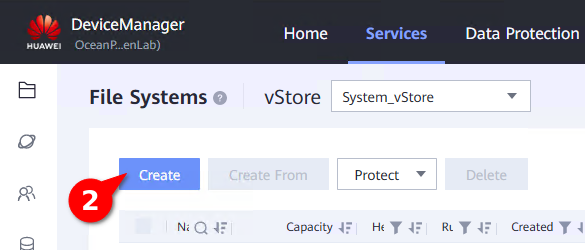
- Fill:
- Name
- Capacity
- Application Type
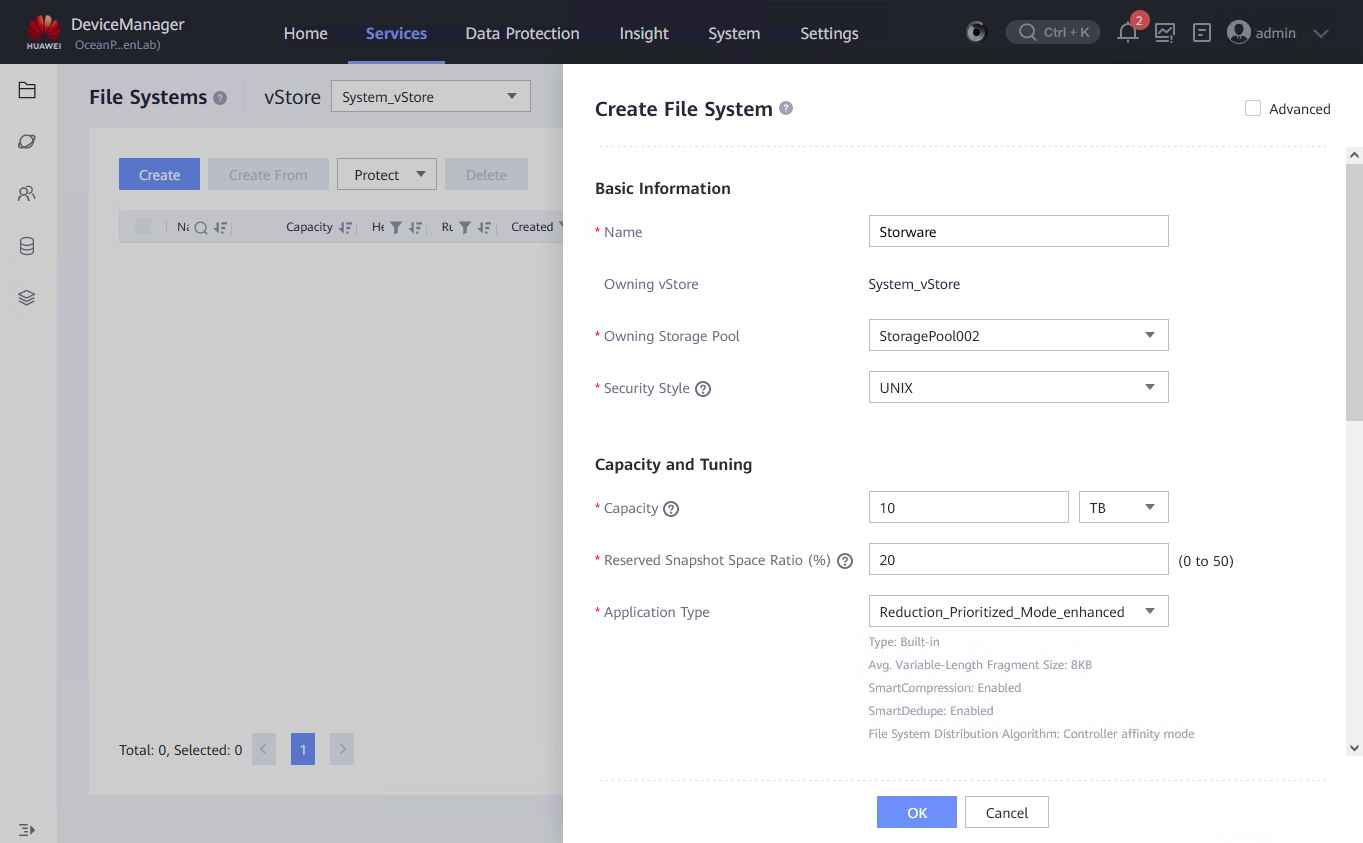
- With NFS, and DataTurbo share
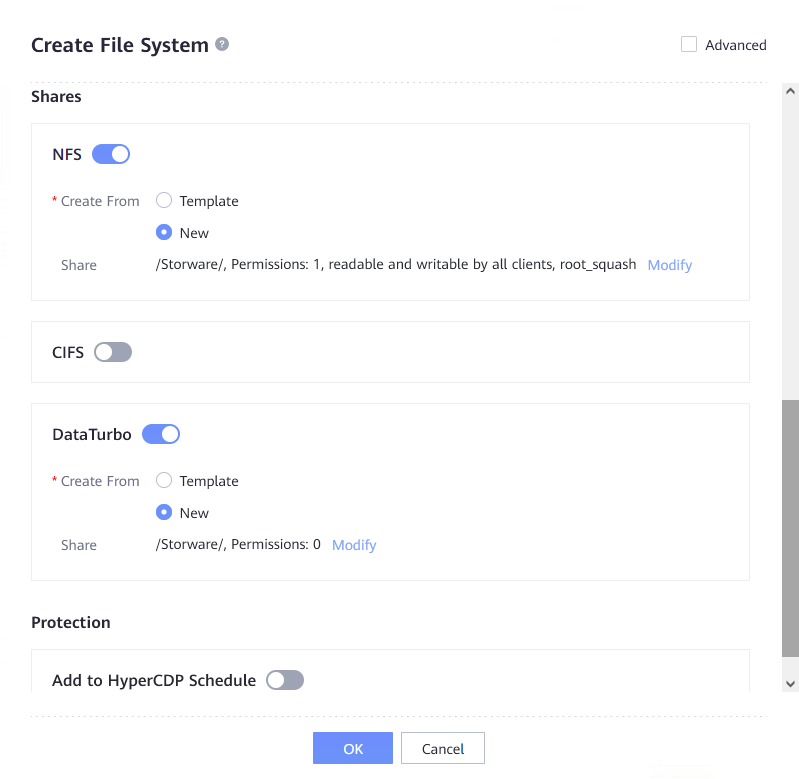
- Fill:
-
On NFS share modify settings:
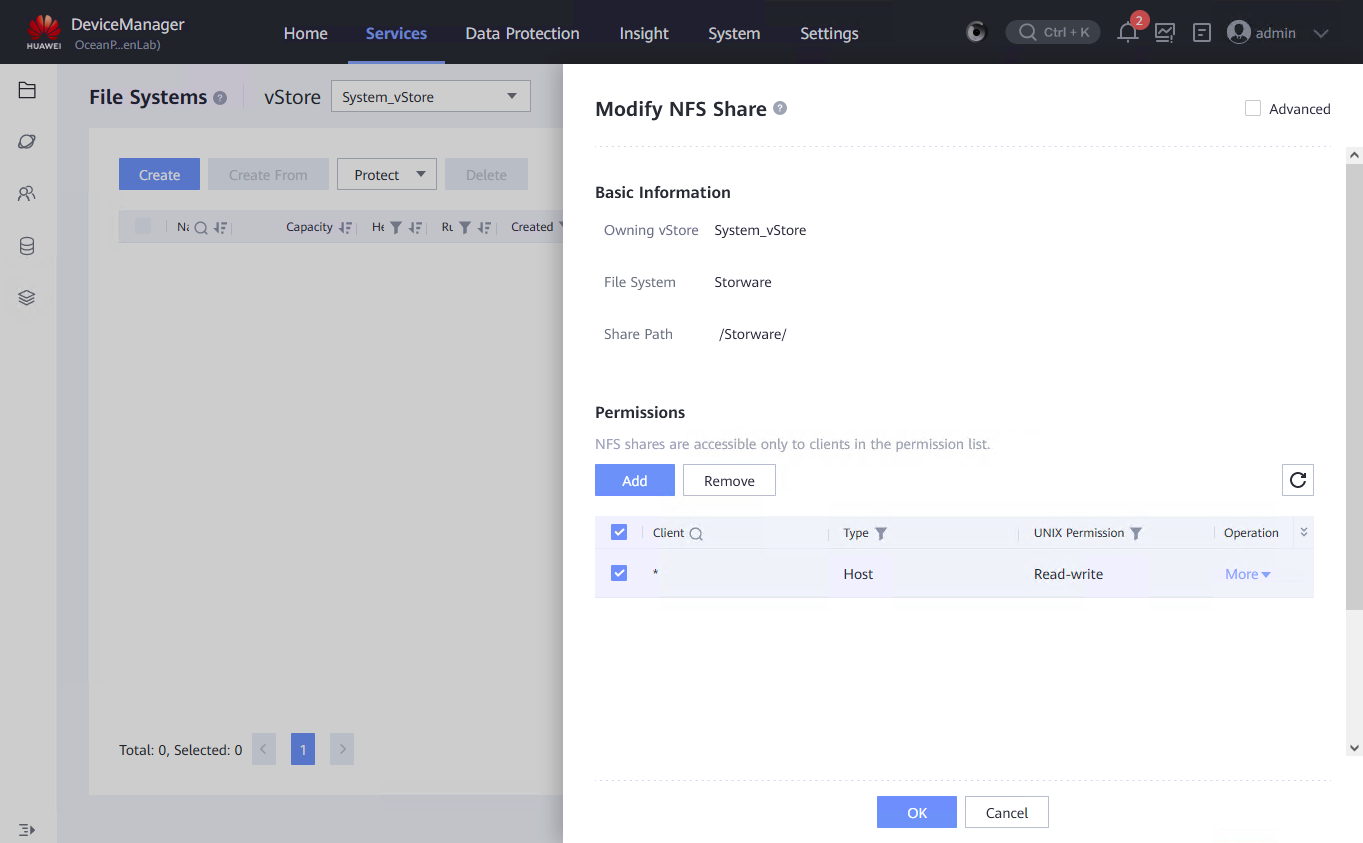
-
In permissions add new client, or modify existing:
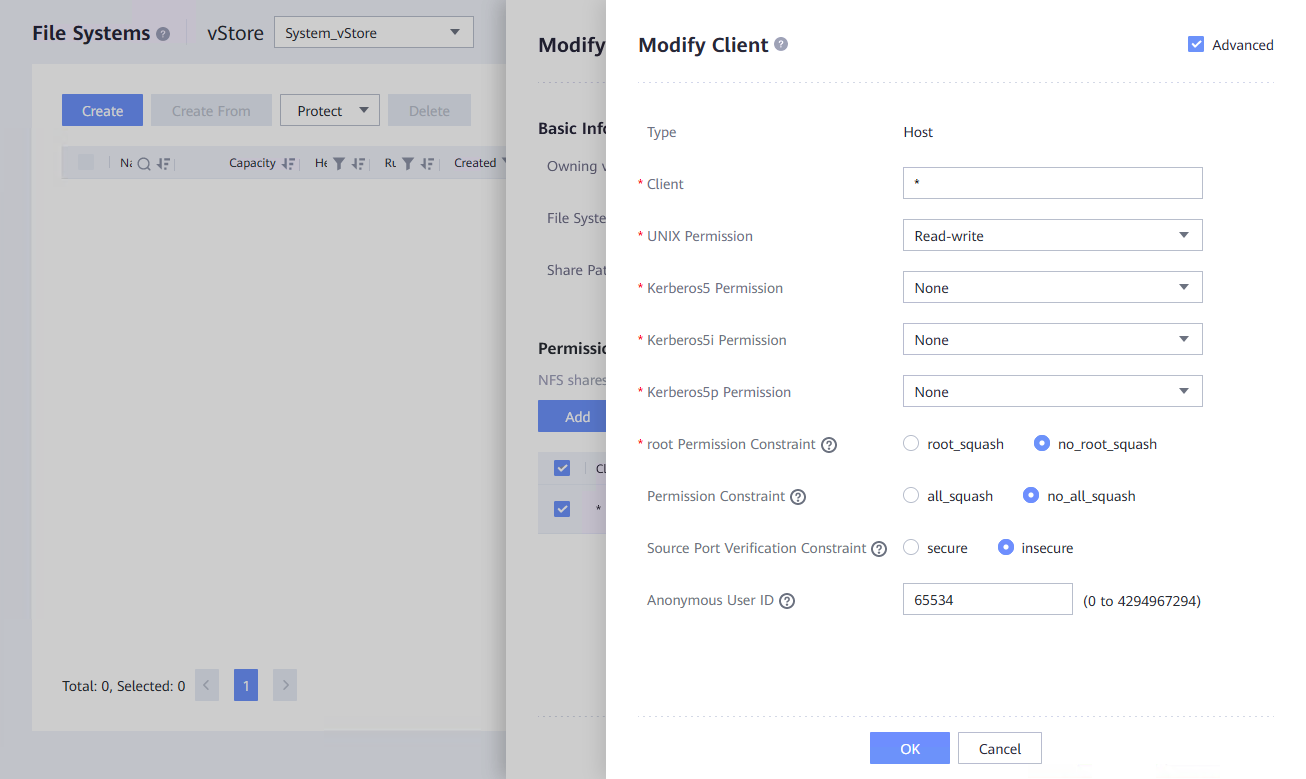
- Client - * , or IP of vPlus node machine
- root Permission Constraint - no_root_squash
-
Save settings and modify DataTurbo share:
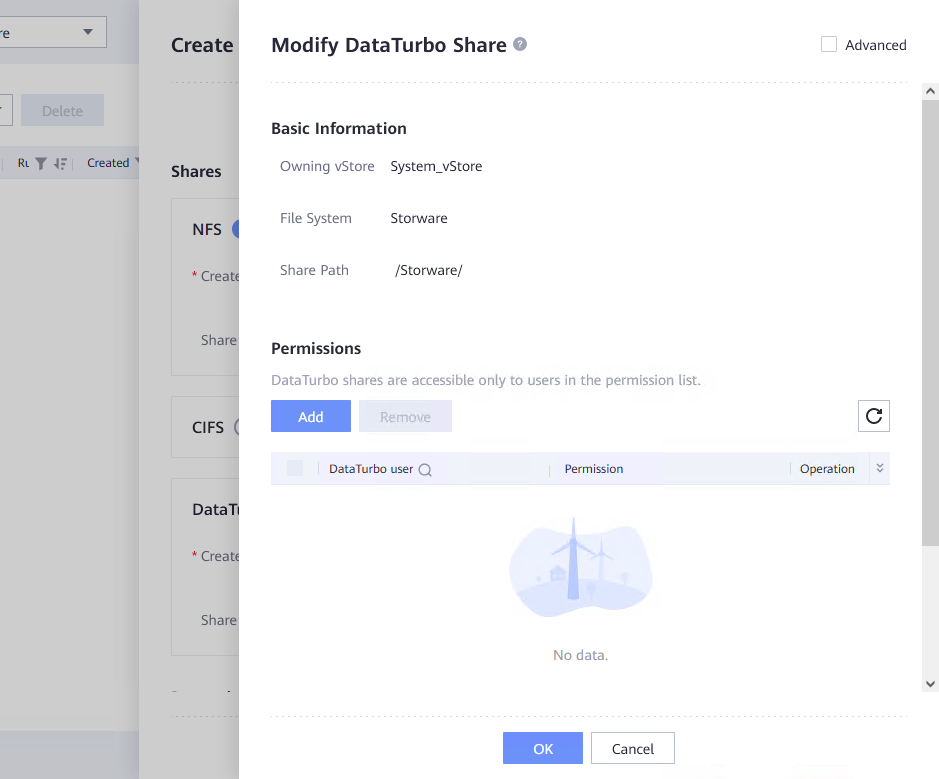
-
In Permissions add user to share:
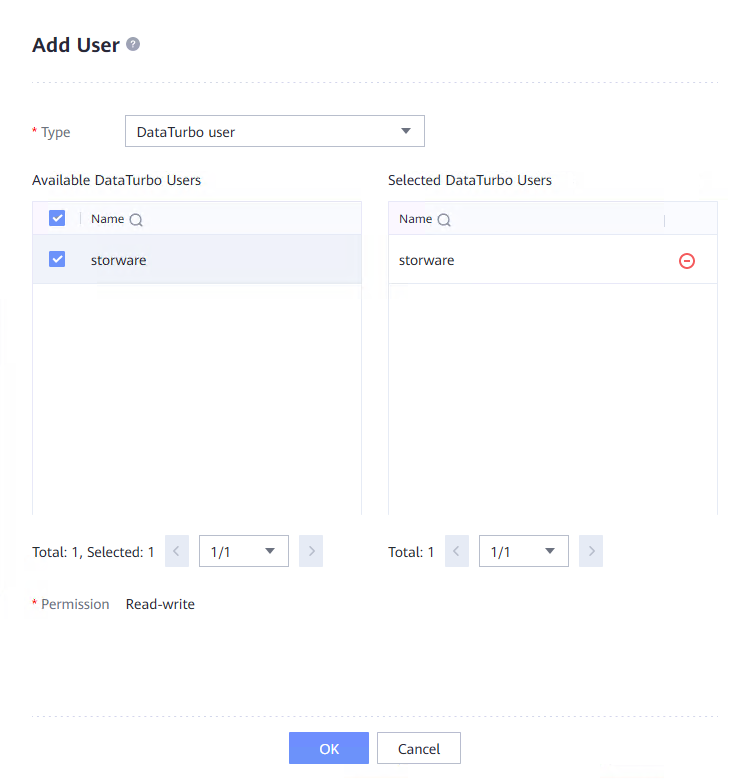
Mount NFS share
-
In DPX vPlus Node, mount NFS share which was created in previous step:
mount OceanProtectIP:/Storware /vprotect_data -
Go to the Create File System Backup Destination section to learn how to create backup destination.
Mount DataTurbo share
Note: DataTurbo share is possible for mounting only in CentOS/Red Hat 7
-
Install DataTurbo package in DPX vPlus Node:
unzip OceanStor_DataTurbo_1.0.0_Linux.zip[root@localhost ~]# unzip OceanStor_DataTurbo_1.0.0_Linux.zipArchive: OceanStor_DataTurbo_1.0.0_Linux.zipcreating: OceanStor_DataTurbo_1.0.0_Linux/creating: OceanStor_DataTurbo_1.0.0_Linux/doc/inflating: OceanStor_DataTurbo_1.0.0_Linux/install.shcreating: OceanStor_DataTurbo_1.0.0_Linux/packages/inflating: OceanStor_DataTurbo_1.0.0_Linux/packages/oceanstor_dataturbo_1.0.0-202211151736.linux.x86_64.rpminflating: OceanStor_DataTurbo_1.0.0_Linux/upgrade.shcd OceanStor_DataTurbo_1.0.0_Linux/chmod a+x install.sh./install.sh[root@localhost ~]# cd OceanStor_DataTurbo_1.0.0_Linux/[root@localhost OceanStor_DataTurbo_1.0.0_Linux]# chmod a+x install.sh[root@localhost OceanStor_DataTurbo_1.0.0_Linux]# ./install.shPreparing... ################################# [100%]CUSTOM_USER=dataturbobegin to create dufault user[dataturbo] and group[dataturbo] ......Updating / installing...1:dataturbo-1.0.0-202211151736 ################################# [100%]The DataTurbo client supports three performance levels: high, medium, and low. A higher level consumes more memory and CPU, you can use cgroupcommand to limit the CPU usage of the DataTurbo process. The current remaining memory of the system is 4 GB. You are advised to selectlevel 1(recommended) or lower. If the level selection process stops abnormally, the recommended level will be used.<0>--Select Default Level. The recommended level will be used.<1>--Select Low Level. It is estimated that at most 4 GB memory is consumed.<2>--Select Medium Level. It is estimated that at most 6 GB memory is consumed.<3>--Select High Level. It is estimated that at most 12 GB memory is consumed.please input your selection:0your selection is [0]install dataturbo succeed. -
Start DataTurbo service
systemctl start dataturbo[root@localhost ~]# systemctl start dataturbo[root@localhost ~]# systemctl status dataturbo● dataturbo.service - dataturboLoaded: loaded (/usr/lib/systemd/system/dataturbo.service; enabled; vendor preset: disabled)Active: active (running) since śro 2023-01-25 15:32:21 CET; 4s agoProcess: 18488 ExecStart=/opt/oceanstor/dataturbo/script/start.sh (code=exited, status=0/SUCCESS)Main PID: 18558 (dpc)Tasks: 95 (limit: 65535)CGroup: /system.slice/dataturbo.service└─18558 /opt/oceanstor/dataturbo/bin/dpcsty 25 15:32:20 localhost.localdomain systemd[1]: Starting dataturbo...sty 25 15:32:21 localhost.localdomain su[18660]: (to dataturbo) root on nonesty 25 15:32:21 localhost.localdomain su[18751]: (to dataturbo) root on nonesty 25 15:32:21 localhost.localdomain systemd[1]: Started dataturbo. -
Create DataTurbo storage object, with DataTurbo user
dataturbo create storage_object storage_name=Storware ip_list=OceanProtectIP[root@localhost ~]# dataturbo create storage_object storage_name=Storware ip_list=10.30.0.66Please input username:storwarePlease input password:********Create storage object successfully. -
Check if storage is created
dataturbo show storage_object[root@localhost ~]# dataturbo show storage_objectStorage Name: StorwareUser : storwareIps : 10.30.0.66IpPair :ID Local Address Remote Address Status---------------------------------------------------------------1 10.30.1.242 10.30.0.66 Normal -
Create mount directory, and mount DataTurbo share
mkdir /vprotect_datadataturbo mount storage_object storage_name=Storware filesystem_name=/Storware mount_dir=/vprotect_data -
Check if share is mounted:
[root@localhost ~]# df -hTFilesystem Type Size Used Avail Use% Mounted ondevtmpfs devtmpfs 2,6G 0 2,6G 0% /devtmpfs tmpfs 2,6G 8,0K 2,6G 1% /dev/shmtmpfs tmpfs 2,6G 8,7M 2,6G 1% /runtmpfs tmpfs 2,6G 0 2,6G 0% /sys/fs/cgroup/dev/mapper/centos-root xfs 17G 1,7G 16G 10% //dev/sda1 xfs 1014M 181M 834M 18% /boottmpfs tmpfs 523M 0 523M 0% /run/user/0tmpfs tmpfs 523M 0 523M 0% /run/user/1000/Storware fuse.dataturbo 8,0T 0 8,0T 0% /vprotect_data -
Grant privileges for vprotect user
chown vprotect:vprotect -R /vprotect_data
Create File System Backup Destination
Note: Only regular File System Backup Destination is currently available.
- Go to Backup Destinations.
- Click on Create Backup Destination, choose a File system.
- Type the name for the new backup destination and select at least one node configuration.
- In Storage paths type
/vprotect_data/backups, where you point to a subdirectory in your staging space, where DPX vPlus will store the backups. - Save the configuration.